My App “Health Notes” primarily focuses on data collection and management, hence it demands high standards for real-time inspection and response in forms. Therefore, creating a Form that is prompt in input response and accurate in feedback is crucial. This article attempts to propose a development approach for Forms in SwiftUI.
Health Notes 1.0
During the development of Health Notes 1.0, due to iOS 13’s lack of support for onChange, the primary method used was similar to the following:
For Simple Cases
@State var name = ""

TextField("name", text: $name)
     .foregroundColor(name.count.isEmpty ? .red : .black)
For More Complex Cases
@State var name = ""
@State var age = ""

TextField("name", text: $name)
    .foregroundColor(!checkName() ? .red : .black)
TextField("age", text: $age)
     .keyboardType(.decimalPad)
     .foregroundColor(!checkAge() ? .red : .black)

Button("Save"){
   // Save
}
.disable(!(checkName() && checkAge()))

func checkName() -> Bool {
   return name.count > 0 && name.count <= 10
}

func checkAge() -> Bool {
   guard let age = Double(age) else {return false}
   return age > 10 && age < 20
}
For very complex forms, I used Combine for validation.
However, there is a response lag between the Publisher and the View refresh cycle, meaning the judgment for the first input only returns results at the second input. This requires the logic to be written in the View. For parts needing network validation, Publisher is still used. Its response, using OnReceive, doesn’t have the judgment time lag mentioned above.
Health Notes 2.0 Approach
In the Health Notes 2.0 I’m currently developing, with the support of onChange in iOS 14, developers have a very convenient timing for logic judgment in the View.
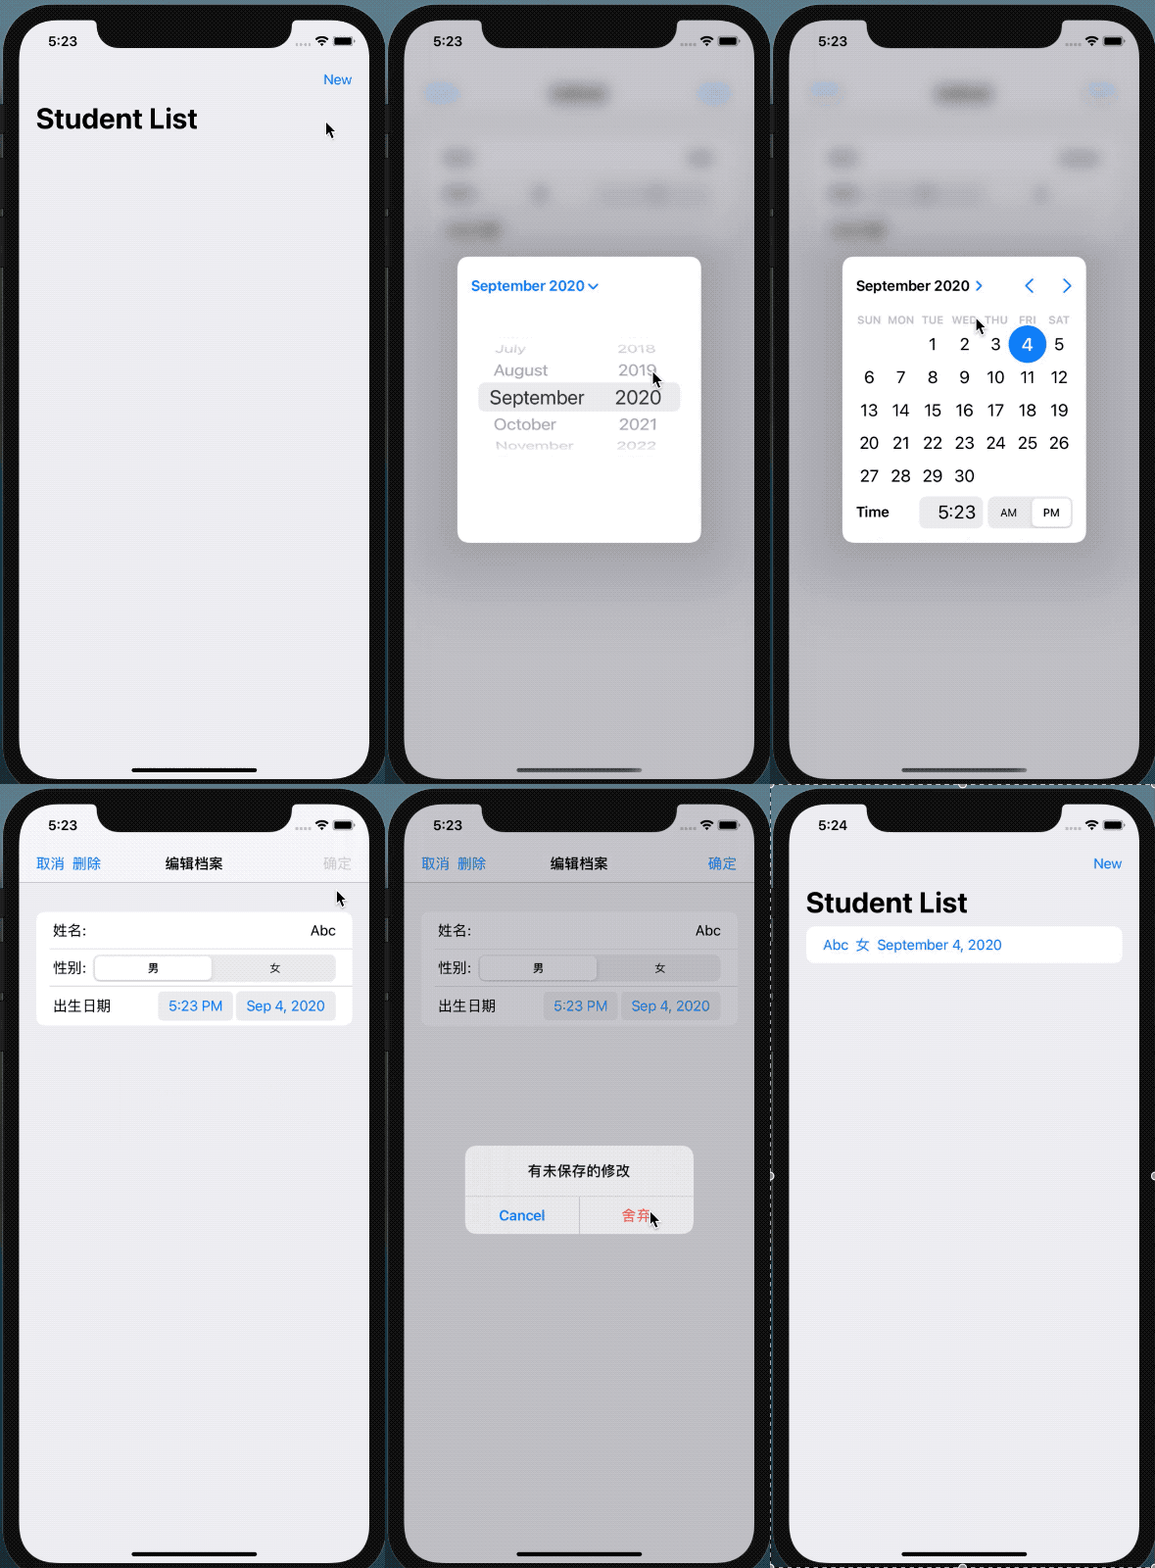
Here’s the current development screen:

Using MVVM to Write Forms
In SwiftUI development, we need to use the MVVM concept not only to consider the architecture of the App but also to treat each View as a mini App.
In the example below, we need to achieve the following functions:
- Use the same code for displaying, editing, and creating profiles.
- Provide timely and accurate feedback for every user input.
- Allow saving only when user data fully meets requirements (all input items meet checking conditions and, in edit mode, current modified data is different from the original data).
- Require a confirmation when the user cancels after modifying or creating data.
- Enable one-click switching to edit mode when viewing profiles.
If the FormView you need to create has simple functionality, please do not use the method below. The following code is only advantageous when creating more complex forms.
The completed video is as follows:

Download (The current code is merged with Creating a Sheet in SwiftUI that can Control Cancel Gestures)
Preparing the Data Source for Input
Unlike creating multiple @State data sources to handle data, I now put all the data needed for entry into one data source.
struct MyState: Equatable {
    var name: String
    var sex: Int
    var birthday: Date
}
Let the View Respond to Different Actions
enum StudentAction {
    case show, edit, new
}
With the above preparation, we can now create a constructor for the form:
struct StudentManager: View {
    @EnvironmentObject var store: Store
    @State var action: StudentAction
    let student: Student?

    private let defaultState: MyState  // Used to save initial data, can be used for comparison, or in my App, to restore previous user values
    @State private var myState: MyState // Data source

    @Environment(\.presentationMode) var presentationMode

    init(action: StudentAction, student: Student?){
        _action = State(wrappedValue: action)
        this.student = student

        switch action {
        case .new:
            self.defaultState = MyState(name: "", sex: 0, birthday: Date())
            _myState = State(wrappedValue: MyState(name: "", sex: 0, birthday: Date()))
        case .edit, .show:
            self.defaultState = MyState(name: student?.name ?? "", sex: Int(student?.sex ??

0), birthday: student?.birthday ?? Date())
            _myState = State(wrappedValue: MyState(name: student?.name ?? "", sex: Int(student?.sex ?? 0), birthday: student?.birthday ?? Date()))
        }
    }
}
Preparing Form Display Content
func nameView() -> some View {
        HStack {
            Text("Name:")
            if action == .show {
                Spacer()
                Text(defaultState.name)
            }
            else {
                TextField("Student Name", text: $myState.name)
                    .multilineTextAlignment(.trailing)
            }
        }
    }
Combining Display Content
Form {
             nameView()
             sexView()
             birthdayView()
             errorView()
      }
Validating Each Input Item
func checkName() -> Bool {
        if myState.name.isEmpty {
            errors.append("Name is required")
            return false
        }
        else {
            return true
        }
    }
Handling All Validation Information
func checkAll() -> Bool {
        if action == .show { return true }
        errors.removeAll()
        let r1 = checkName()
        let r2 = checkSex()
        let r3 = checkBirthday()
        let r4 = checkChange()
        return r1 && r2 && r3 && r4
    }
Using onChange for Validation
.onChange(of: myState) { _ in
         confirm = checkAll()
       }
// Since onChange is only triggered when the data source changes, validate once when the View first appears
.onAppear {
     confirm = checkAll()
   }
Processing the Content of the Toolbar
ToolbarItem(placement: ToolbarItemPlacement.navigationBarTrailing) {
                    if action == .show {
                        Button("Edit") {
                            action = .edit
                            confirm = false
                        }
                    }
                    else {
                    Button("Confirm") {
                        if action == .new {
                        presentationMode.wrappedValue.dismiss()
                        store.newStudent(viewModel: myState)
                        }
                        if action == .edit {
                            presentationMode.wrappedValue.dismiss()
                            store.editStudent(viewModel: myState, student: student!)
                        }
                    }
                    .disabled(!confirm)
                    }
For more detailed content, please refer to the Source Code