This article briefly introduces the new App and Scene protocols in SwiftUI 2.0. It discusses how to organize Data Flow under the new code structure and provides some usage examples of the preset Scenes in SwiftUI 2.0.
The current running environment is Xcode Version 12.0 beta (12A6159), macOS Big Sur 11.0 Beta (20A4299v).
At WWDC 20, Apple brought a new project template based on SwiftUI for developers. Using this template, project code becomes exceptionally concise and clear.
@main
struct NewAllApp: App {
    var body: some Scene {
        WindowGroup {
            Text("Hello world")
        }
    }
}
The code above can display “Hello world” on the screen and can run on both iOS and macOS platforms.
Basic Concepts
App
A new protocol provided by SwiftUI 2.0. Create an application by declaring a structure that conforms to the App protocol, and implement the content of the program through the computed property body.
- Set the entry point of the program with @main (a new feature in Swift 5.3). Each project can only have one entry point.
- Manages the entire lifecycle of the App.
- Constants and variables declared in this scope have a lifecycle that is completely consistent with the entire App.
Scene
A scene is a container for a view hierarchy. Specific programs are presented by combining one or more instances that conform to the Scene protocol in the body of the App instance.
- Lifecycle managed by the system.
- The system adjusts the display behavior of the scene according to different running platforms (for example, the same code presents differently on iOS and macOS, or some scenes can only run on specific platforms).
- SwiftUI 2.0 provides several preset scenes, and users can also write their own scenes that conform to the Scene protocol. The code above uses one of the preset scenes, WindowGroup.
The addition of App and Scene is not just about reducing the amount of code. With this clear hierarchical setting, we can better grasp the lifecycle of each part in different scopes, more accurately transfer data, and more conveniently share code across multiple platforms. The article will later elaborate on this with specific code.
App and Scene are both parsed through their respective functionBuilders, meaning the new template starts with a DSL description right from the entry of the program.
System Event Responses in the Program
Since AppDelegate.swift and SceneDelegate.swift are removed, SwiftUI 2.0 provides new methods for the program to respond to system events.
For AppDelegate.swift
In iOS, using @UIApplicationDelegateAdaptor conveniently implements the functionality previously provided in AppDelegate.swift:
@main
struct NewAllApp: App {
   @UIApplicationDelegateAdaptor(AppDelegate.self) var appDelegate
    var body: some Scene {
        WindowGroup {
            Text("Hello world")
        }
    }
}

class AppDelegate:NSObject,UIApplicationDelegate{
    func application(_ application: UIApplication, didFinishLaunchingWithOptions launchOptions: [UIApplication.LaunchOptionsKey : Any]? = nil) -> Bool {
        print("launch")
        return true
    }
}
Since it’s still in beta, although many events have been defined, they are not yet responsive. It is expected that this will be updated soon.
For SceneDelegate.swift
SwiftUI introduces a more interesting solution for scene event handling with the addition of the EnvironmentKey scenePhase and the new onChange method:
@main
struct NewAllApp: App {
    @Environment(\.scenePhase) var phase
    var body: some Scene {
        WindowGroup {
           ContentView()
        }
        .onChange(of: phase){phase in
                switch phase{
                case .active:
                    print("active")
                case .inactive:
                    print("inactive")
                case .background:
                    print("background")
                @unknown default:
                    print("for future")
                }
          }
    }
}
Again, due to it being a beta version, this response is not yet complete. However, this code currently seems to be universal for both iOS and macOS.
Updates
It has been found that the status update of scenePhase can be obtained in the View. The following code can now be executed normally:
struct ContentView:View{
  @Environment(\.scenePhase) private var scenePhase
 var body: some Scene {
  WindowGroup {
   ContentView()
  }
  .onChange(of: phase){phase in
                switch phase{
                case .active:
                    print("active")
                case .inactive:
                    print("inactive")
                case .background:
                    print("background")
                @unknown default:
                    print("for future")
                }
         }
   }
}
Prebuilt Scenes
-
WKNotificationScene Only applicable to watchOS 7.0, used to respond to remote or local notifications of specified categories. It hasn’t been explored yet.
-
WindowGroup
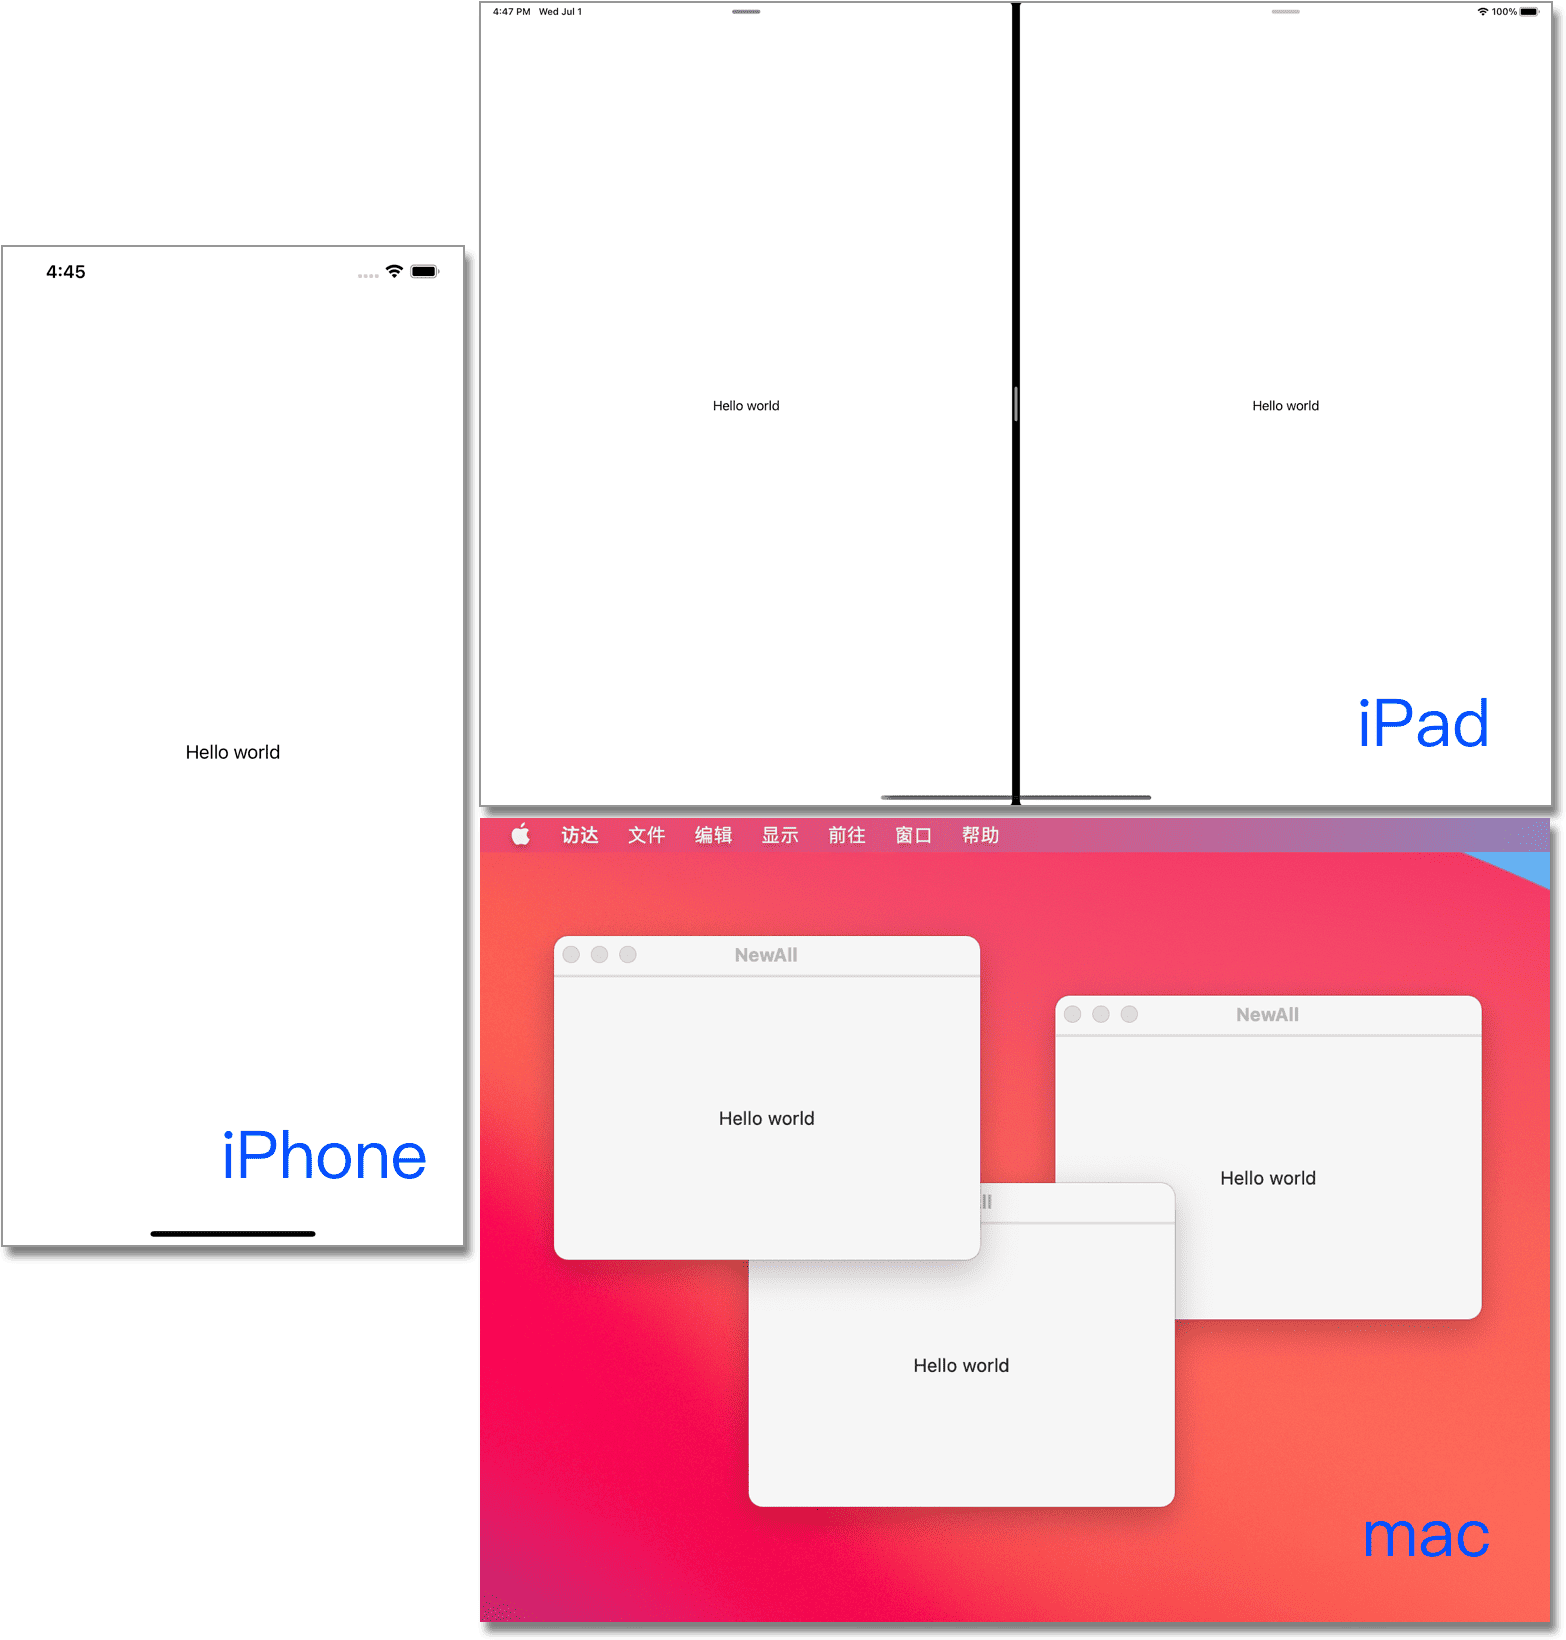
The most commonly used scene, it can present a group of windows with similar structure. With this scene, no code modification is needed, just set whether to support multiple windows in the project, and the system will manage automatically according to the platform characteristics.
In iOS, only one active window can be displayed.
In PadOS (if multi-window support is enabled), up to two active windows can be displayed, either side-by-side or in full-screen mode.
In macOS, multiple windows can be opened and managed through the program’s window menu.
The initial code’s status on three platforms:
When multiple WindowGroups are added to a Scene, only the foremost one can be displayed.
-
DocumentGroup
Creates a window that can handle specified file types. In iOS and PadOS, a file manager is presented first, and then the corresponding View is displayed after clicking a file. In macOS, files are selected or created through menu operations.
Define which formats are supported and how to open and save files by creating a structure that conforms to FileDocument.

  // For plain text files. The write method describes how to write to the file, which can be empty if writing is not needed.
  struct TextFile: FileDocument {
      static var readableContentTypes = [UTType.plainText]
      var text = ""
      init(initialText: String = "") {
          text = initialText
      }
      init(fileWrapper: FileWrapper, contentType: UTType) throws {
          if let data = fileWrapper.regularFileContents {
              text = String(decoding: data, as: UTF8.self)
          }
      }
      func write(to fileWrapper: inout FileWrapper, contentType: UTType) throws {
          let data = Data(text.utf8)
          let file = FileWrapper(regularFileWithContents: data)
          fileWrapper = file
      }
  }
  // Image files, which need to be converted to UIImage, thus this code only supports iOS or PadOS
  #if os(iOS)
  struct ImageFile: FileDocument {
      static var readableContentTypes = [UTType.image]
      var image = UIImage()
      init(initialImage: UIImage = UIImage()) {
          image = initialImage
      }

      init(fileWrapper: FileWrapper, contentType: UTType) throws {
          if let data = fileWrapper.regularFileContents {
              image =   UIImage(data: data) ?? UIImage()
          }
      }

      func write(to fileWrapper: inout FileWrapper, contentType: UTType) throws { }
  }
  #endif
Invocation:
  import SwiftUI
  #if os(iOS)
  import UIKit
  #endif
  import UniformTypeIdentifiers

  @main
  struct NewAllApp: App {
     @SceneBuilder var body: some Scene {
          // Read and write
          DocumentGroup(newDocument: TextFile()) { file in
                  TextEditorView(document: file.$document)
          }


          #if os(iOS)
          // Read-only
          DocumentGroup(viewing: ImageFile.self) { file in
                  ImageViewerView(file: file.$document)
            }
          #endif
      }
  }

  struct TextEditorView: View {
      @Binding var document: TextFile
      @State var name = ""
      var body: some View {
          VStack{
          TextEditor(text: $document.text)
              .padding()
          }
          .background(Color.gray)
      }
  }

  #if os(iOS)
  struct ImageViewerView:View{
      @Binding var document:ImageFile
      var body: some View{
          Image(uiImage: document.image)
              .resizable(resizingMode: .stretch)
              .aspectRatio(contentMode: .fit)
      }
  }
  #endif
On macOS, the com.apple.security.files.user-selected.read-write setting in macOS.entitlements must be set to true to complete the writing process.
When adding multiple scenes to a Scene, use @SceneBuilder or a Group to encompass multiple scenes.
On macOS, when both WindowGroup and DocumentGroup are added simultaneously, both functions can run normally. In iOS or PadOS, only the one placed at the front will be displayed.
Due to being a beta version, many functionalities are still not implemented or have issues. For example, it’s still not possible to set file names through fileDocument on iOS, or to choose formats when creating new files.
-
Settings
Used only for macOS, for writing the program’s preference settings window.
  #if os(macOS)
      Settings{
        Text("Preferences").padding(.all, 50)
      }
  #endif
Other
-
onChange Monitors a specified value and performs a specified action when the value changes. An example of its use is shown in the introduction of
scenePhase. -
onCommands Sets the program’s menu in macOS. For detailed usage, please refer to SwiftUI2.0 — Commands (macOS Menus).
-
defaultAppStorage If you don’t want to use the default
UserDefault.standard, you can set your own storage location. This is not frequently used.
Summary
Thus far, this article has briefly introduced the new App and Scene in SwiftUI 2.0. In the next article, we will explore how to organize our code’s Data Flow within this new structural hierarchy.
The current @AppBuilder and @SceneBuilder functionalities are very basic and do not include any logical judgment capabilities. Therefore, I currently cannot selectively display the required Scene based on conditions. I believe Apple will add such capabilities in the future.
The code in this article has been expanded with compilation judgments to be usable on multiple platforms. If you are developing SwiftUI only for iOS or macOS, you can simplify the code according to each platform. Also, code completion in Xcode 12 is very sensitive to the Target setting. If you find that you cannot complete specific statements for some platforms, please check whether the Scheme is set to the corresponding platform.