This article explores the CloudKit dashboard.
Introduction to the Dashboard
The CloudKit Dashboard requires an Apple Developer Program account. It’s accessible at https://icloud.developer.apple.com.
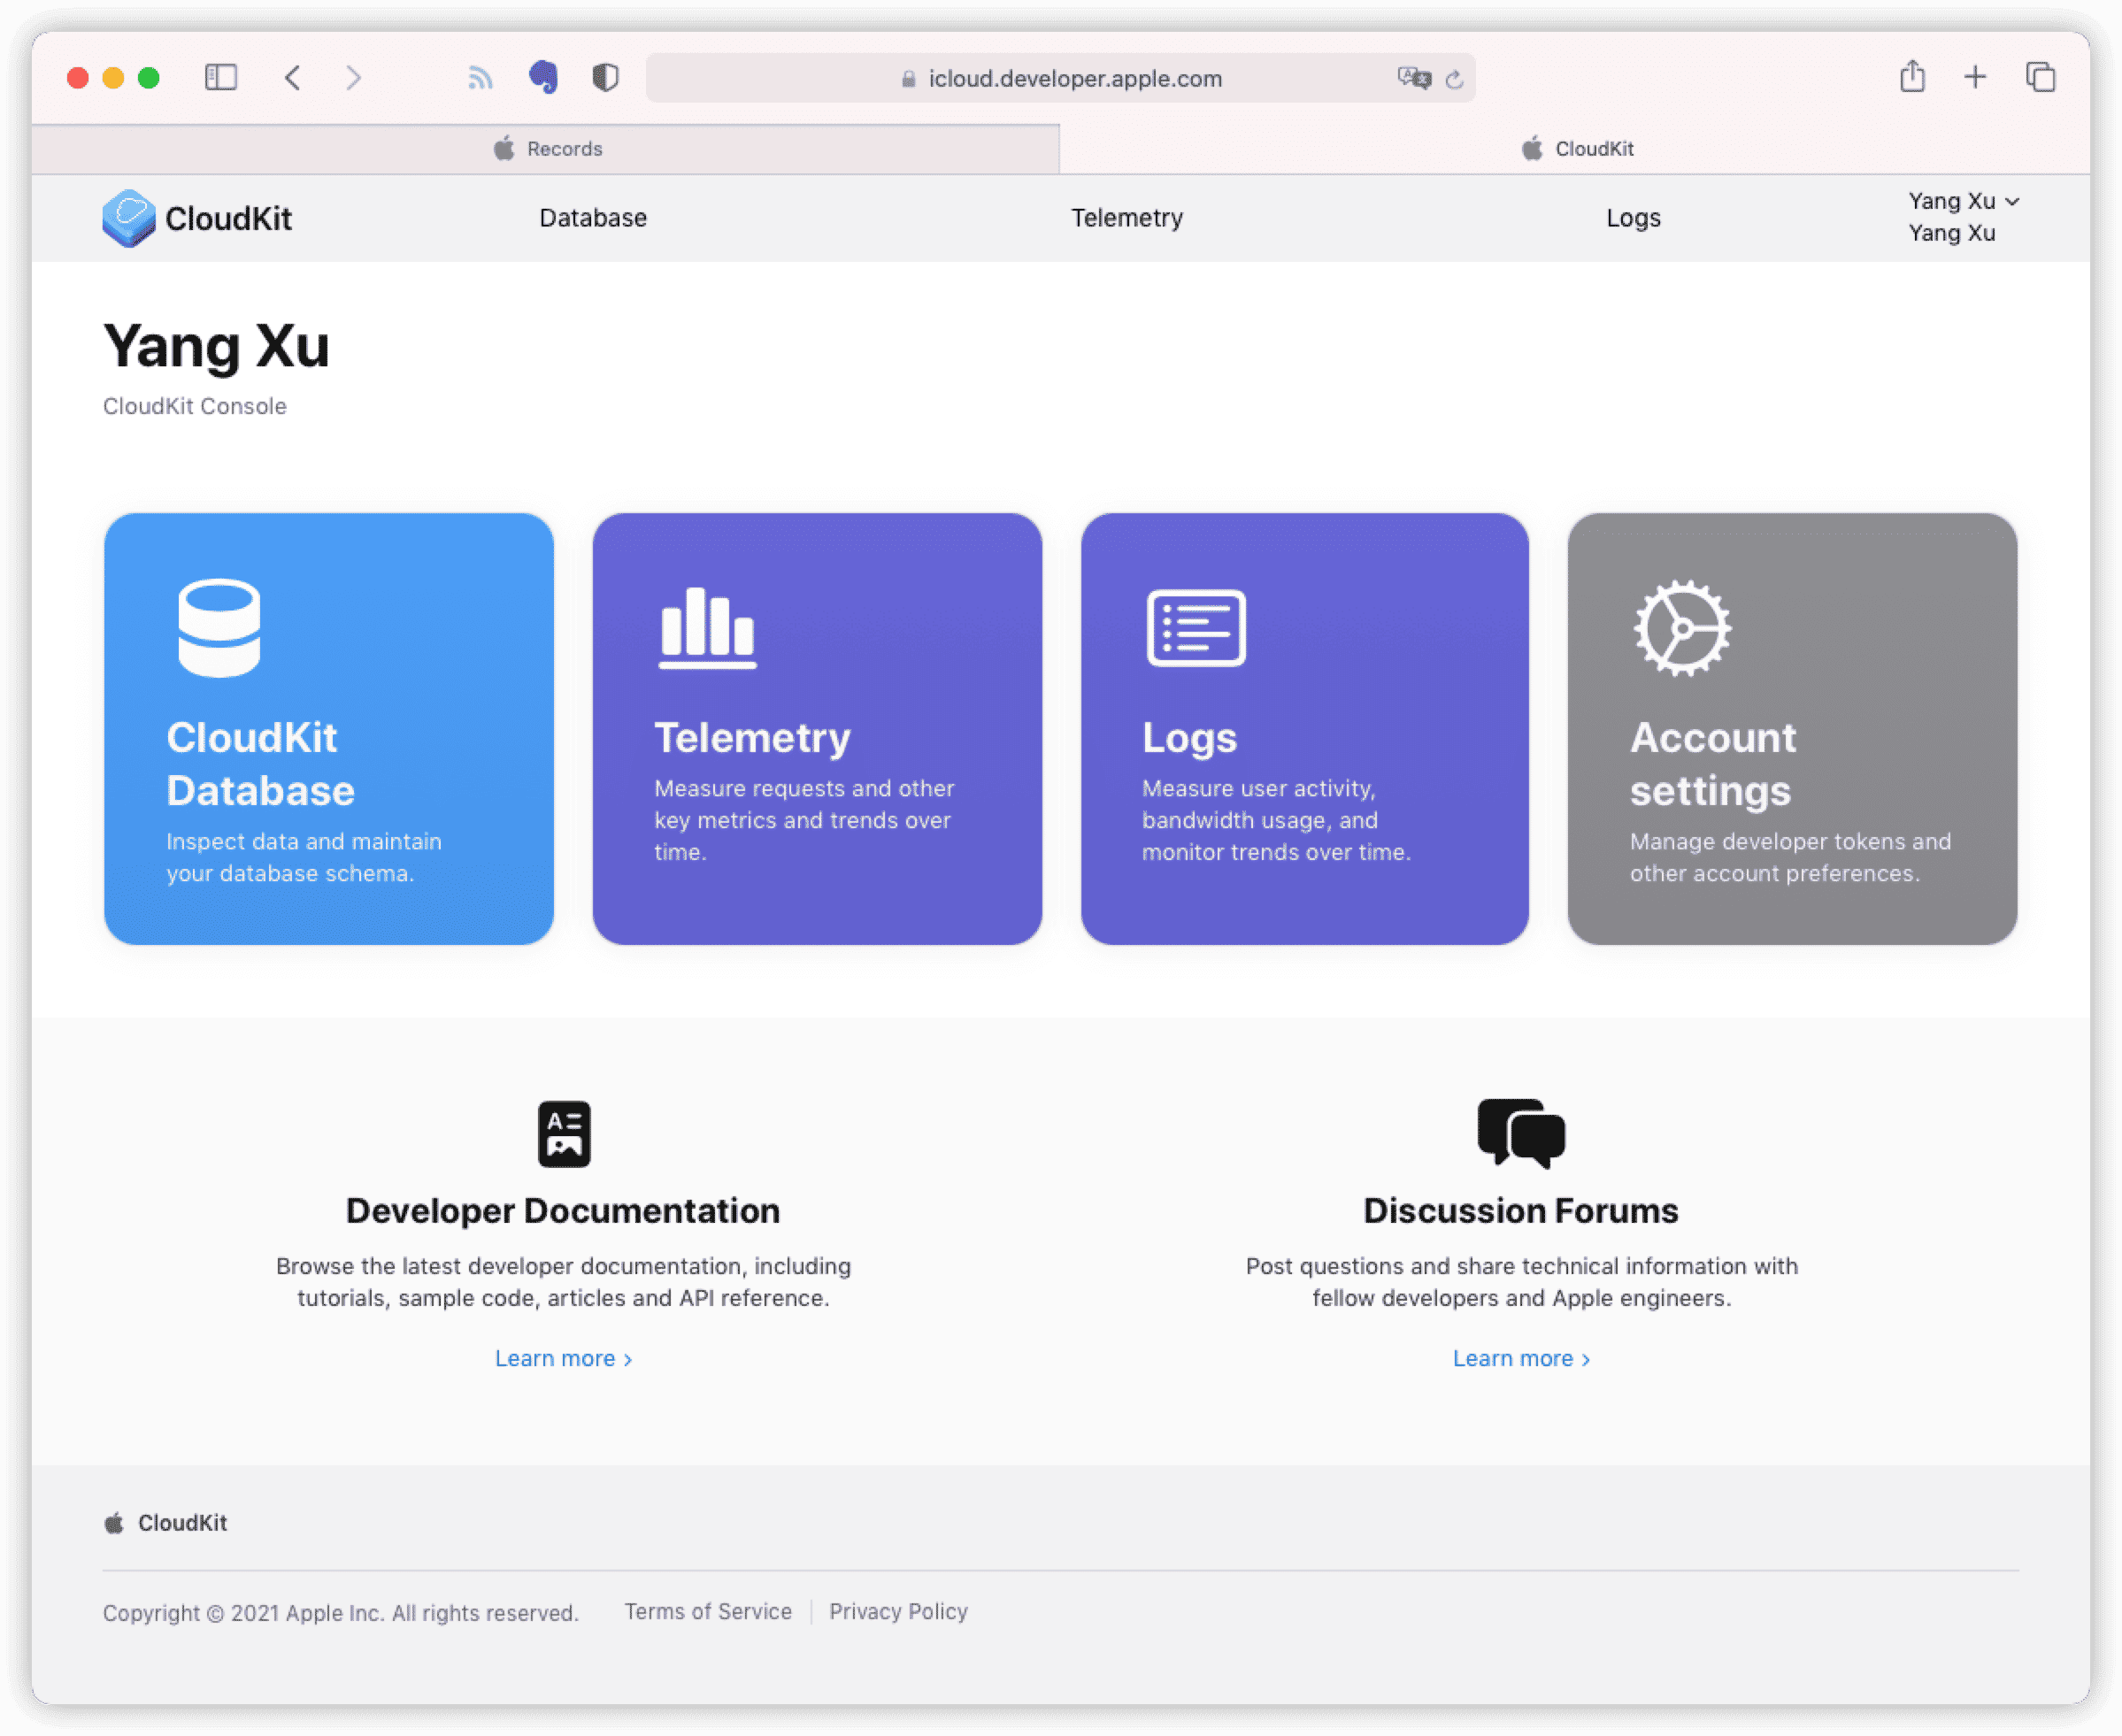
Apple has significantly revamped the CloudKit Dashboard layout in the last two years. The screenshot above is from mid-2021.
The dashboard is divided into three sections:
-
Database (
CloudKit Database)A web client for managing
Schema,Record,Zone, user permissions, container environments, etc. -
Telemetry (
Telemetry)Provides a visual insight into server-side performance and the utilization of databases and push events.
-
Logs (
Logs)Real-time and historical logs generated by CloudKit servers, showing interactions between the application and servers.
For most uses of
Core Data with CloudKit, only a few features of the dashboard are needed (like environment deployment). However,CloudKit Dashboardhelps understand the mechanisms behindCore Datadata synchronization.
Database (CloudKit Database)
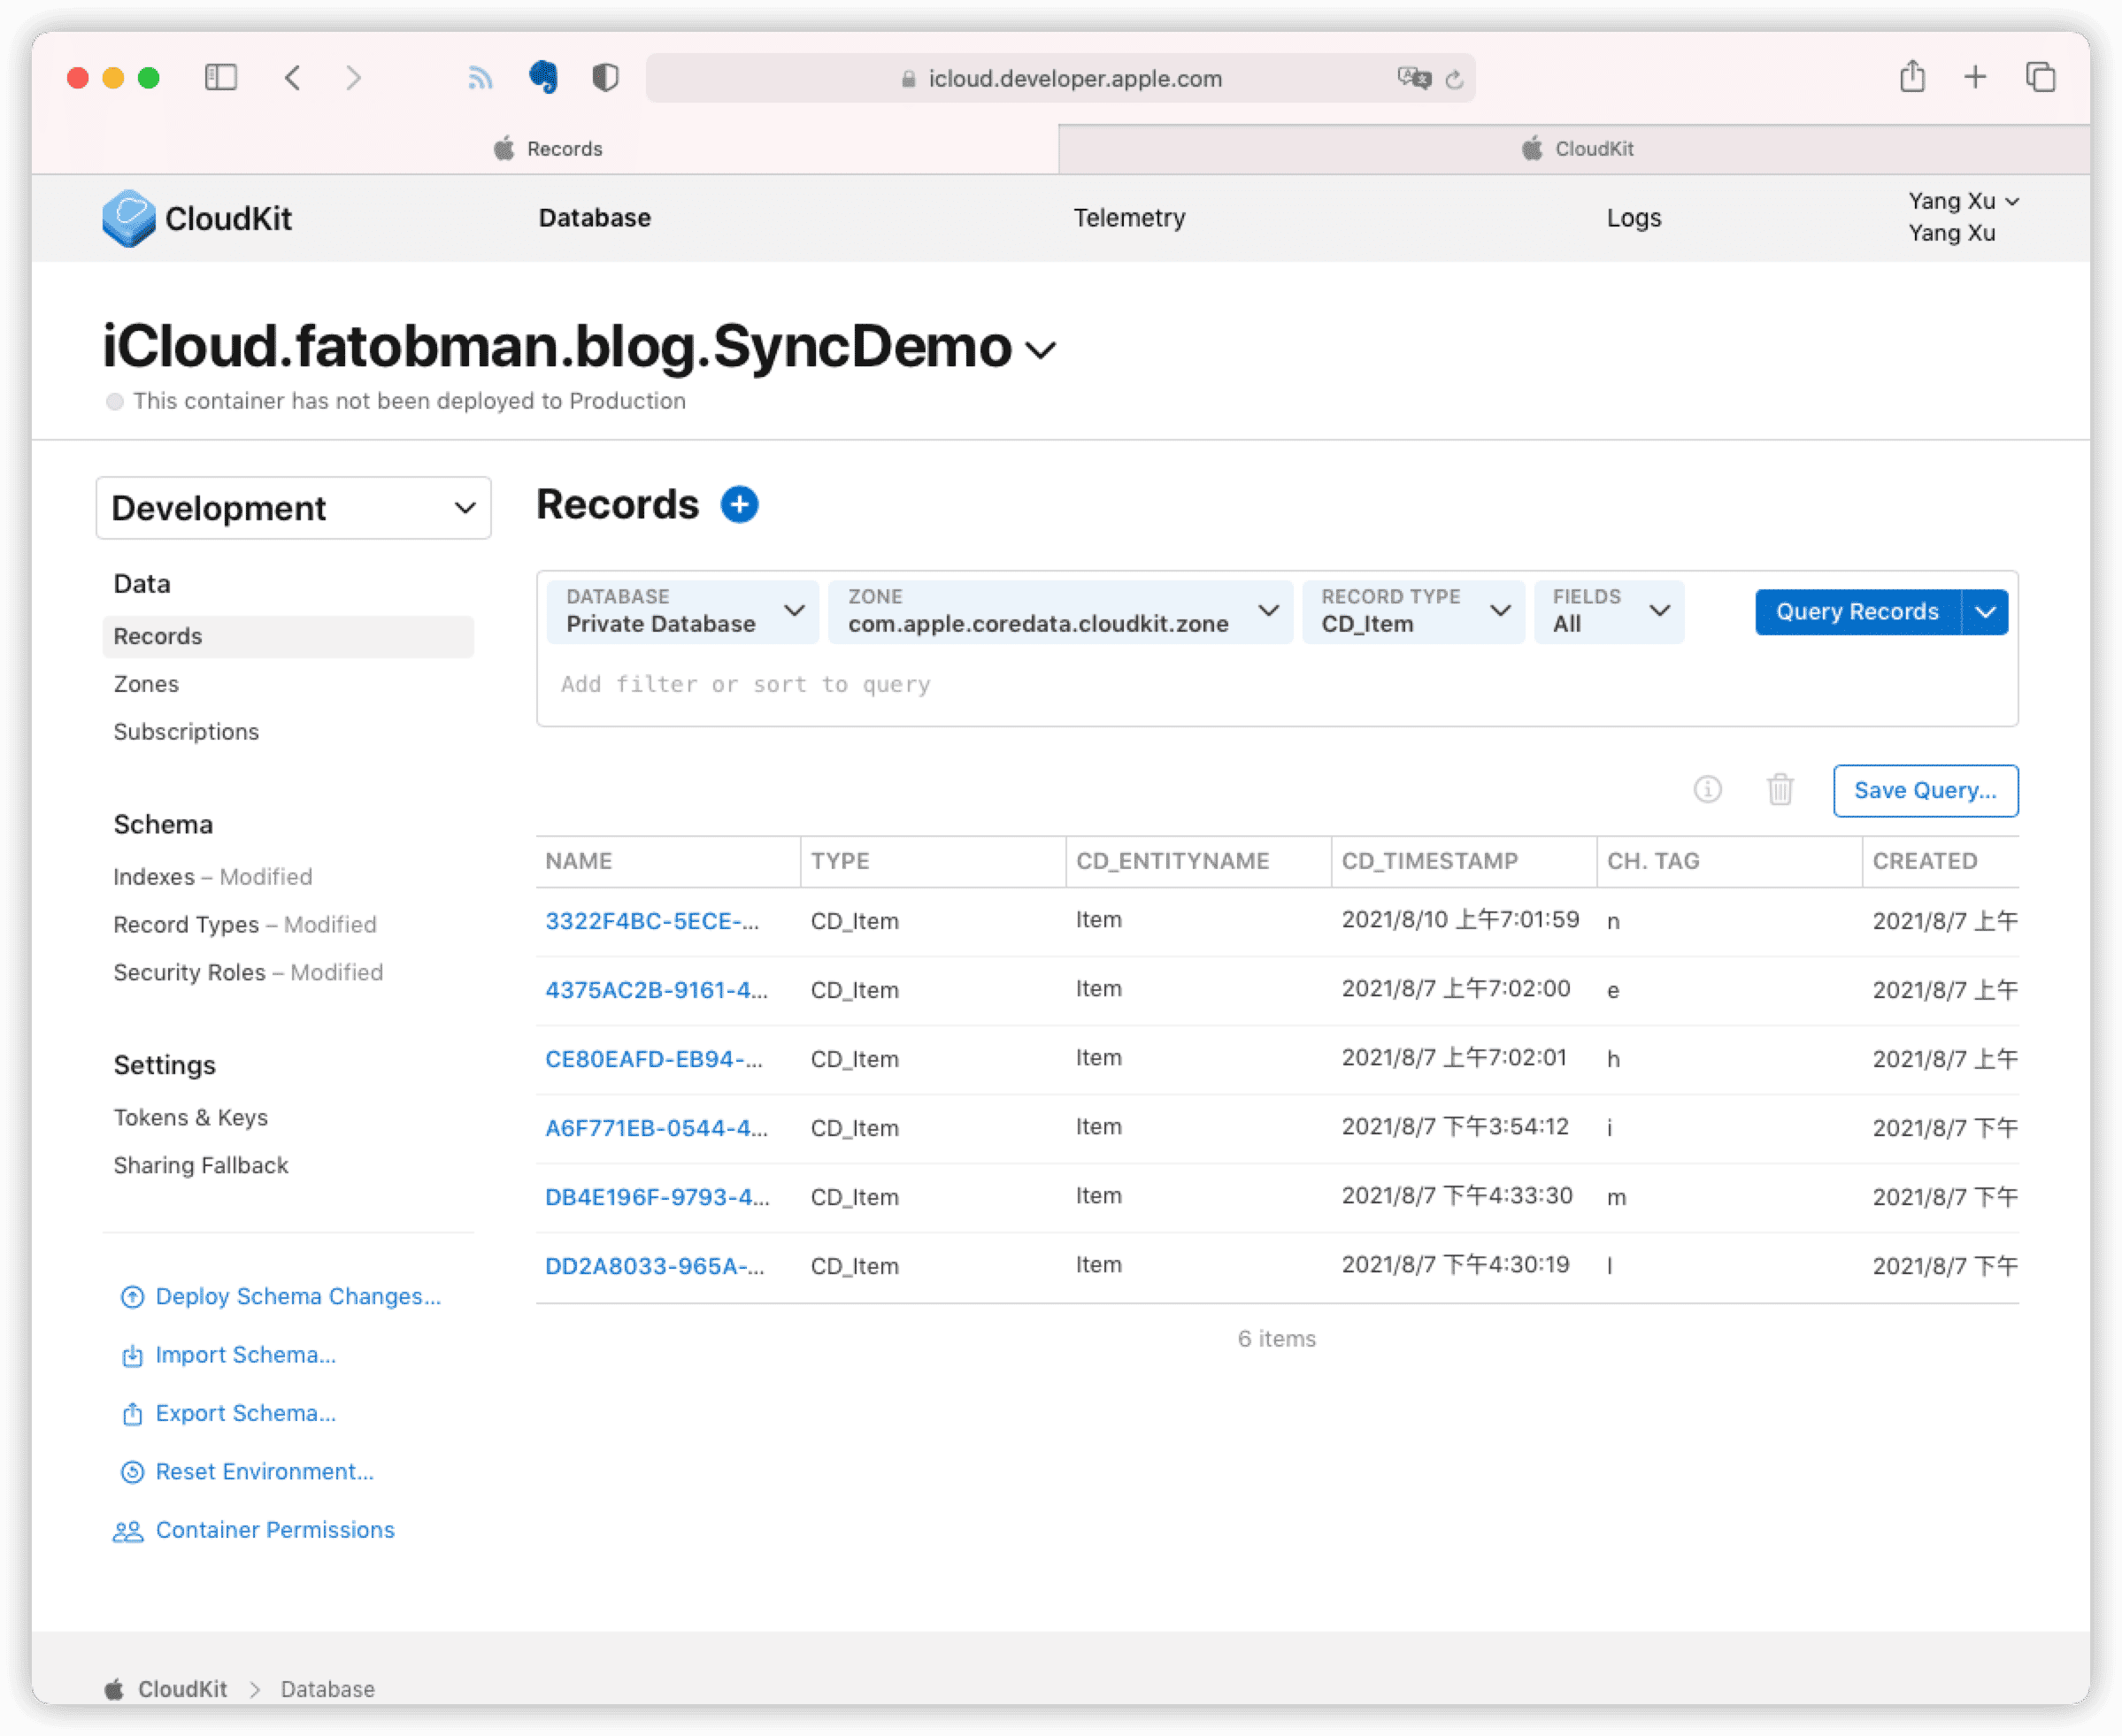
In Core Data with CloudKit: The Basics, basic objects like CKContainer, CKDababase, CKZone, CKSubscription, CKRecord were discussed. This article will further introduce other objects and features of CloudKit.
Environments
CloudKit offers Development and Production environments for your app’s network data.
-
Development Environment
During development, data generated through
CloudKitis saved only in the development environment, accessible only to team members. Here, you can adjustSchemastructure, modifyRecord Typeproperties, and reset the environment if necessary, similar to the pre-launch state of aCore Dataapplication. Developers can thoroughly test the app withCloudKitservices before offering them to users. -
Production Environment
When the app is ready for the App Store, the development environment’s structure must be deployed to the production environment (
Deploy Schema Changes). Once deployed, modifications to theSchemain the production environment must be forward-compatible.The reason is straightforward: once an app is live, client update frequencies can’t be controlled. To ensure lower version clients can access data, any model changes need to be downward compatible.
Apps sold on the
App Storecan only access the production environment.
Even if a developer’s account coincides with their personal iCloud account, development and production environments are separate sandboxes with no data overlap. When using Xcode for debugging, the app accesses the development environment, while versions downloaded through Testflight or the App Store access the production environment.
Deploying the development environment’s Schema to the production environment is done with Deploy Schema Changes.
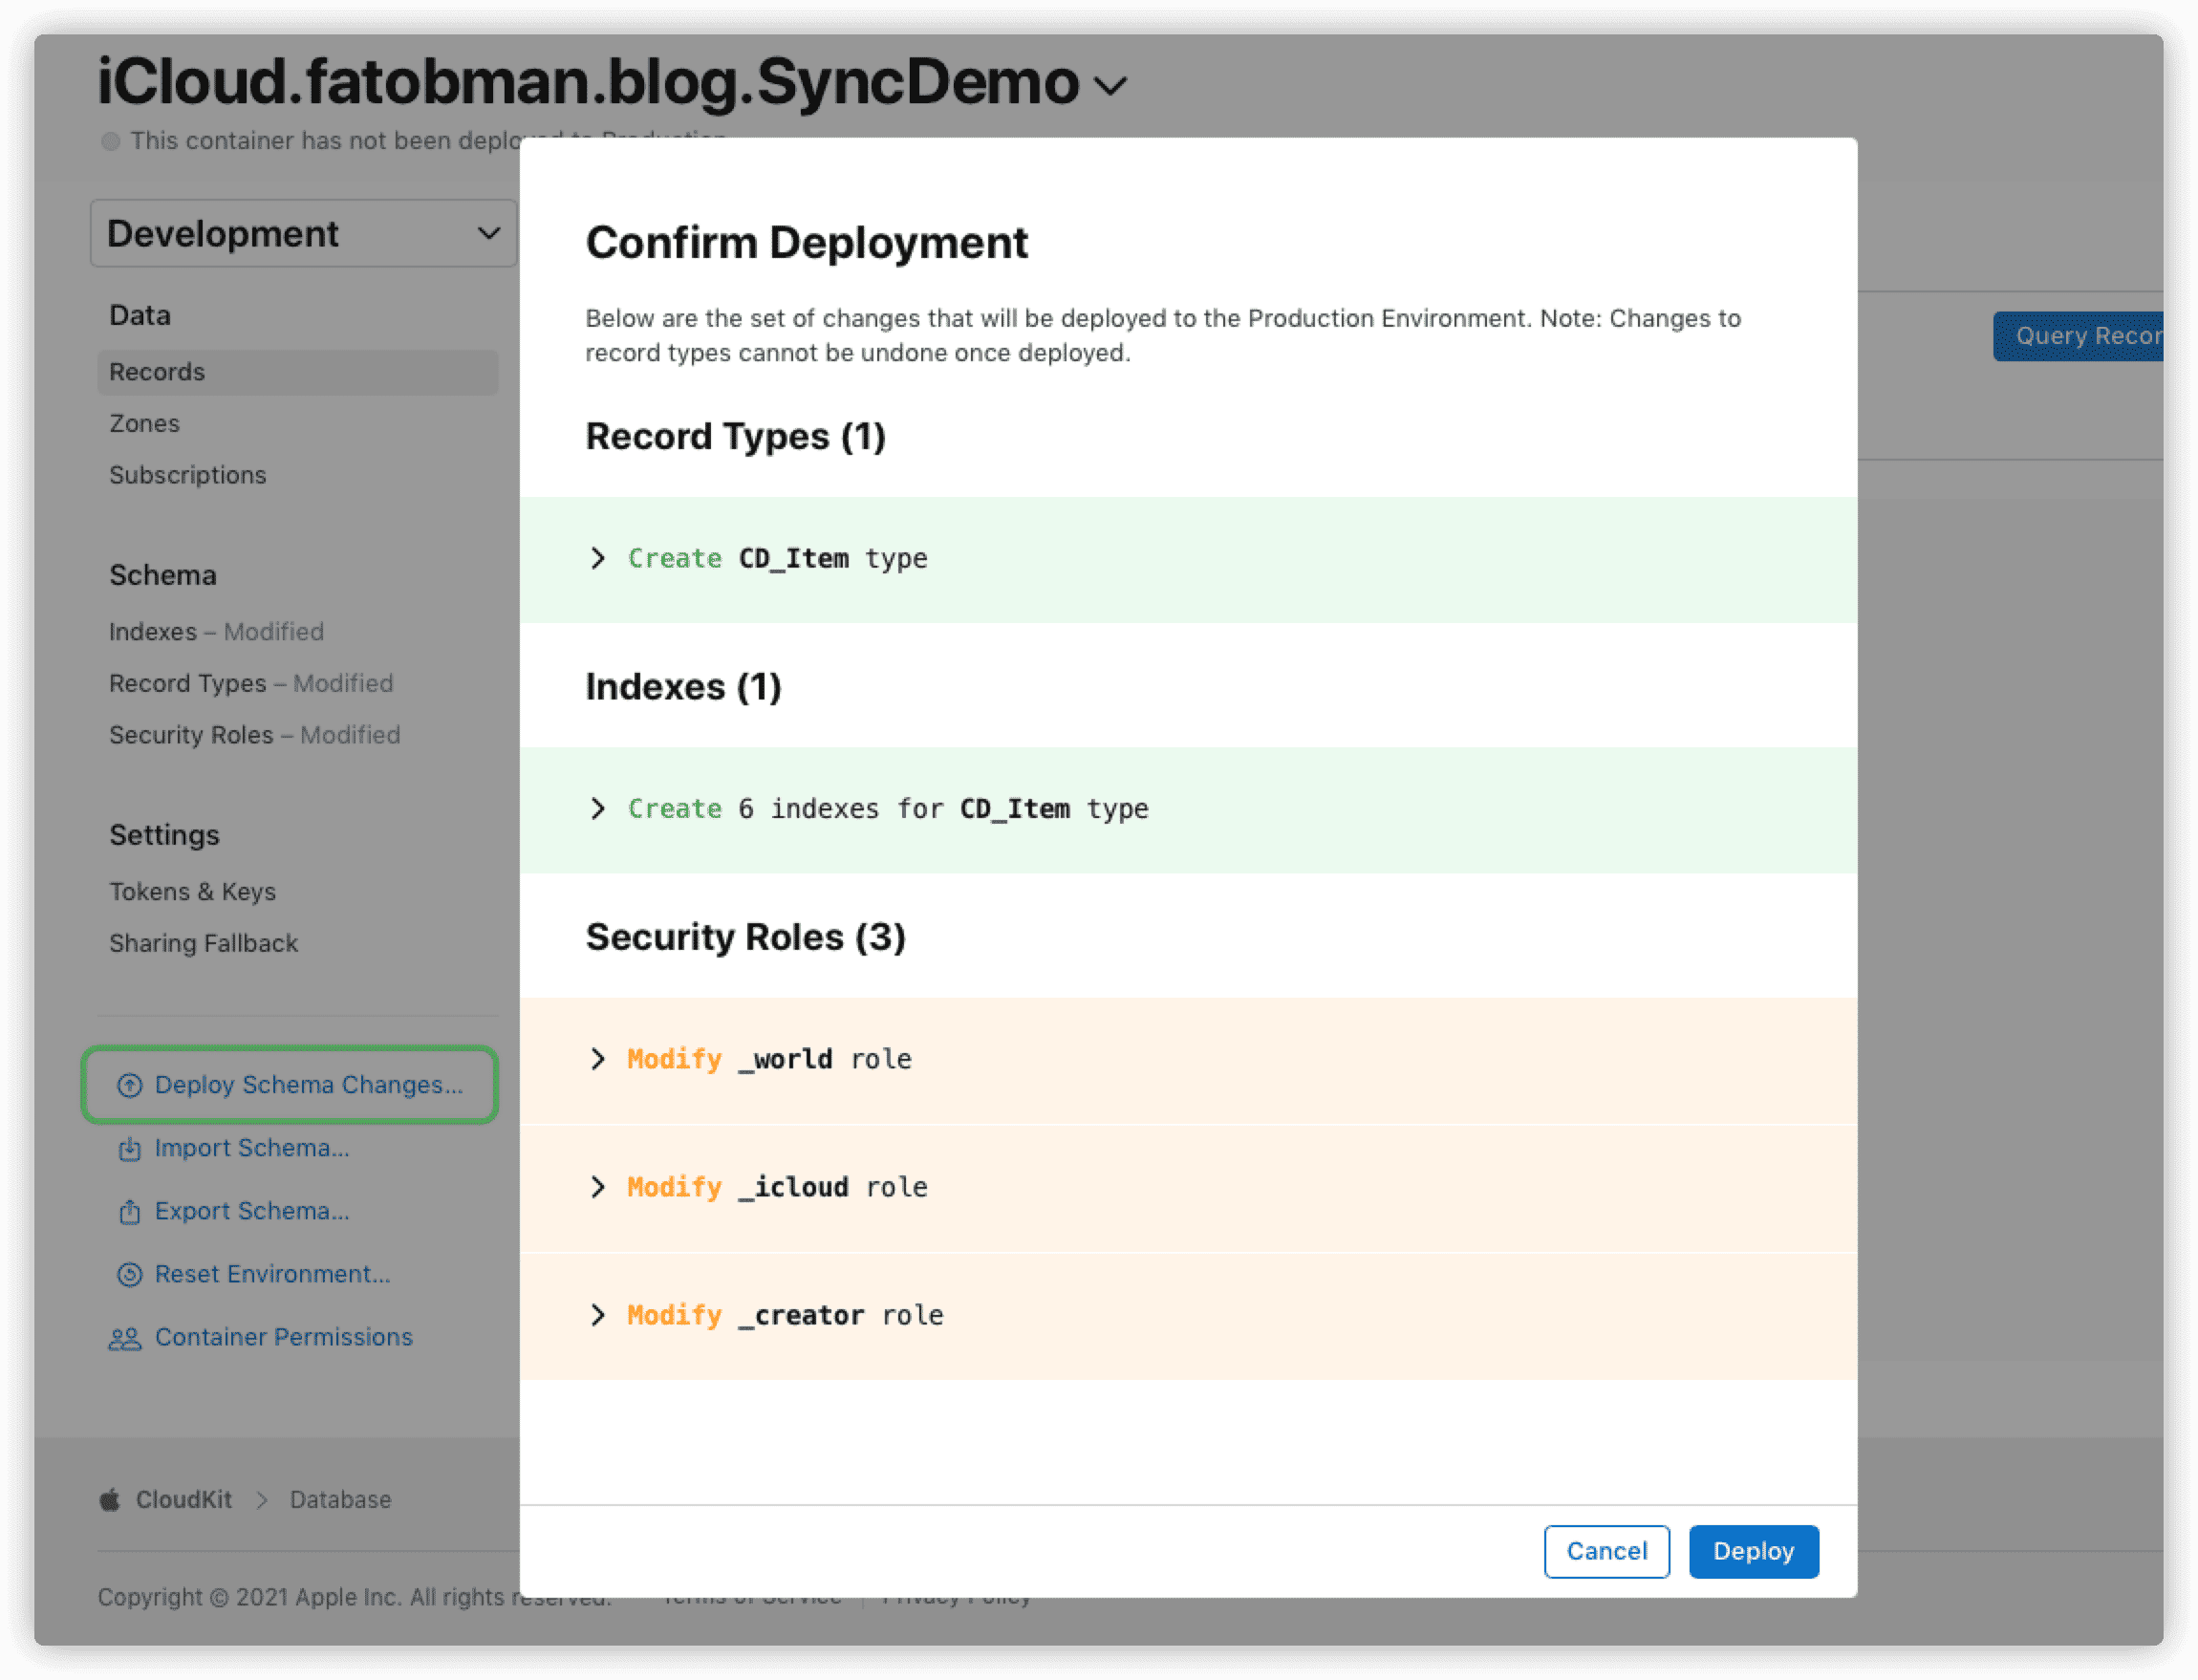
During deployment, modifications made since the last deployment are shown.
Even after deploying Schema to production, changes can still be made to the development environment and deployed again. If a model change doesn’t meet compatibility conditions, CloudKit Dashboard will prohibit deployment.

Below the container name, the Schema deployment status is displayed. The first image shows the pre-deployment state, while the second shows the post-deployment state.

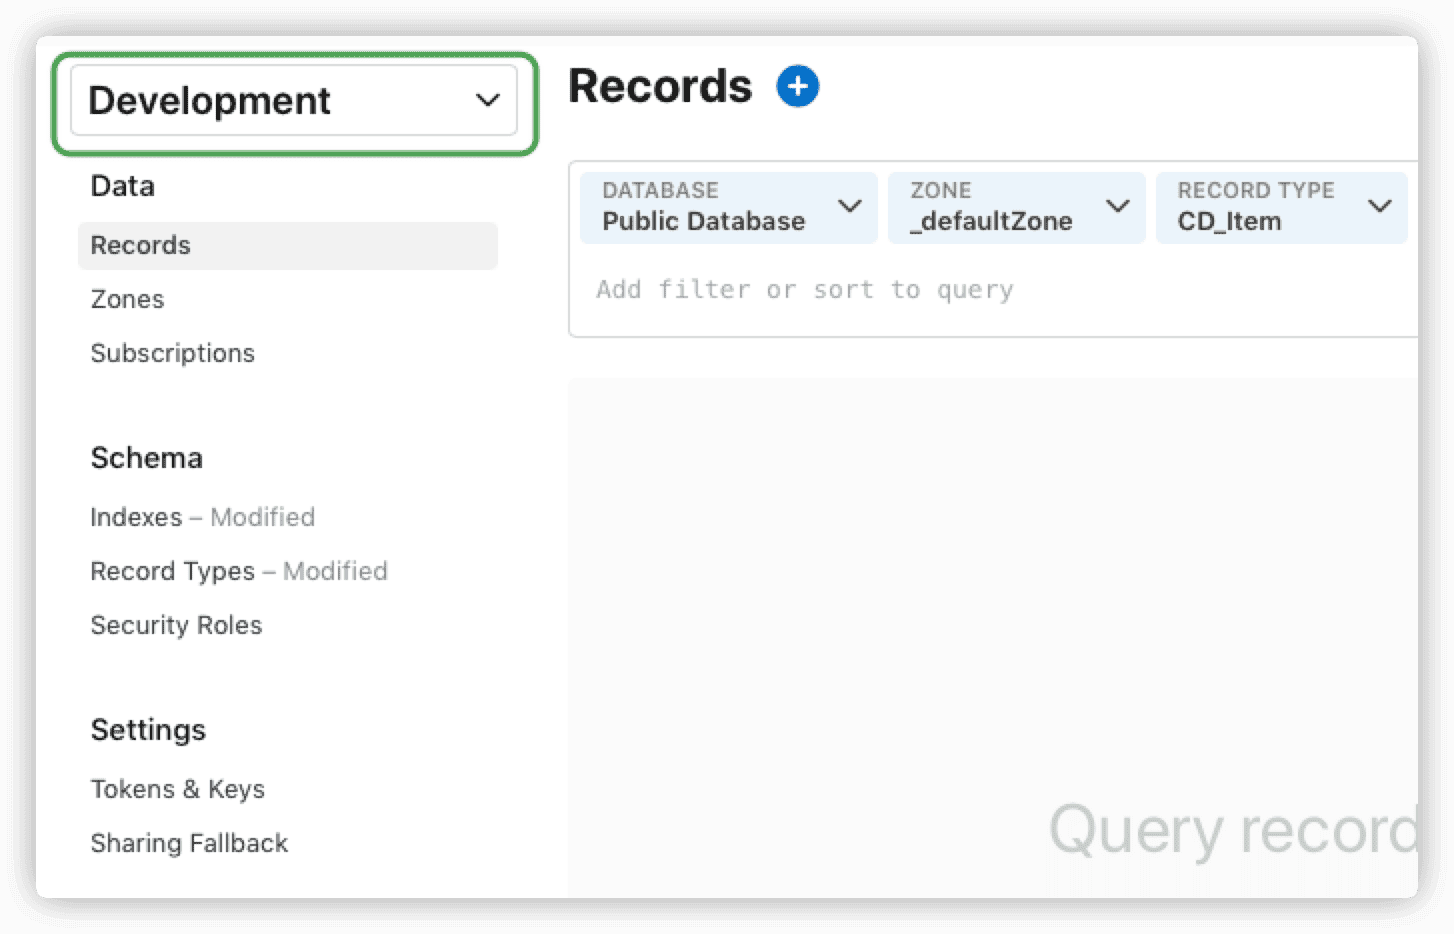
Before any operation, ensure you’re in the correct environment setting.
Given
CloudKit’s environment deployment rules, be very cautious when designing theCore Datadata model in projects usingCore Data with CloudKit. My principle is to add, not subtract, not change. I will discuss how to migrateCore Data with CloudKitdata models in a future article.
Security Roles
Security roles apply only to public databases.
CloudKit uses role-based access control (RBAC) to manage permissions and control access to data in public databases (private databases are unique to each app user). With CloudKit, you can set
permission levels for a role, then assign that role to a given record type (Record Type).
Permissions include read, write, and create. Read allows only reading records, write allows reading and writing, and create allows reading, writing, and creating new records.
CloudKit includes three preset roles: World (_world), Authenticated (_icloud), and Creator (_creator). World applies to anyone, regardless of iCloud status. Authenticated is for any authenticated iCloud user. Creator is the creator of the record (Record).
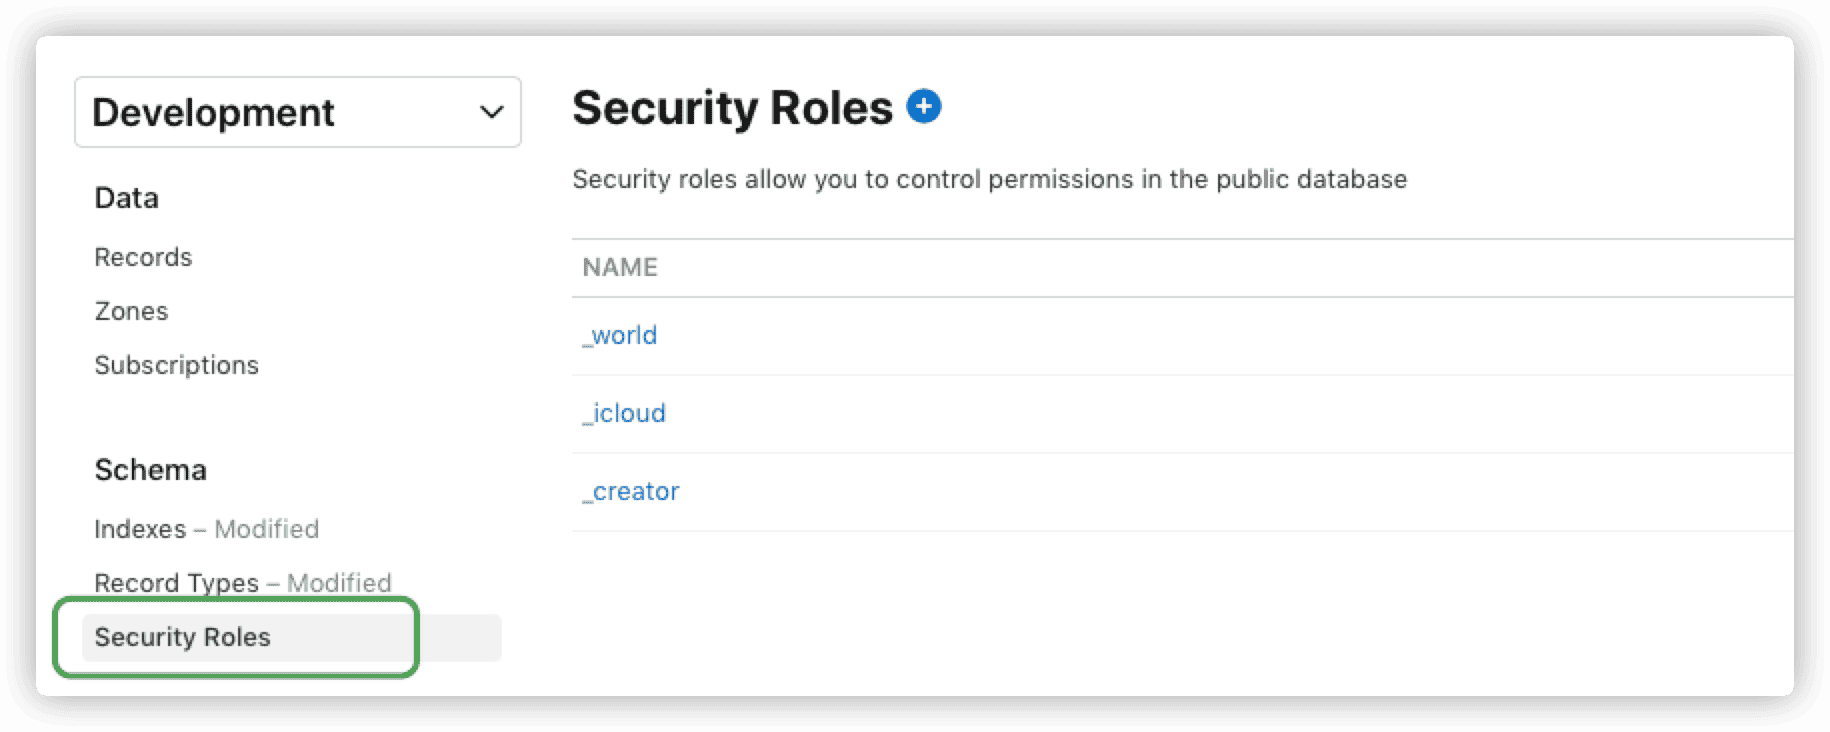
The default setting allows anyone to read data, only authenticated iCloud users can create new records, and the creator can update their records.
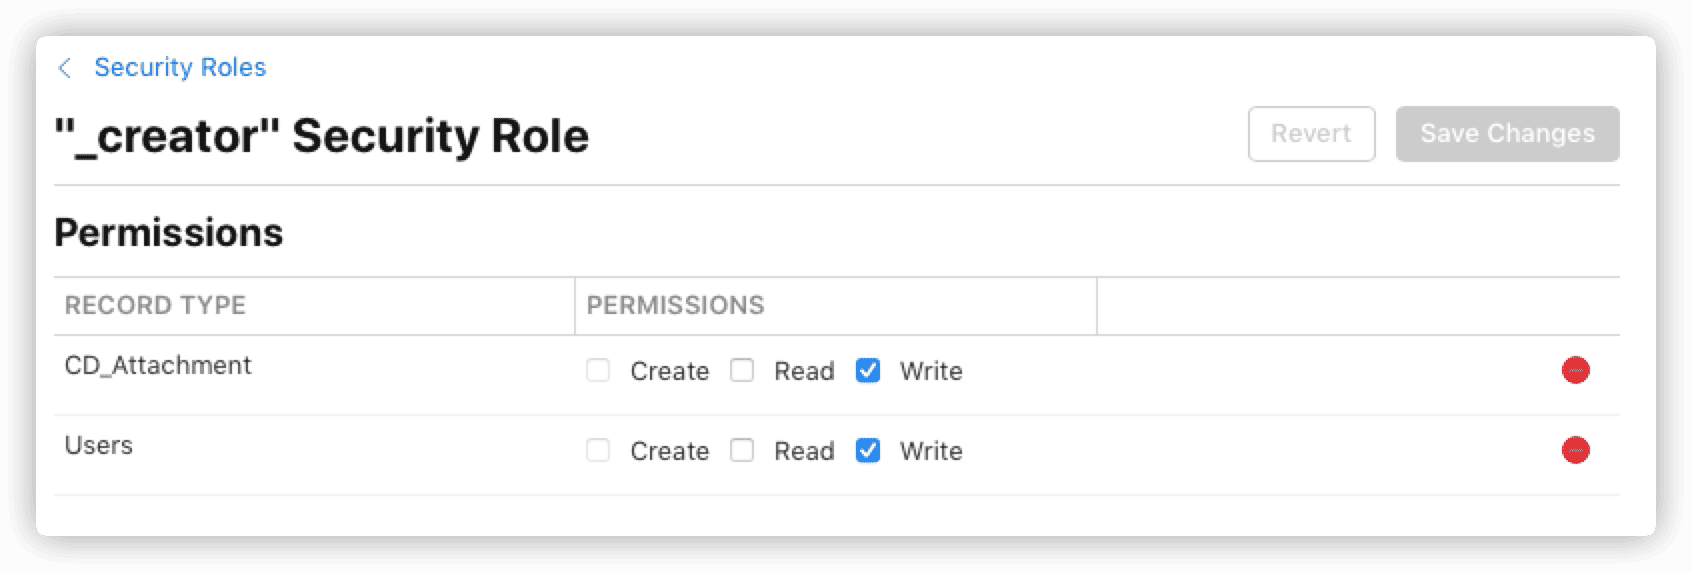
You can create custom security roles but cannot create user records (User Record). The system creates a user record for a user when they authenticate with the container for the first time. Existing users can be found and assigned to any custom role.
Security roles are part of the data model (Schema). Any security settings changes require deployment to the production environment to take effect. Once deployed, security roles cannot be deleted.
For most
Core Data with CloudKitapplications, the default system configuration suffices.
Indexes
CloudKit indexes come in three types:
- Queryable (
queryable) - Searchable (
searchable) - Sortable (
sortable)
After creating a Recored Type through CloudKit, you can create necessary indexes for each field (only NSString supports searchable). Index types are independent; for example, if you want a field to be both queryable and sortable, you need to create two separate indexes.
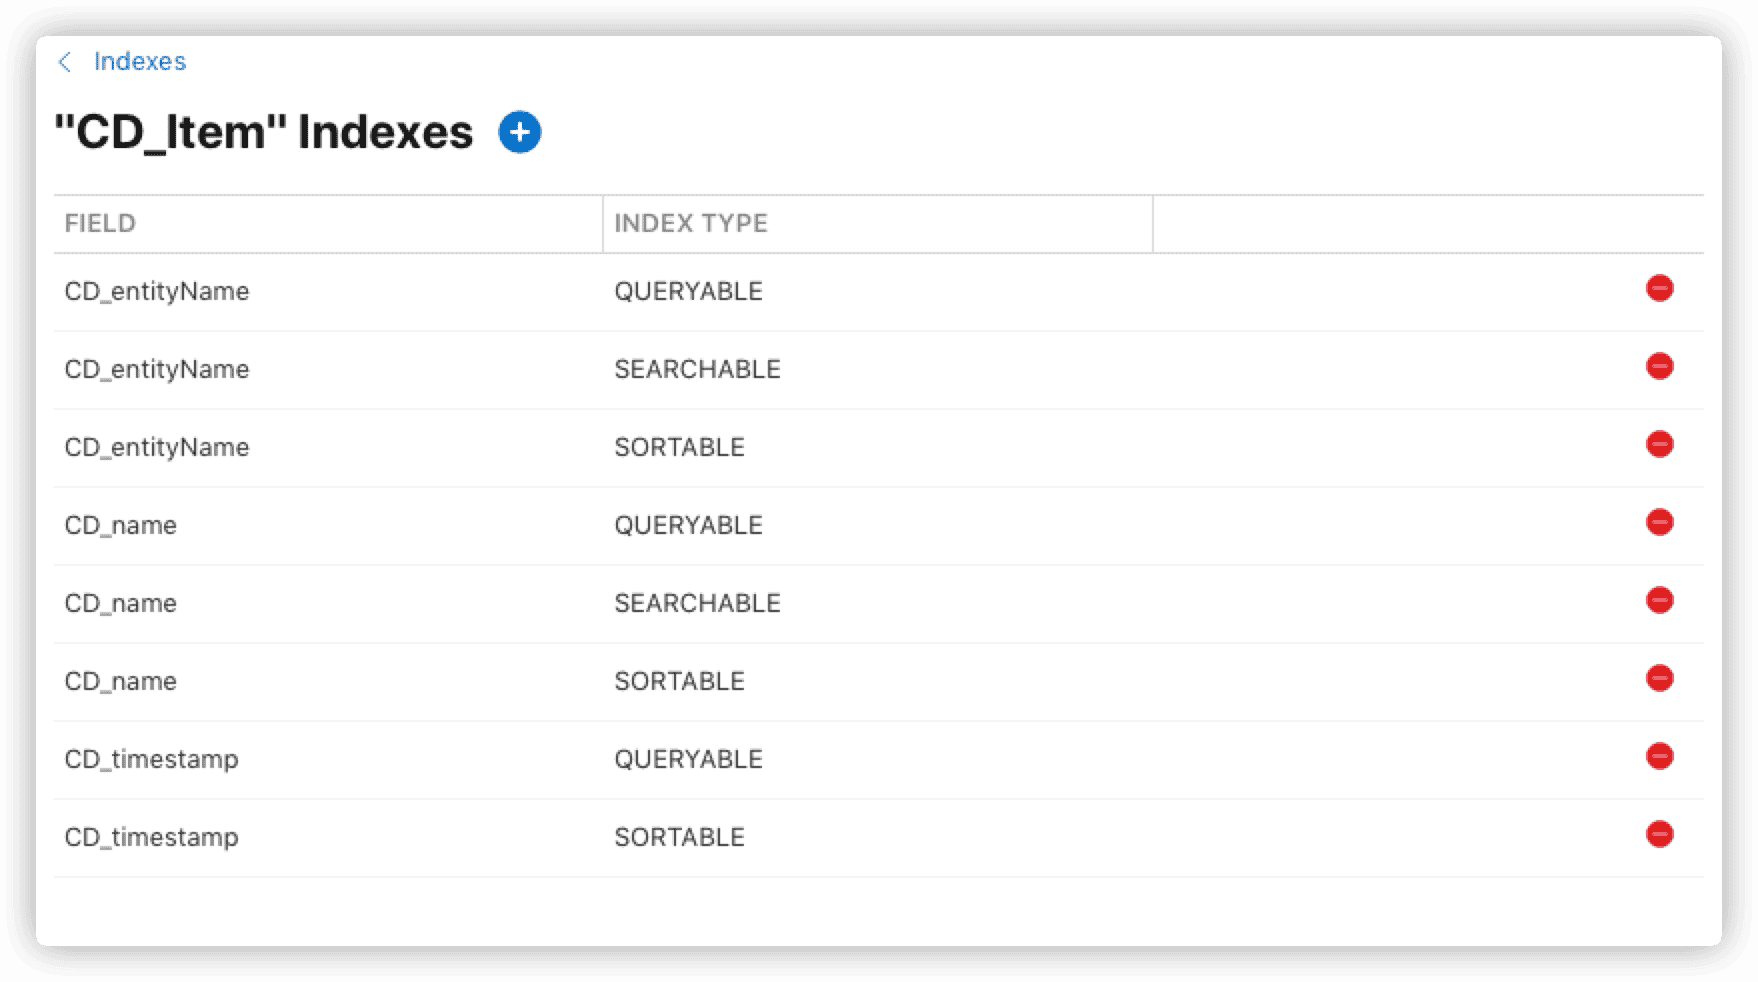
Only after creating a queryable index for the recordName of a Record Type can you browse the data of that Type in Records.


Core Data with CloudKitautomatically creates necessary indexes for every attribute of a managed object entity inCloudKit(excludingrecordName). Unless you need to browse data in theCloudKitdashboard, there’s no need to add any indexes.
Record Types
Record Type is a type identifier specified by developers for CKRecord. You can create it directly in code or in the CloudKit dashboard.

As mentioned in the Basics, while Entity has more configuration information than Record Type, the latter has a feature not present in Entity – metadata.
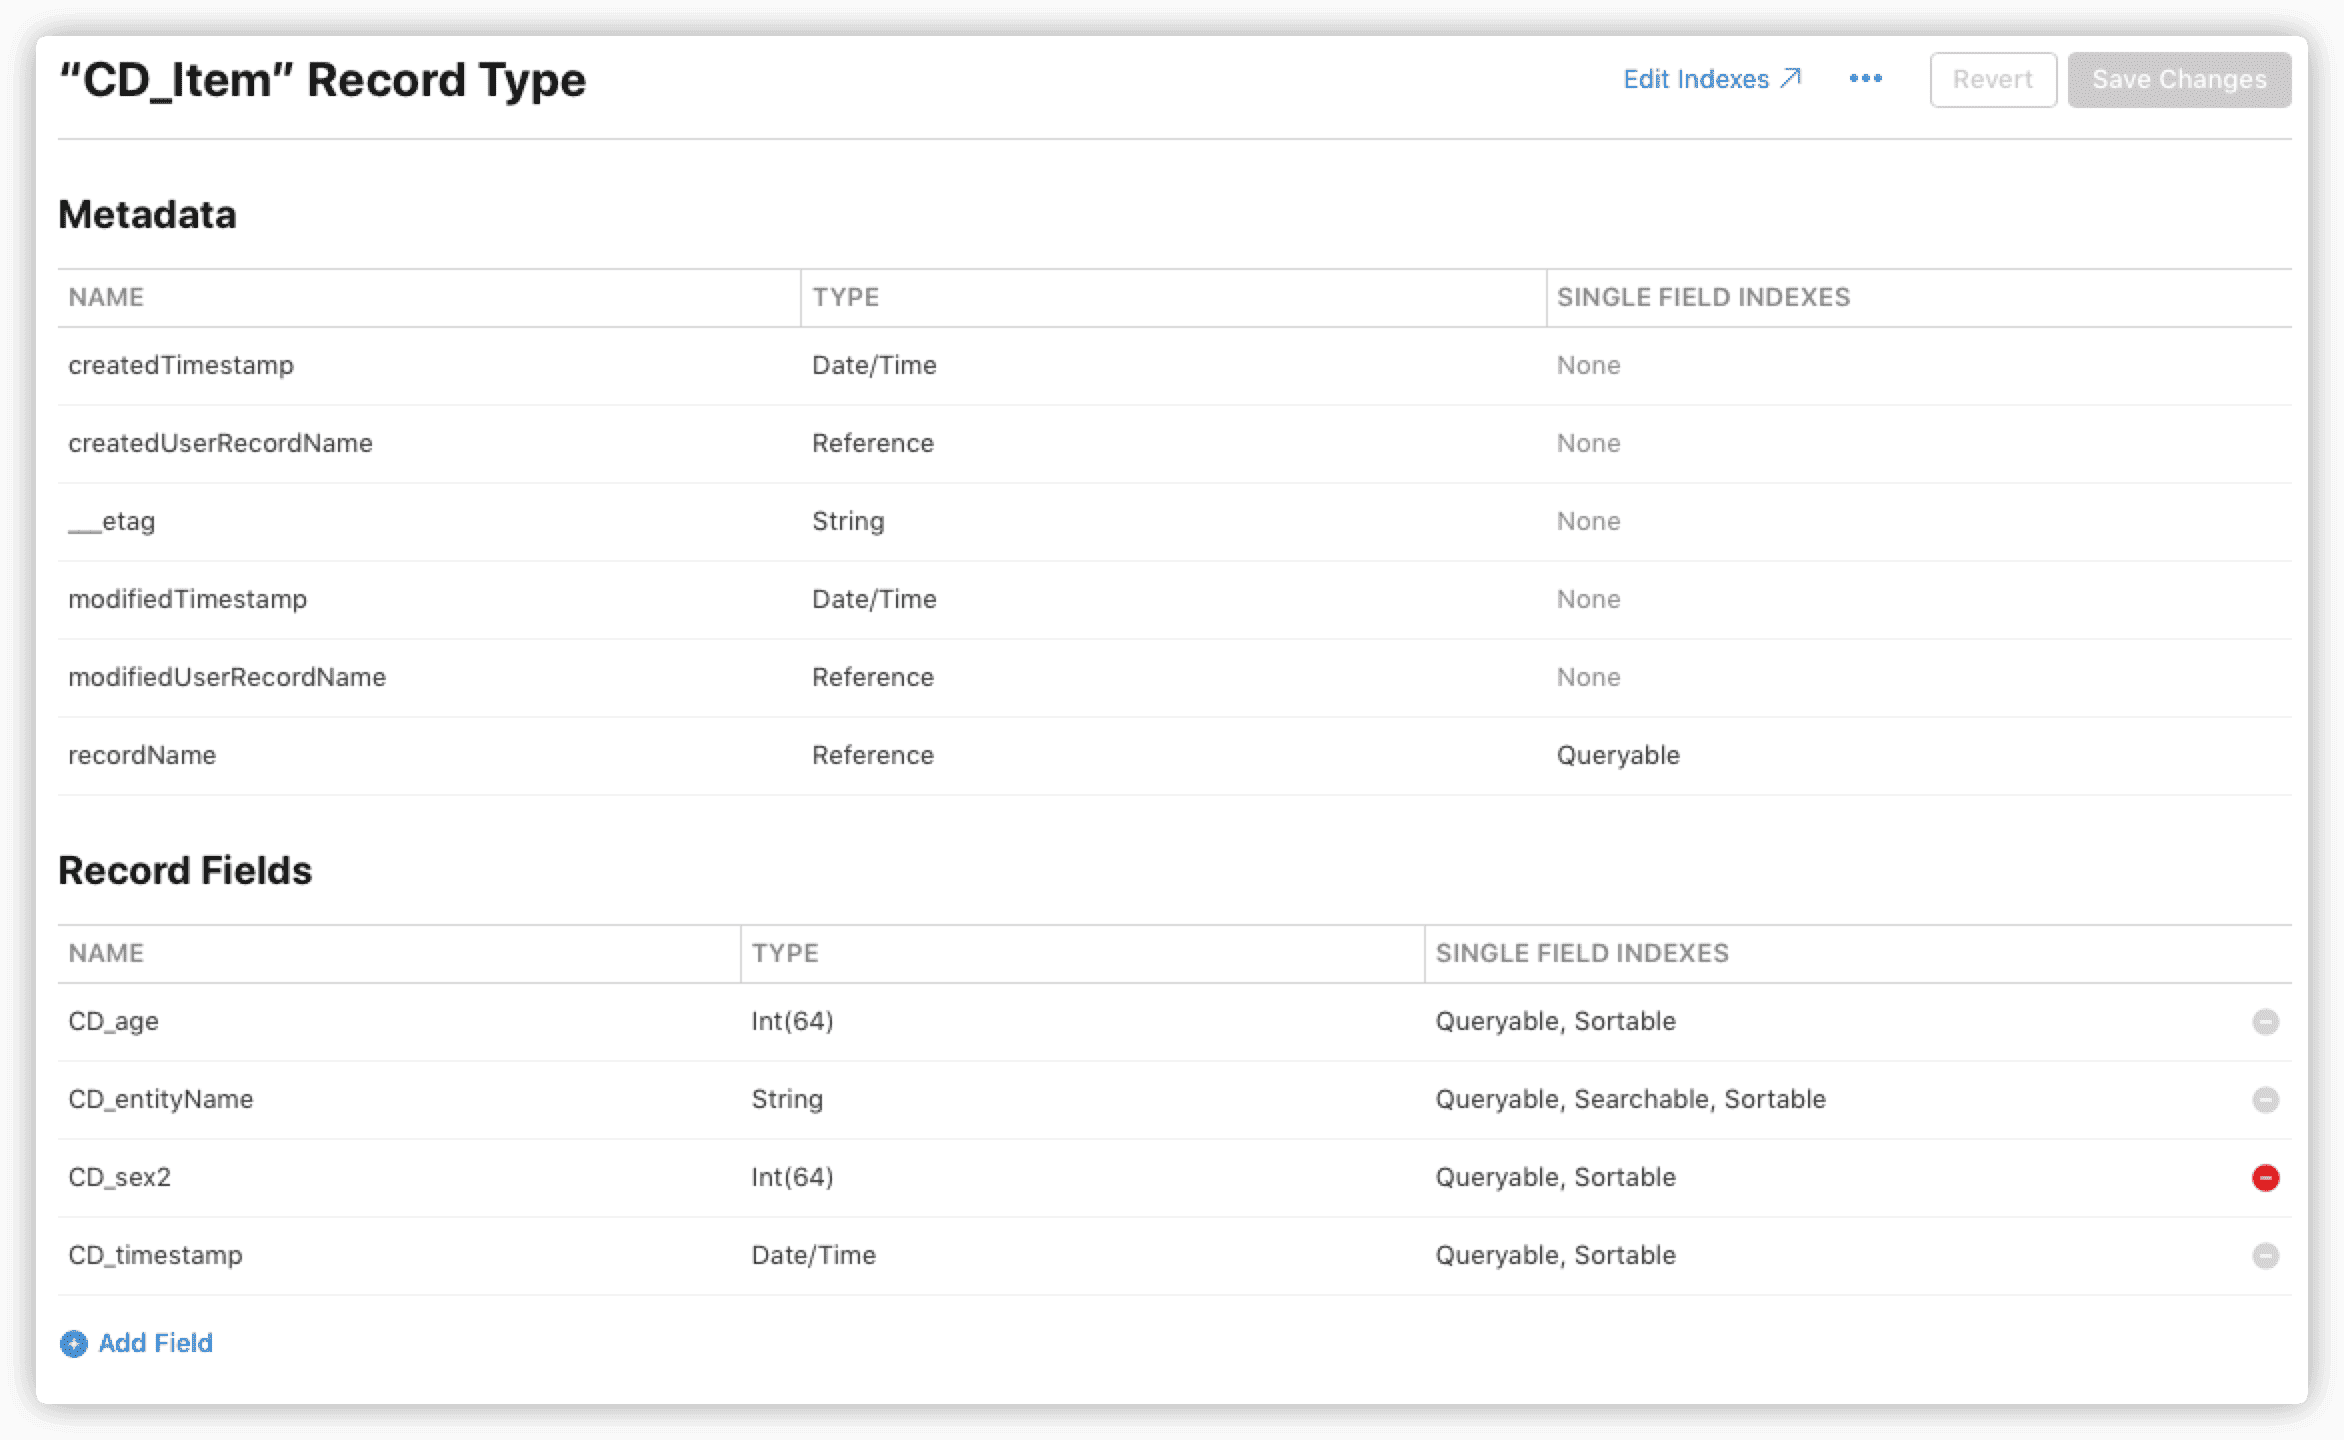
CloudKit presets several metadata fields for each Record Type (even without any other fields created by developers). Each data record (CKRecord) contains this information, most of which are set automatically by the system.
- createdTimestamp
- createUserRecordName
- _etag
- modifiedTimestamp
- modifiedUserRecordName
- recordName
For certain Record Type types, the system adds specific metadata, like role, cloud.shared, etc.
This article focuses on Core Data with CloudKit. Let’s see how NSPersistentCloudKitContainer converts Core Data managed object attributes into CloudKit Recore Type fields.


The above image shows the
Record Typefor theItemin the template project from Synchronizing Local Database to iCloud Private Database inCloudKit.CloudKitautomatically creates fields for each attribute of the managed object entity, mapping the attribute names to fields withCD_[attribute.name]keys. The field types
Translation: “These strings prefixed with CD_ will continuously appear in the console during the data synchronization process, and understanding their composition can be helpful for debugging code.”
Once a Record Type is deployed in the production environment, its fields cannot be deleted or renamed. As a result, certain operations in Core Data are not permissible in Core Data with CloudKit.
Do not rename entities or attributes in the data model of an application that has already been launched. This restriction applies even when using Mapping Model or Renaming ID. During development, if renaming is necessary, you may need to delete the app, reinstall, and reset the CloudKit development environment.
Zones
Each database type has a default Zone, and only private databases can have custom Zones.

For data in private databases, you can assign a Zone when creating a CKRecord.
let zone = CKRecordZone(zoneName: "myZone")
let newStudent = CKRecord(recordType: "Student",
                          recordID: CKRecord.ID(recordName: UUID().uuidString,
                                                zoneID: zone.zoneID))
NSPersistentCloudKitContainer sets the ZoneID uniformly to com.apple.coredata.cloudkit.zone when converting managed objects to CKRecord. You must switch to the correct Zone to view the data.

- OWNER RECORD NAME: User record, corresponding to the
_creatorof theZone. - CHANGE TOKEN: Comparison token.
- ATOMIC: If set to
true, the entire operation fails if CloudKit cannot update one or more records in theZone.
Records
Used for browsing, creating, deleting, modifying, and querying data records.

When browsing data, keep in mind:
- Select the correct environment (development and production environments have completely different data).
- Choose the right
Database,Zone. - Ensure the
Record TypemetadatarecordNamehas aqueryableindex. - Create corresponding indexes for fields if sorting or filtering is needed.
- Indexes only take effect in the production environment after deployment.
Modifying
Core Datamirror data in theCloudKitdashboard triggers immediate remote notifications and updates on the client side, though this practice is not recommended.
You can also access the CKRecord corresponding to a Core Data managed object in code:
func getLastUserID(_ object: Item?) -> CKRecord.ID? {
    guard let item = object else { return nil }
    guard let ckRecord = PersistenceController.shared.container.record(for: item.objectID) else { return nil }
    guard let userID = ckRecord.lastModifiedUserRecordID else {
        print("can't get userID")
        return nil
    }
    return userID
}
The above code retrieves the CKRecord of the managed object record and its last modified user.
Subscriptions
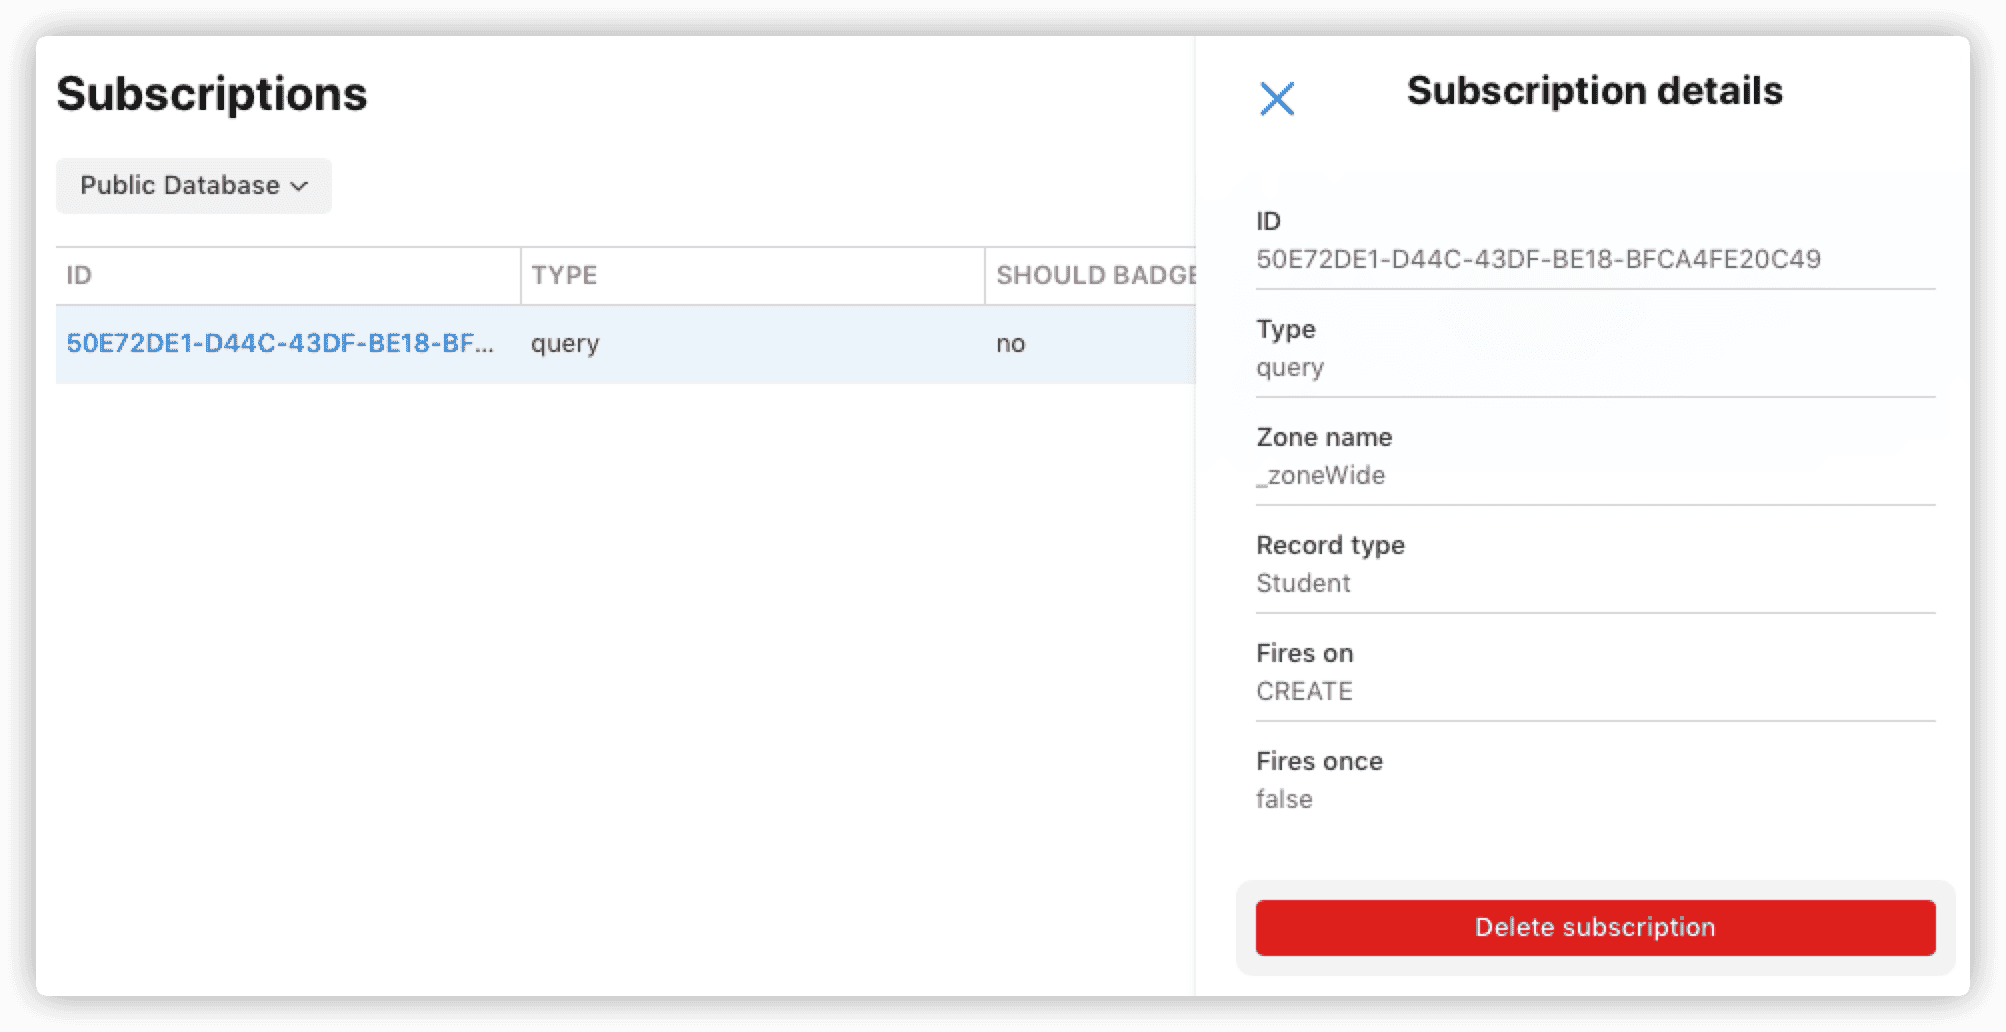
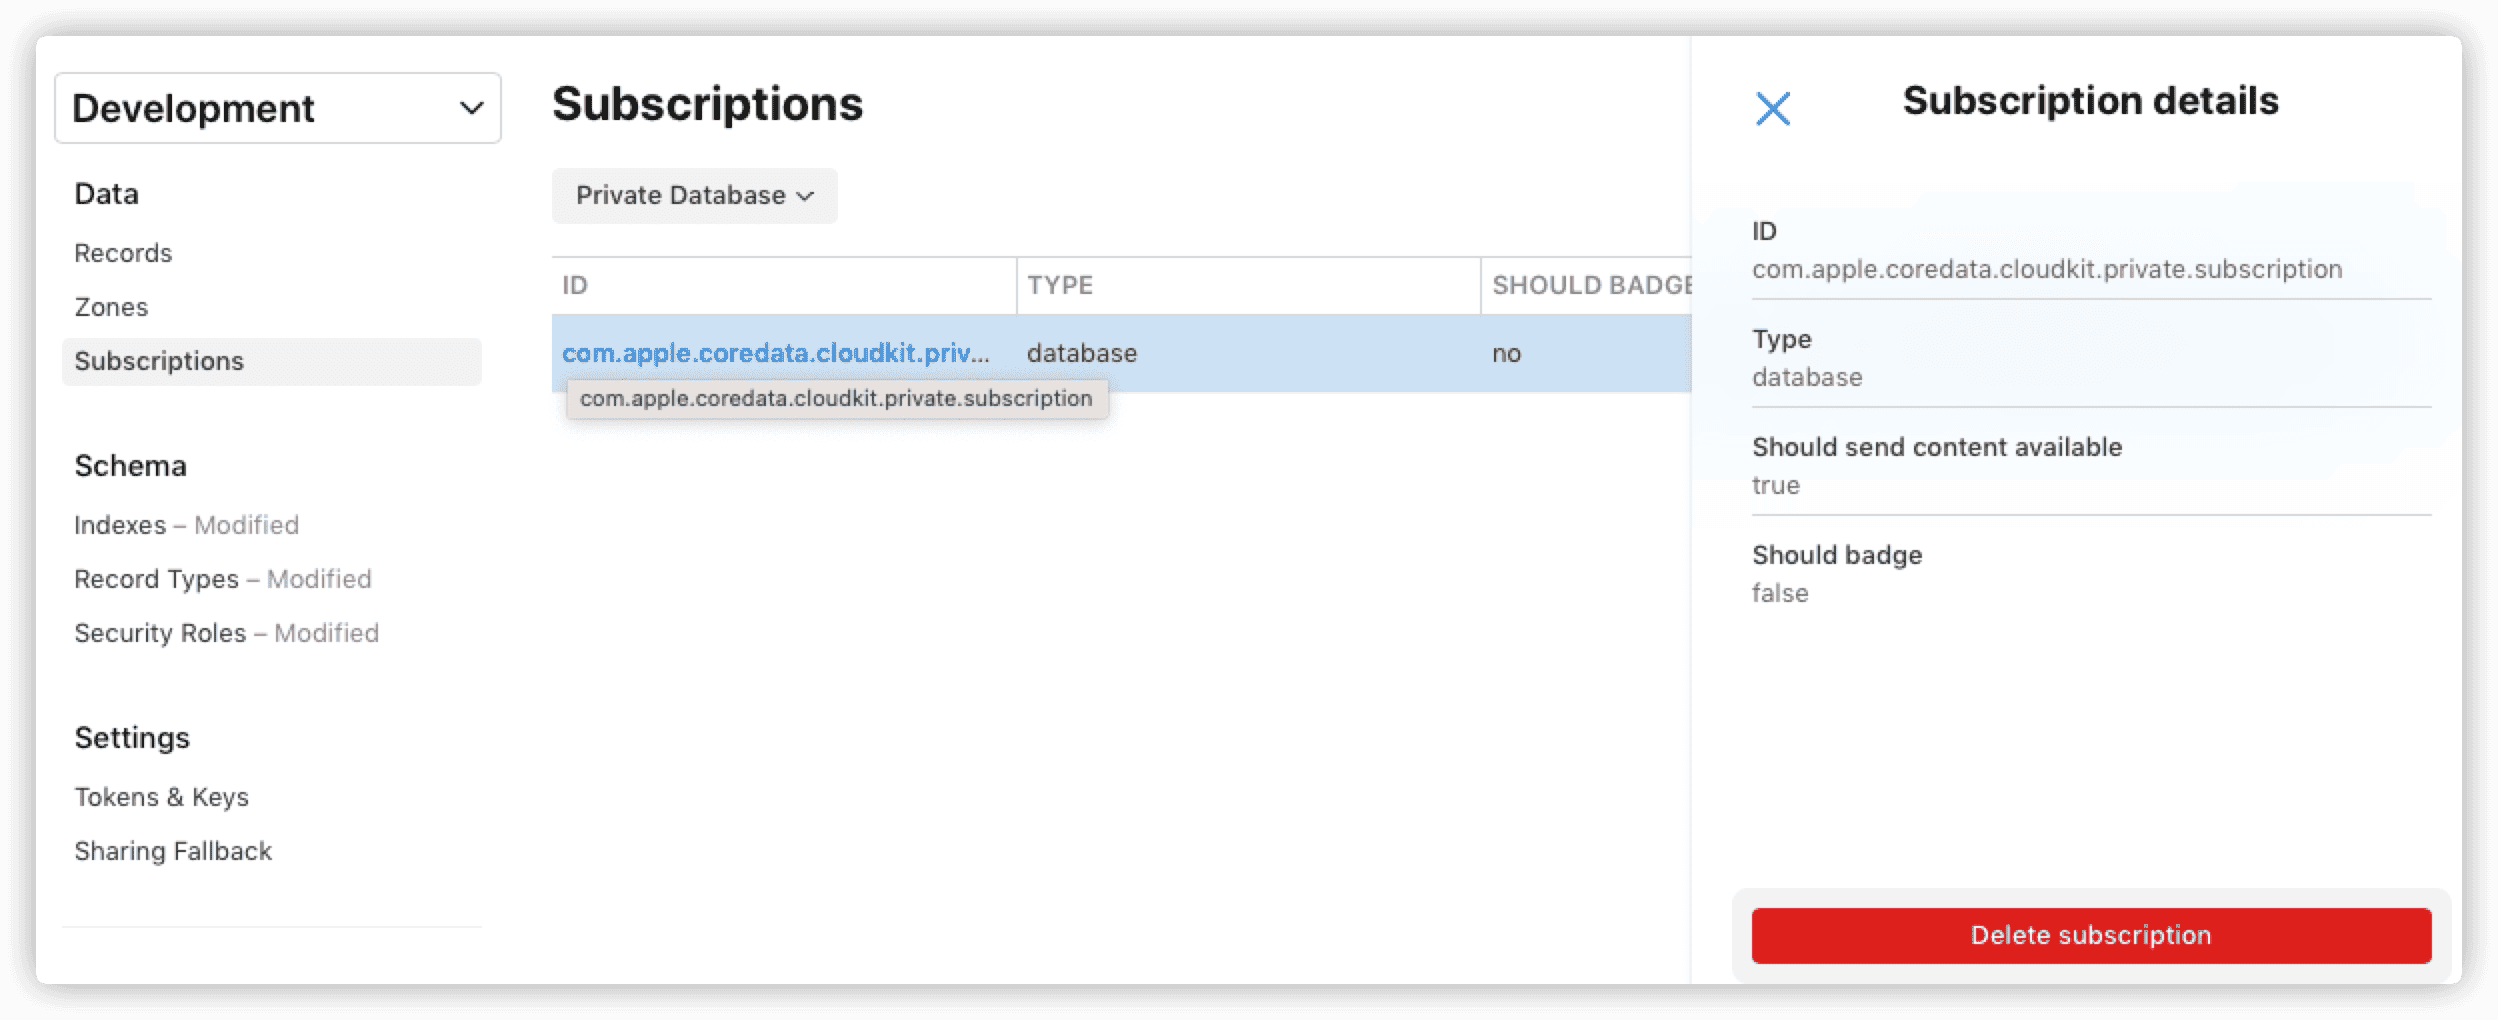
View CKSubscription registered on the container.
CKSubscriptions are created via code and can only be viewed or deleted on the dashboard. For example, the following code creates a CKQuerySubscription:
let predicate = NSPredicate(format: "name = 'bob'")
let subscription = CKQuerySubscription(recordType: "Student",
                                       predicate: predicate,
                                       options: [.firesOnRecordCreation])
let info = CKSubscription.NotificationInfo()
info.alertLocalizationKey = "create a new bob"
info.soundName = "NewAlert.aiff"
info.shouldBadge = true
info.alertBody = "hello world"

subscription.notificationInfo = info

publicDB.save(subscription) { subscription, error in
    if let error = error {
        print("error:\(error)")
    }
    guard let subscription = subscription else { return }
    print("save subscription successes:\(subscription)")
}
NSPersistentCloudKitContainerregisters aCKDatabaseSubscriptionfor the private database mirror ofCore Data. Remote notifications are pushed when data incom.apple.coredata.cloudkit.zoneis updated.
Tokens & Keys
Set API tokens for the container.
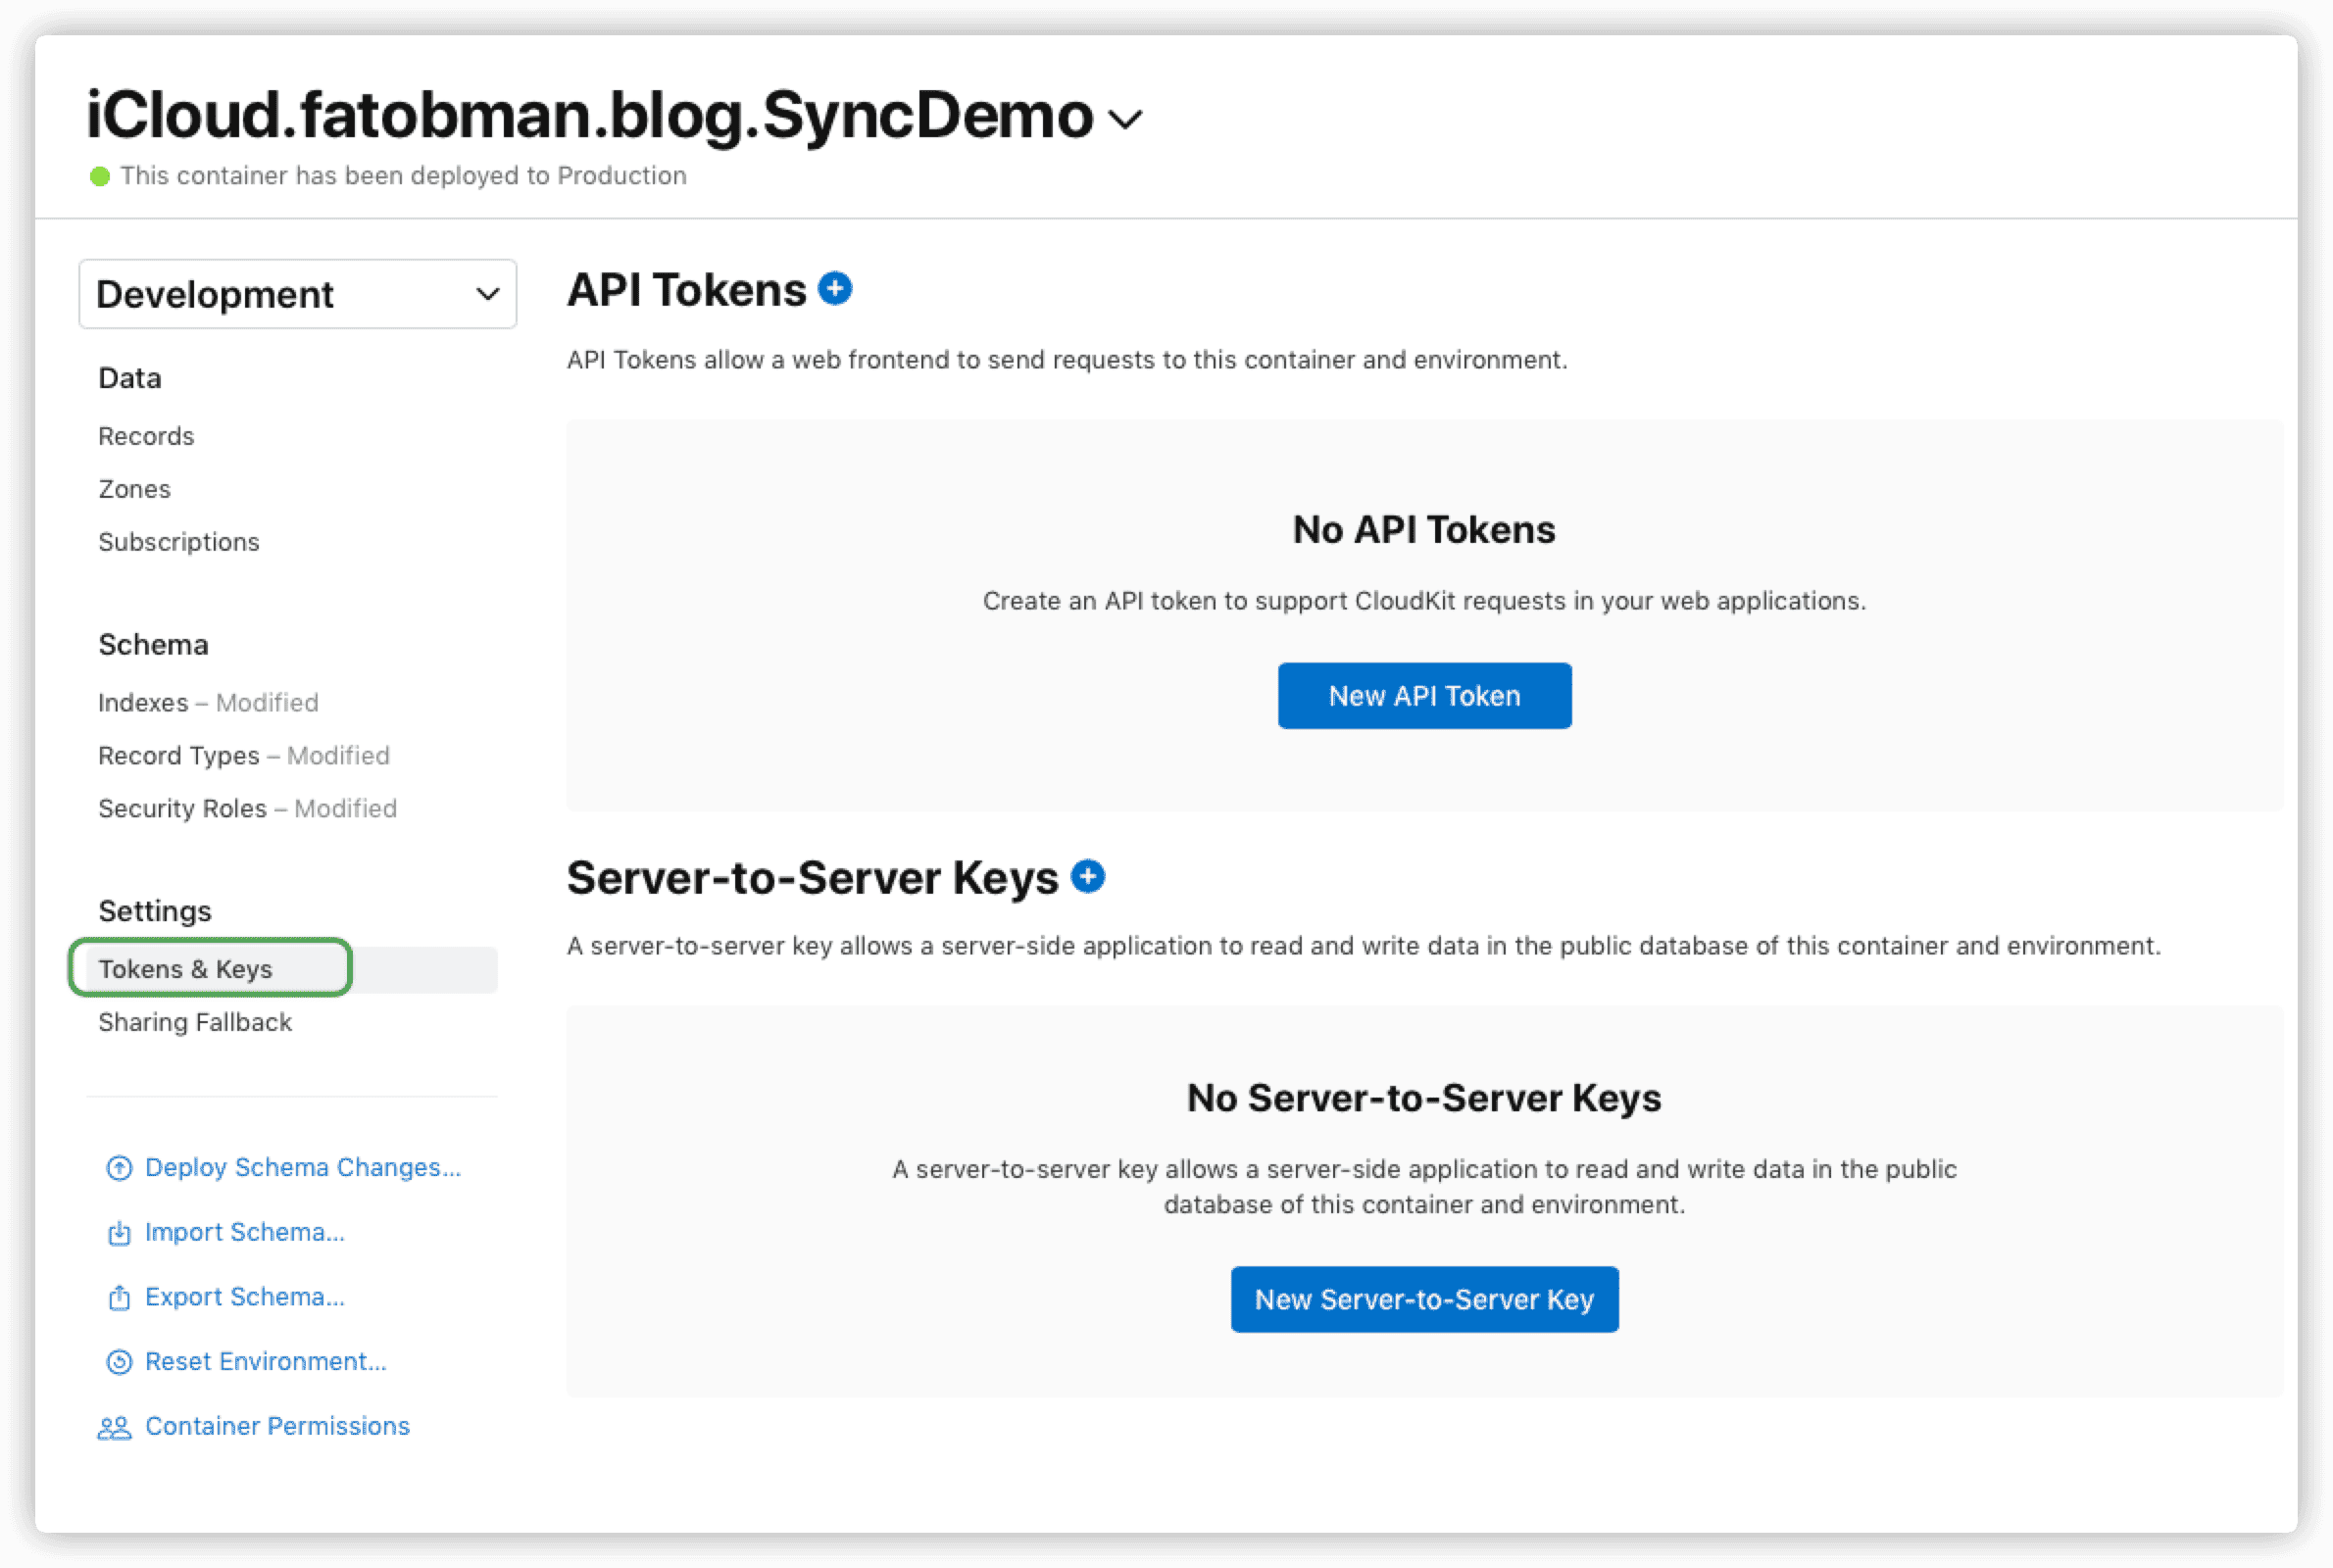
Apart from manipulating data through code and the CloudKit dashboard, Apple also offers ways to access iCloud data from the web or other platforms. After obtaining tokens, developers can interact with data using CloudKit JS or CloudKit Web Services. Some developers have leveraged these services to create third-party libraries for accessing iCloud data on other platforms, like DroidNubeKit for accessing CloudKit on Android.
For the network mirror of
Core Data, unless your data model is simple enough, this approach is not recommended.CloudKit Webservices are better suited for data records created directly throughCloudKit.
Sharing Fallbacks
Provides data record sharing fallback support for operating systems older than iOS 10 and macOS Sierra.
Telemetry
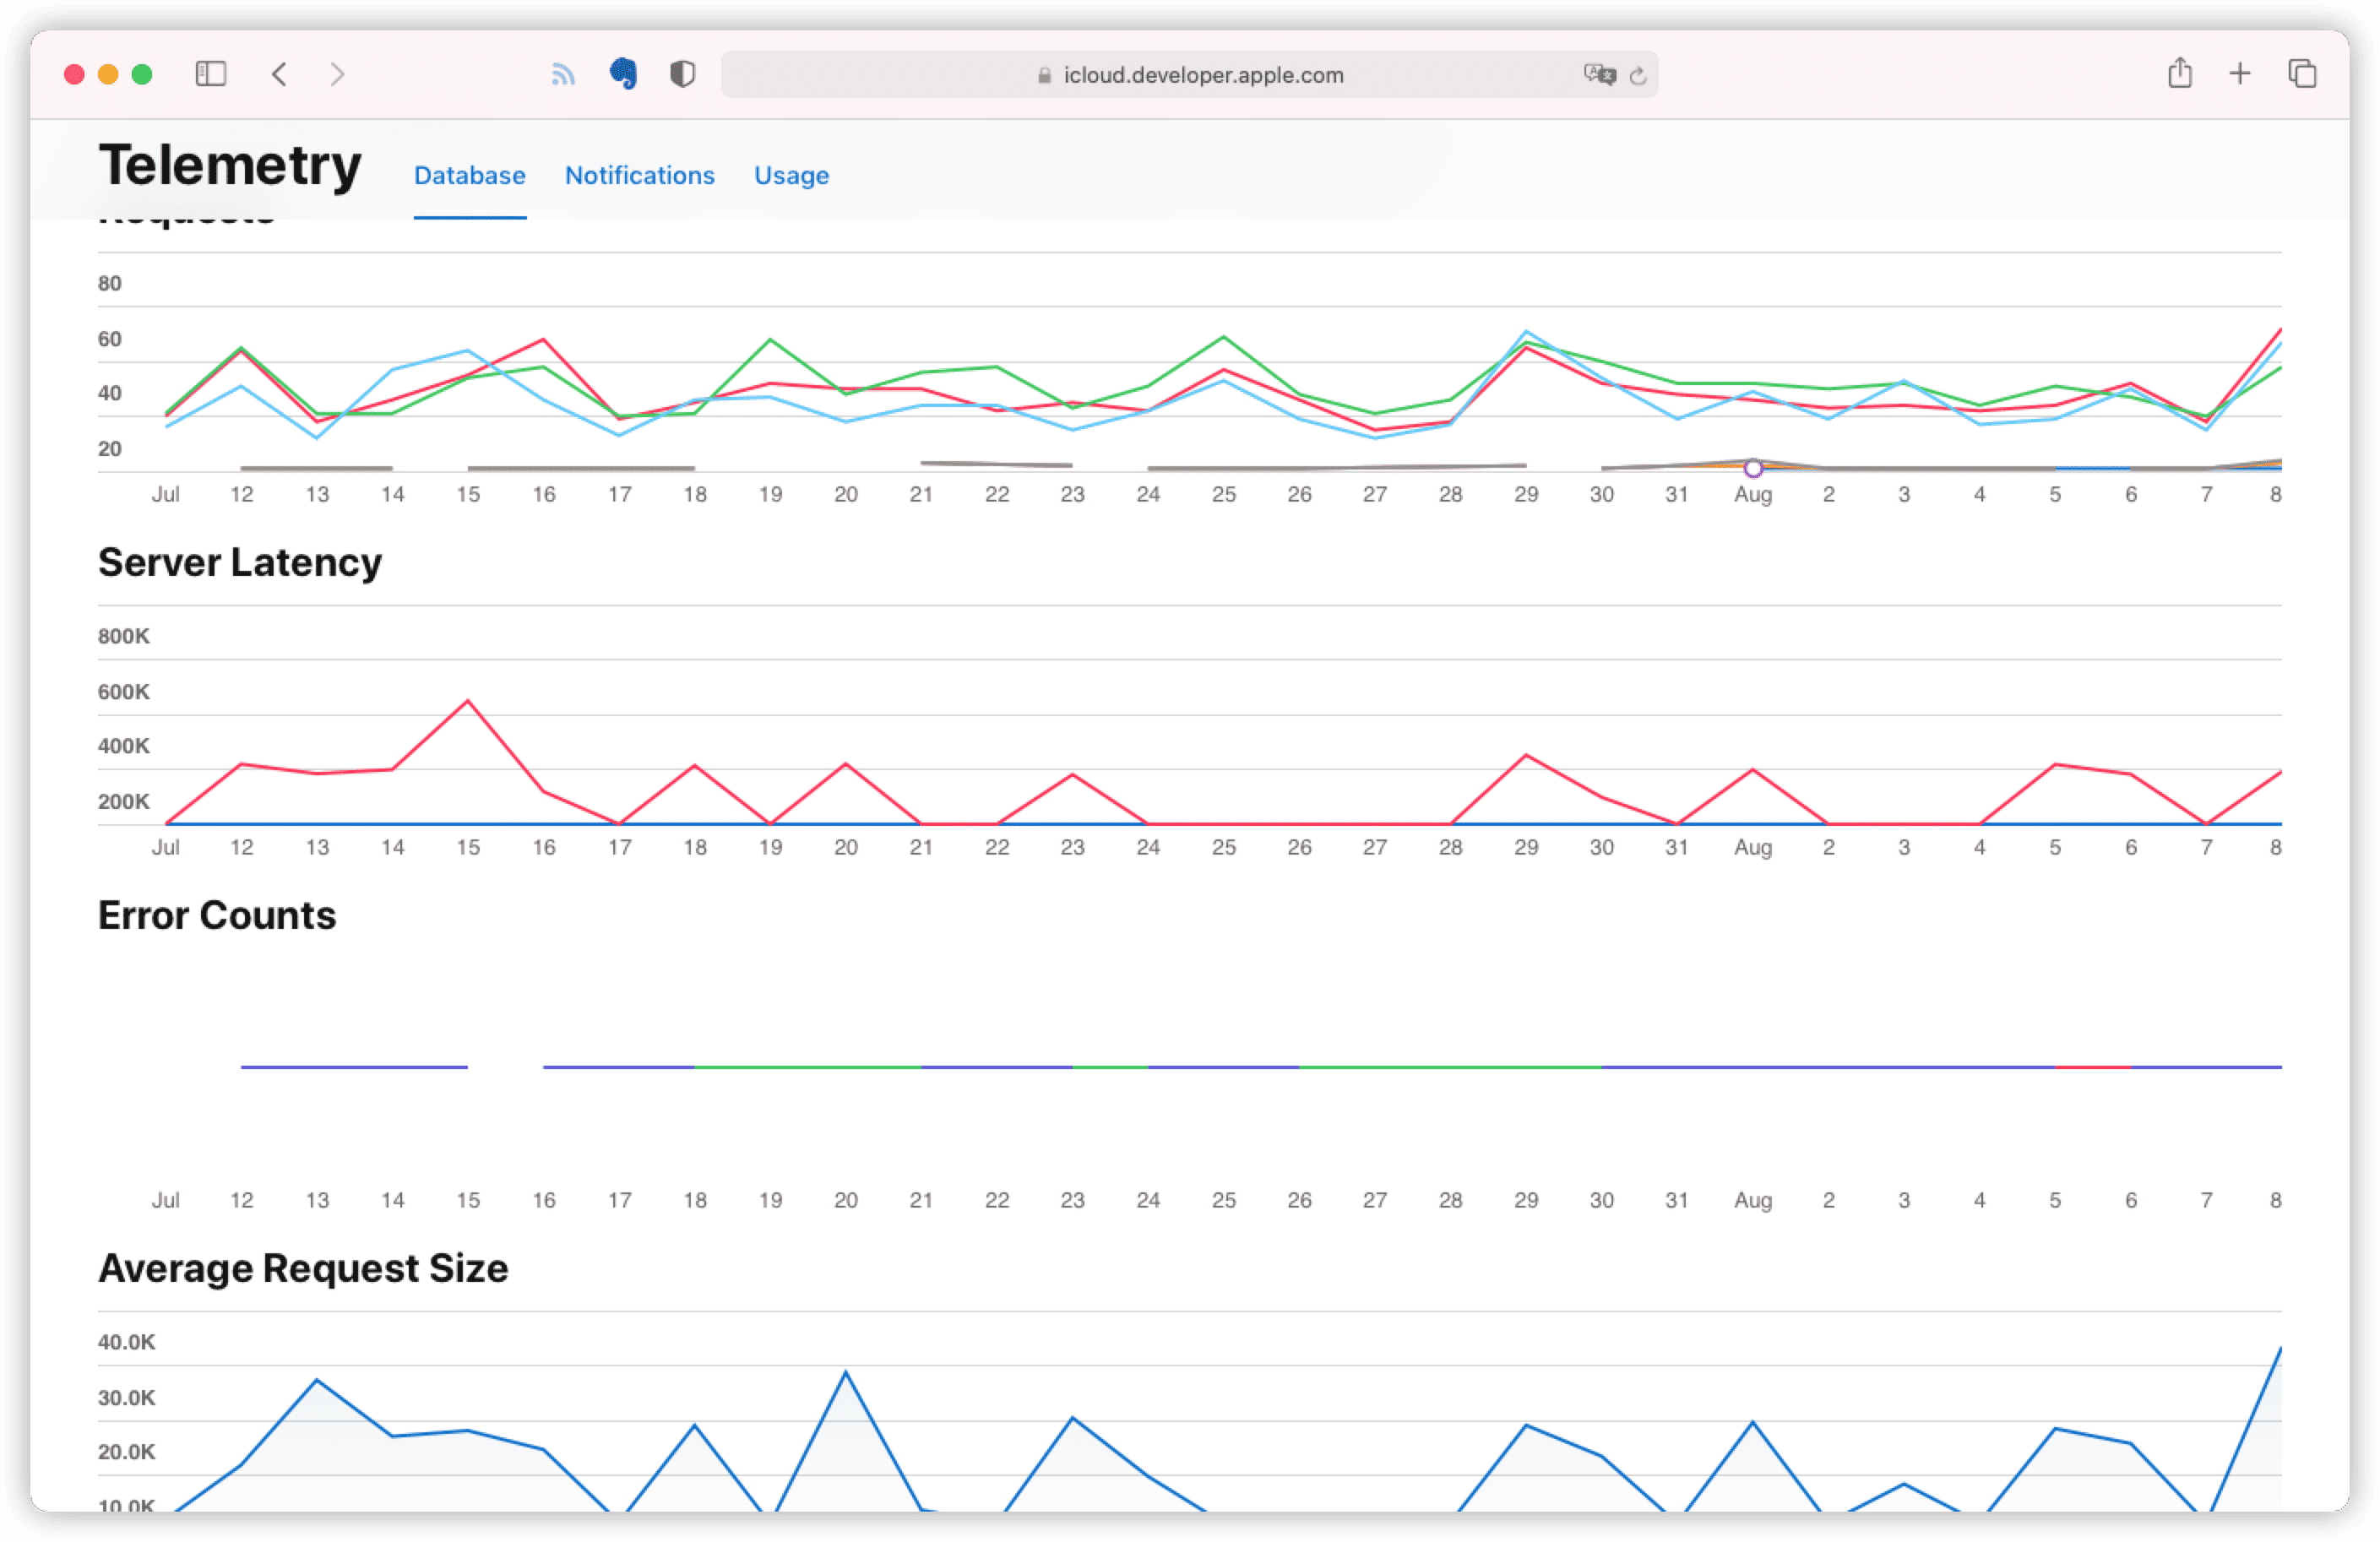
Telemetry metrics help visualize performance when developing or updating your app. These include the number of requests, number of errors, push counts, server latency, average request size, etc. By setting a range, you can display data relevant to your needs, helping you better understand your application’s traffic configuration and usage trends.
Logs
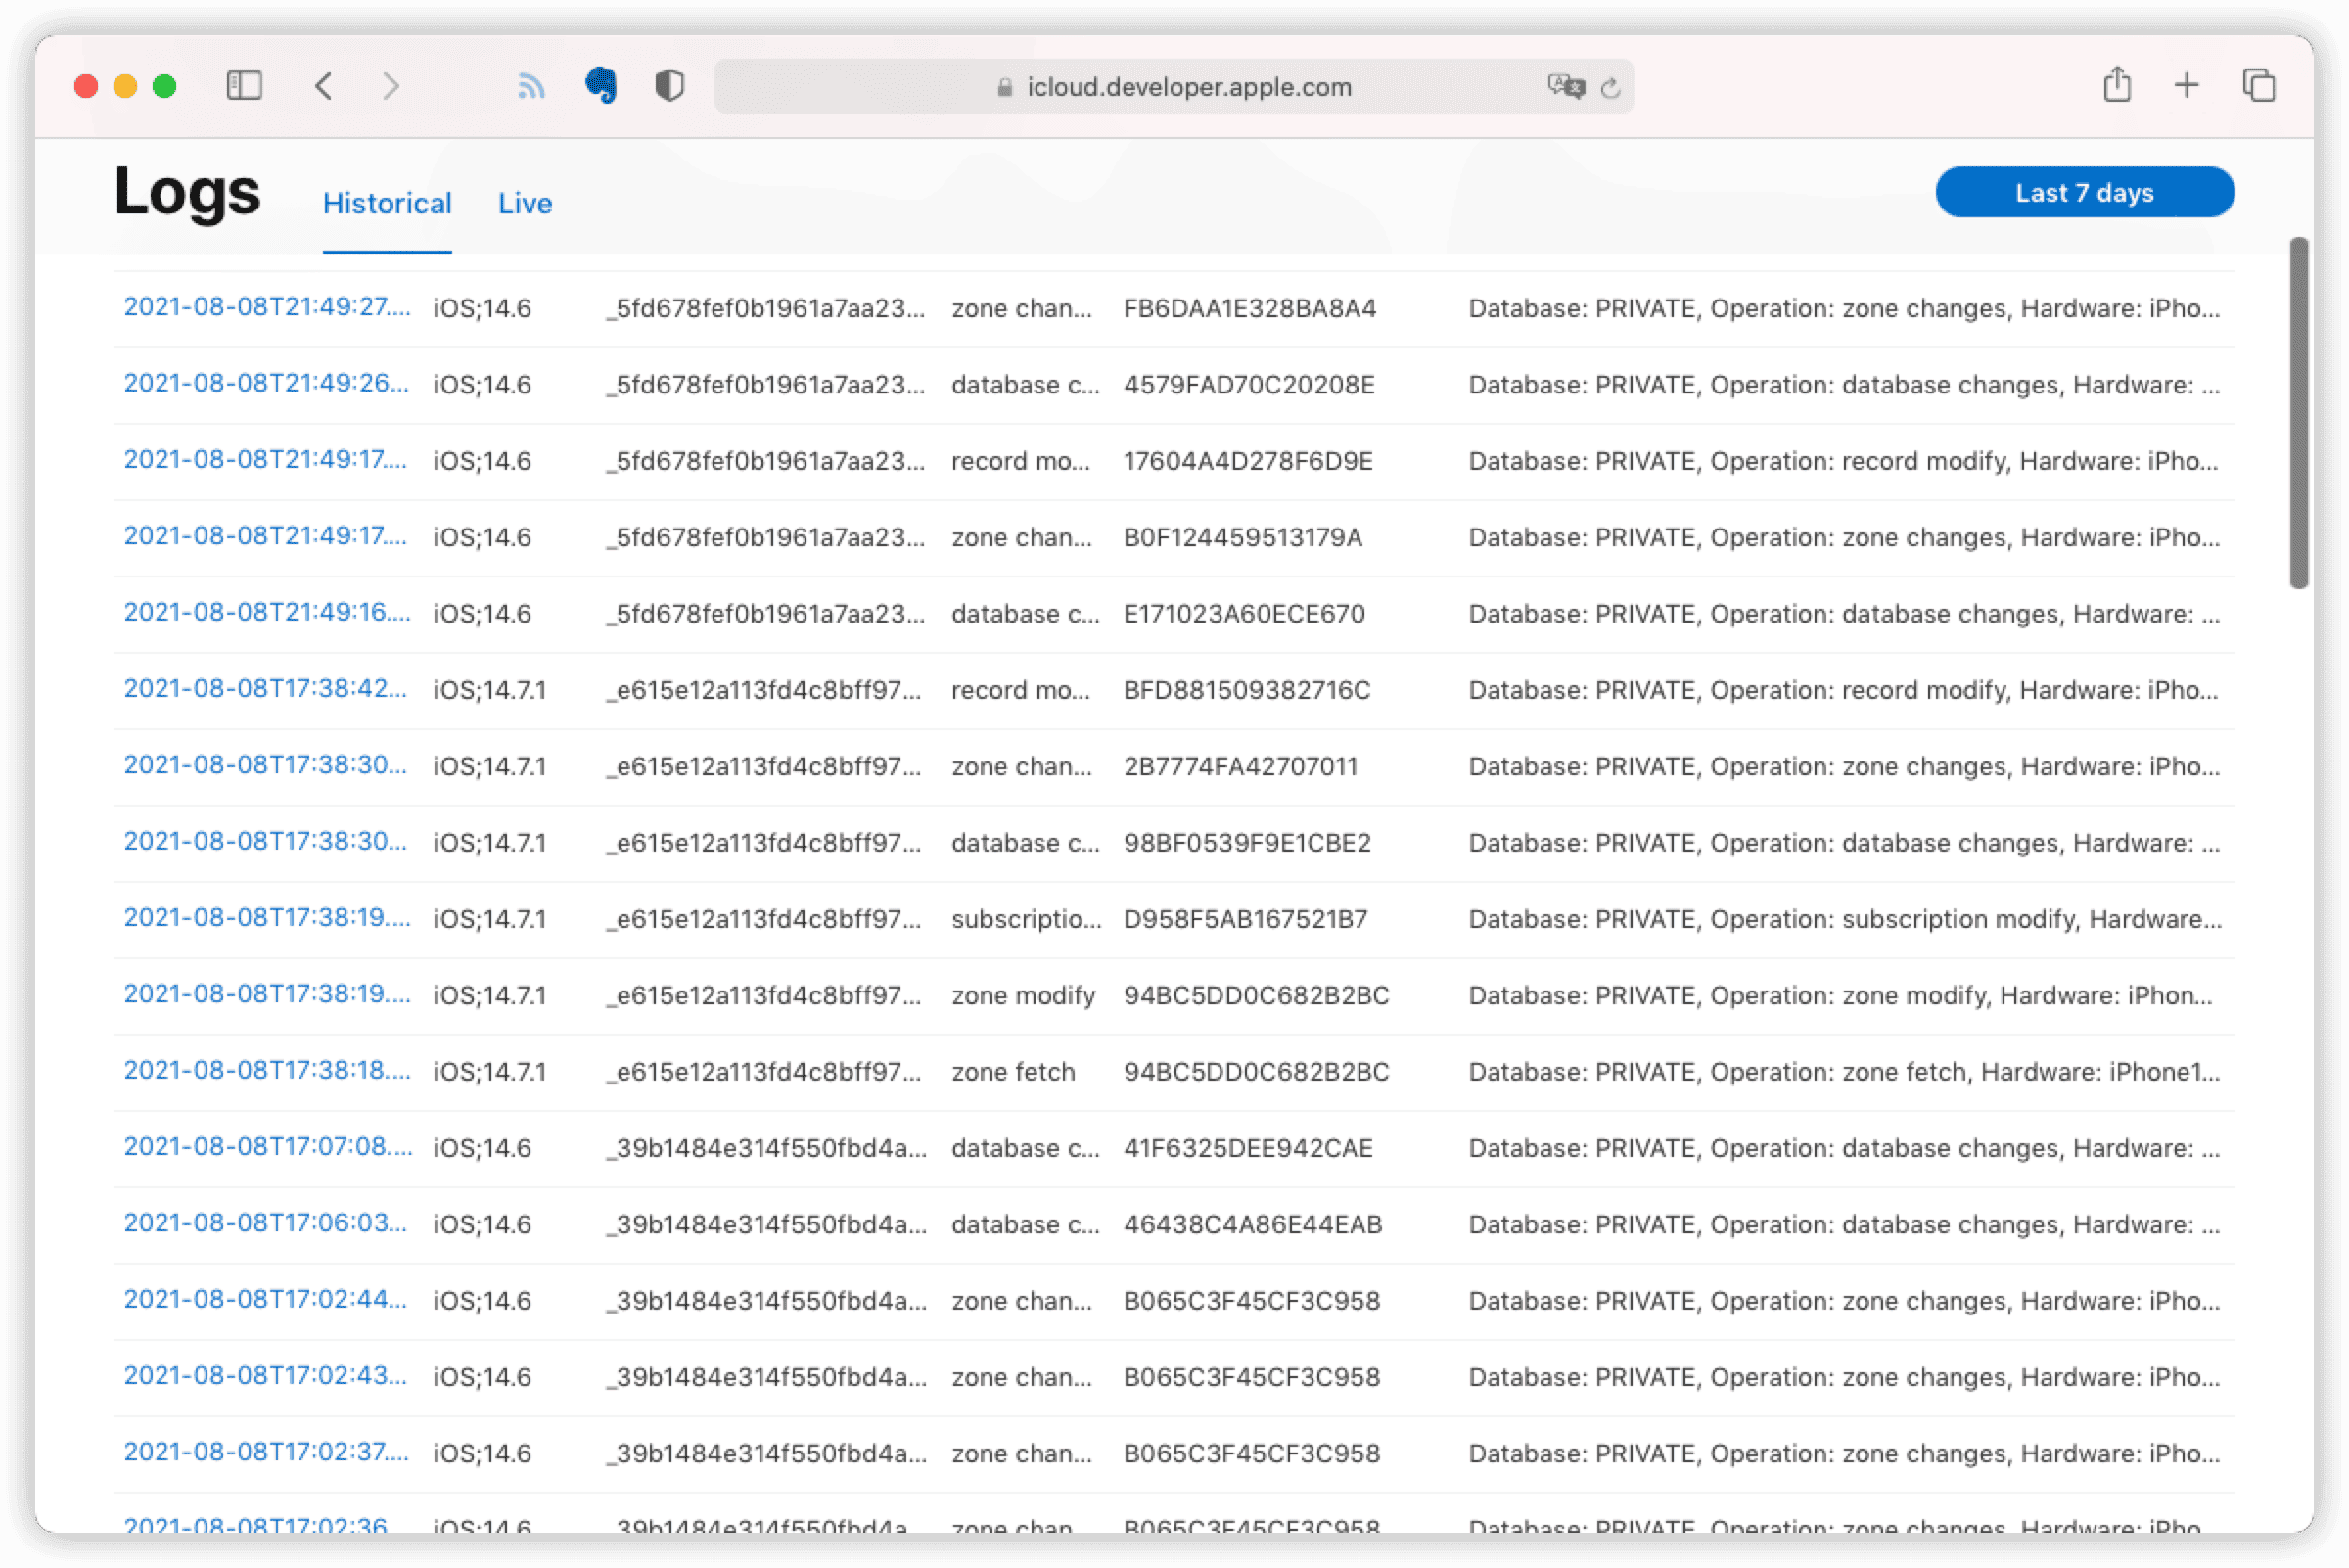
In the historical logs, you can view details including time, client platform version, users (anonymously), events, organizations, and more. While providing detailed information, CloudKit maintains the secrecy of user data as much as possible. The logs show server events for each user record in a container, without exposing any personal identity information. They only display anonymous, container-specific CloudKit users.
Analytics from AppStoreConnect are only from users who have agreed to share diagnostic and usage information with app developers, whereas CloudKit log information comes from all users of your app who use CloudKit services. Using both in conjunction provides better insights.
Summary
In most Core Data with CloudKit scenarios, developers rarely need to use the CloudKit dashboard. However, occasionally studying the data on the dashboard can be a fun experience.
In the next article, we will discuss some common situations encountered in developing Core Data with CloudKit projects, such as debugging, testing, data migration, etc.