Swift and Linux
Since Swift announced its open-source status and Linux support in 2015, more than 5 years have passed. Despite Swift’s rapid development in the initial years, it wasn’t widely accepted in the Linux community. This situation was due to several reasons, including issues with language stability and insufficient support for Linux, lacking attractive foundational and third-party libraries, and a shortage of high-profile projects.
In the past two years, these issues have seen significant improvements.
- Starting with Swift 5, the Swift team announced ABI stability. With ABI stability as a foundation, Swift’s support for other platforms has significantly increased.
- In 2020, the Swift team released version 5.3, which, besides “important quality and performance enhancements,” crucially supported Linux and Windows platforms. This was the first time Swift’s release process appointed release managers for three different platforms. As a commitment to bringing Swift to Linux, the Swift team announced that the new Swift version is available for various Linux distributions.
- A large number of excellent official and third-party cross-platform libraries have emerged. Apple alone has contributed a significant amount of Swift code to the community in recent years, maintaining a high submission frequency.
- Swift has achieved notable success in server-side and deep learning applications.
Swift is now ready for more extensive performance on Linux.
Reason for Writing This Article
Some time ago, I wrote an introduction to Creating a Blog with Publish: Getting Started (a static website generator written in Swift). A reader asked if it could be used on Linux, to which I replied affirmatively. However, while Publish supports Linux perfectly, can developers debug as conveniently as on a Mac?
Previously, when using Vapor, I installed Swift on Ubuntu through Docker, but debugged the code on a Mac. I was also curious about the state of Swift’s development environment on Linux in 2021.
This article aims to establish a production-standard Swift development and debugging environment on Linux. Users will get a comprehensive development experience supporting code highlighting, autocomplete, definition jumping, breakpoint debugging, code beautification, and static code scanning across different OS platforms.
Preparation
Since everyone uses different Linux distributions, you might need to install necessary dependencies as prompted by your system during the installation process.
This article will explain each step and provide the necessary rationale. Even if you use a different Linux distribution, editor, or if Swift or other tools undergo significant upgrades, you can still follow these installation thoughts.
The starting point for this article is an Ubuntu 20.04 LTS system (minimally installed) with Visual Studio Code 1.53.0 installed. The chosen Swift Toolchain is version 5.3.3.
For Ubuntu 20.04, you need to install python2.7 and npm to complete the following operations.
$ sudo apt install libpython2.7 libpython2.7-dev libz3-4 npm Swift Toolchain
Toolchain Selection
Although you can download the source code of the Swift Toolchain and compile it yourself, the most recommended method is to use the official pre-compiled download package. swift.org provides download packages for Ubuntu 16.04, Ubuntu 18.04, Ubuntu 20.04, CentOS 7, CentOS 8, and Amazon Linux 2. Other distributions also have their official support, such as Fedora, Red Hat Enterprise Linux 8, Raspbian OSi, etc.
Since Swift officially supported the Linux platform starting from version 5.3, this article chooses to install Swift 5.3.3 Release on Ubuntu 20.04.
Installing the Toolchain
Find the Swift Toolchain download address for your distribution on swift.org.

$cd ~
$wget https://swift.org/builds/swift-5.3.3-release/ubuntu2004/swift-5.3.3-RELEASE/swift-5.3.3-RELEASE-ubuntu20.04.tar.gz
Unzip the file.
$tar -xzf swift-5.3.3-RELEASE-ubuntu20.04.tar.gz The swift toolchain will be unzipped into ~/swift-5.3.3-RELEASE-ubuntu20.04. Move this directory to your preferred path
, for example:
$sudo mv swift-5.3.3-RELEASE-ubuntu20.04 /usr/share/swiftRemember the moved path /usr/share/swift, as it will be used multiple times in the following configurations.
Add swift bin path to the environment.
$echo "export PATH=/usr/share/swift/usr/bin:$PATH" >> ~/.bash
$source .bash
Swift is now installed on the current system.
$swift --version
Swift version 5.3.3 (swift-5.3.3-RELEASE)
Target: x86_64-unknown-linux-gnu
Running the First Code
Create hello.swift with the content:
#!/usr/bin/env swift
print("My first swift code")$cd ~
$swift hello.swift
My first swift codeAlternatively, you can execute swift code as a script.
$chmod +755 hello.swift
$./hellow.swift
My first swift code
Creating Your First Swift Project
Swift Package Manager (SPM) is a tool introduced by Apple for creating libraries and executable programs using swift. It is now part of the Swift Toolchain.
Create an executable program project.
$cd ~
$mkdir MyProject
$cd MyProject
$swift package init --type executable
Creating executable package: MyProject
Creating Package.swift
Creating README.md
Creating .gitignore
Creating Sources/
Creating Sources/MyProject/main.swift
Creating Tests/
Creating Tests/LinuxMain.swift
Creating Tests/MyProjectTests/
Creating Tests/MyProjectTests/MyProjectTests.swift
Creating Tests/MyProjectTests/XCTestManifests.swift
Compile and run the project.
~/MyProject$swift run
[4/4] Linking MyProject
Hello, world!
This project will also be used in the following configurations. You can also directly open the project file with vscode.
~/MyProject$code .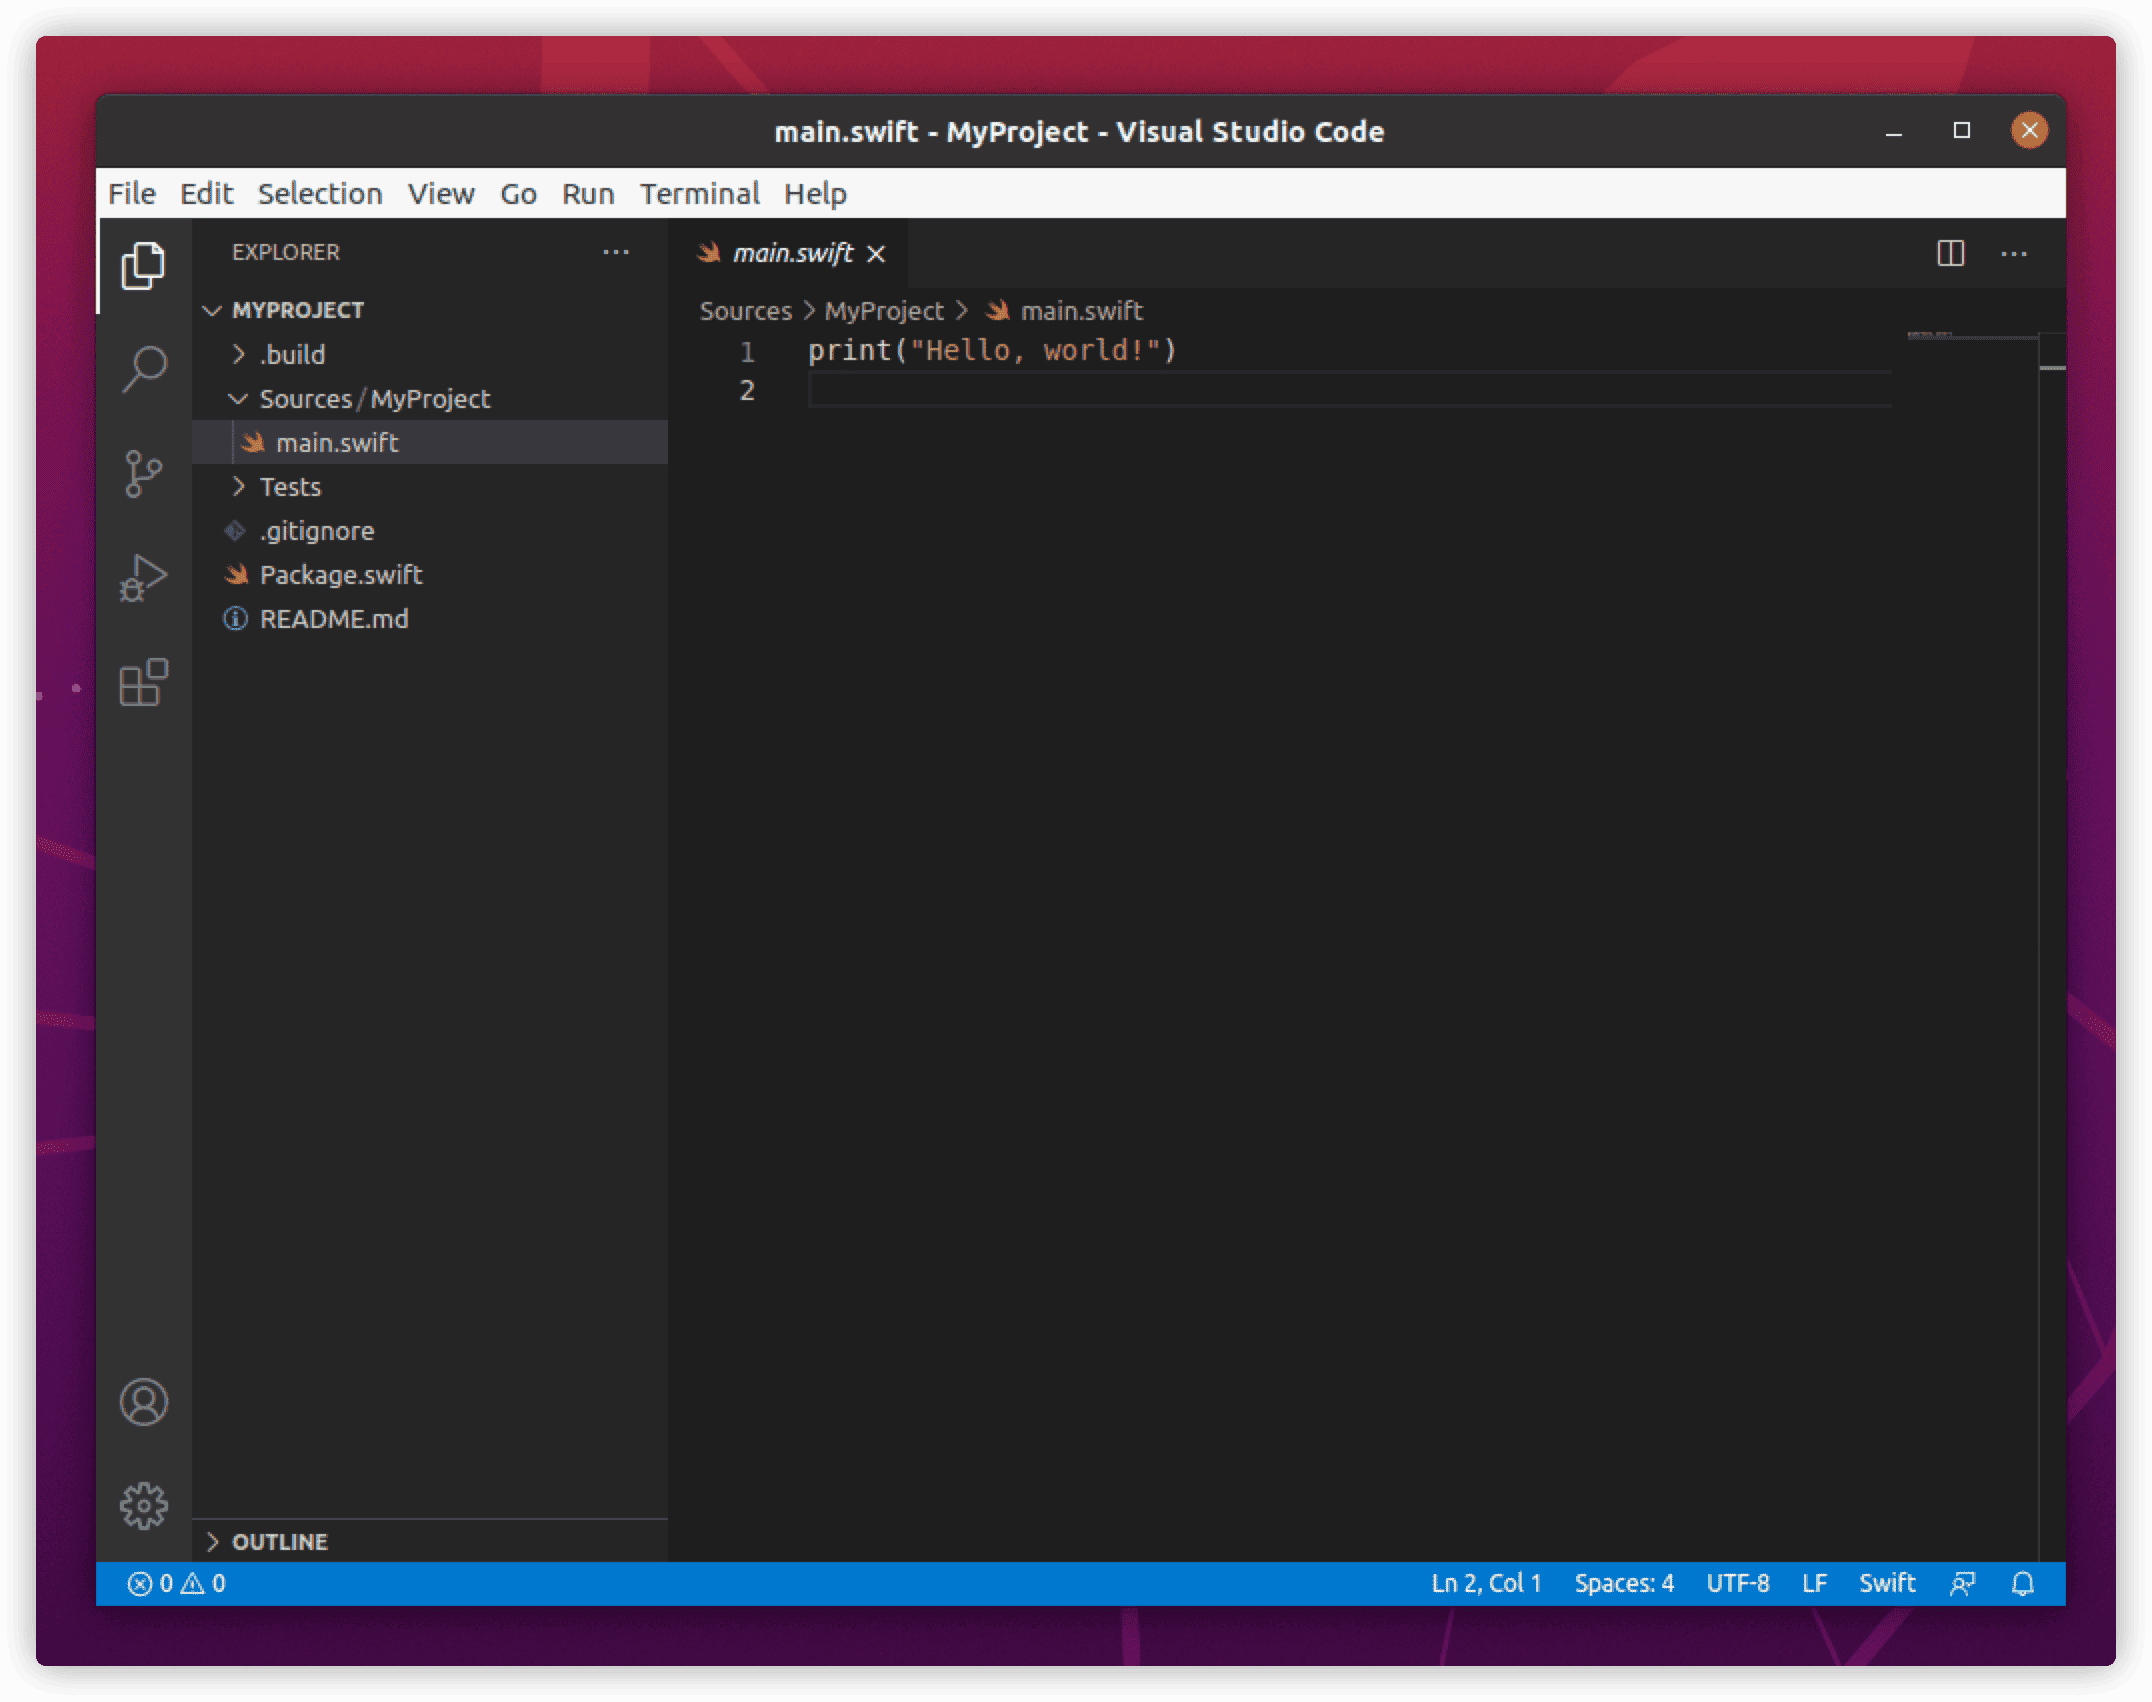
vscode already has built-in support for Swift code highlighting.
SourceKit-LSP
What is LSP?
LSP stands for Language Server Protocol, a standardized protocol proposed by Microsoft, aiming to unify communication between development tools and Language Servers. LSP provides a common feature set for supported languages, including syntax highlighting, autocomplete, definition jumping, reference finding, and more. Since 2018, Apple has been providing code and support for LSP to the Swift community. LSP is now integrated into the Swift toolchain.
Installing LSP
Even though Swift ToolChain already includes LSP, we still need to install and configure the corresponding plugin for vscode to use Swift’s LSP features in it.
Since the Swift LSP plugin is not available in the vscode marketplace, it needs to be downloaded from Apple’s LSP Github.
$git clone https://github.com/apple/sourcekit-lsp.gitThe downloaded files contain all of LSP’s code and plugin code, but we only need to install the plugin code.
$cd sourcekit-lsp/Editors/vscode/
$npm run createDevPackage
Update August 2021
New LSP versions have changed the plugin compilation command.
$cd sourcekit-lsp/Editors/vscode/
$npm install
$npm run dev-package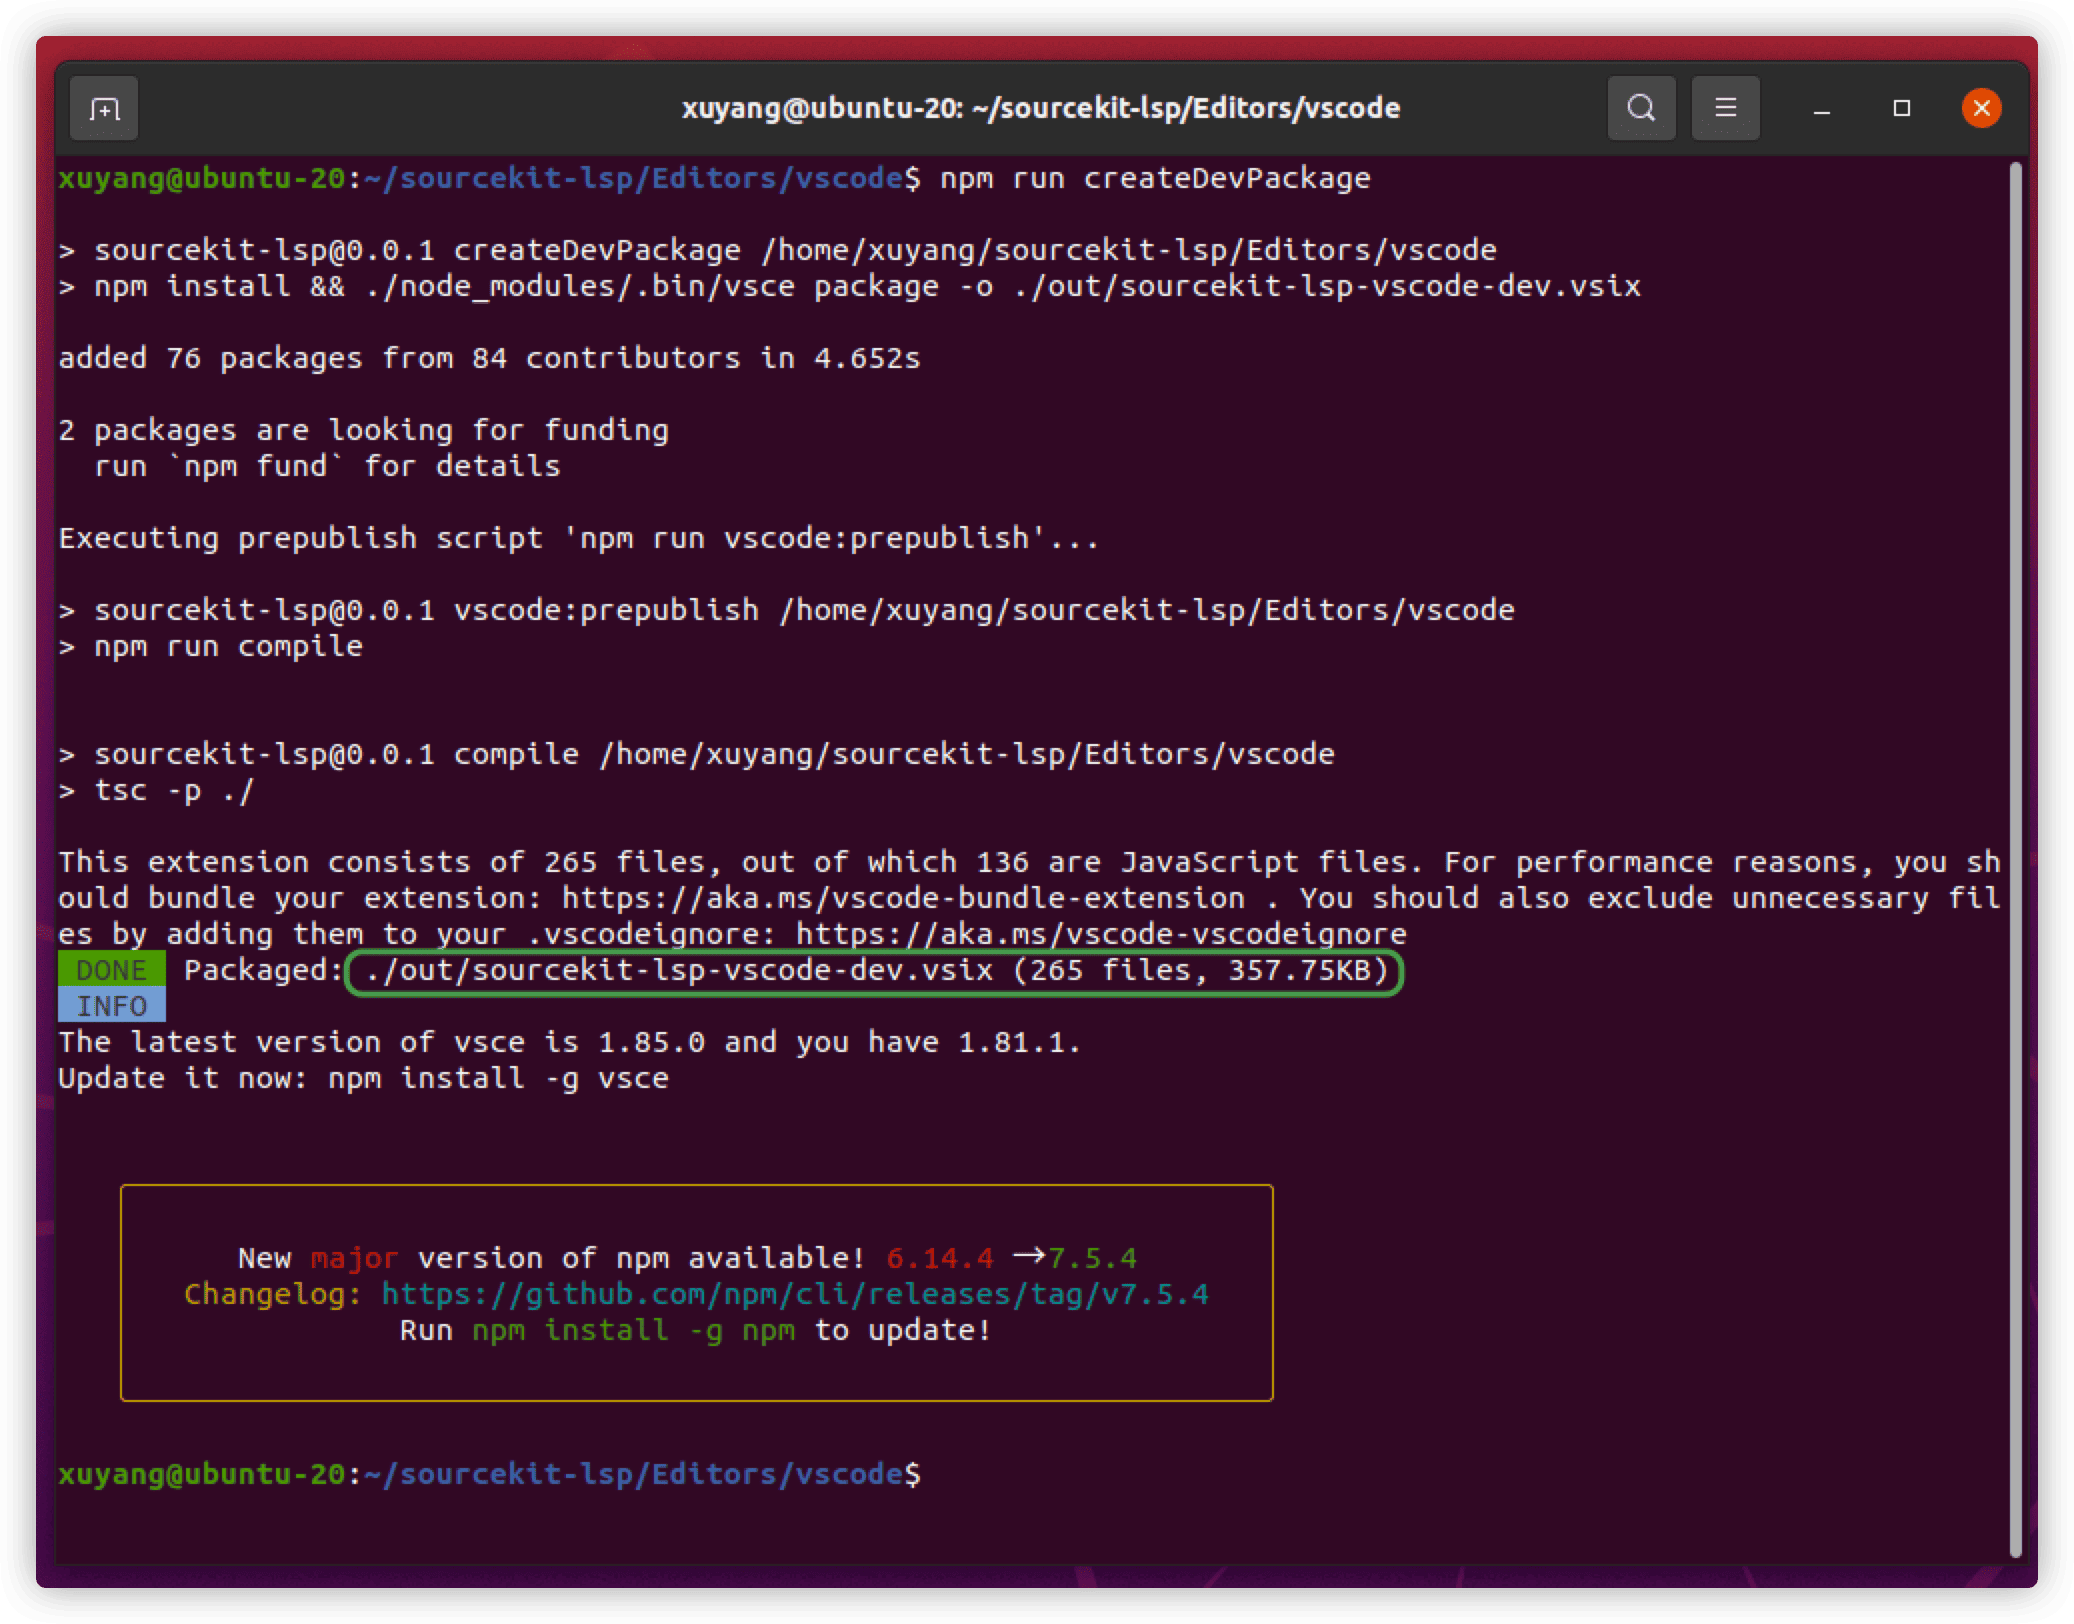
The successfully compiled plugin is placed in the ~/sourcekit-lsp/Editors/vscode/out directory.
Configuring vscode
Install the plugin in vscode using the command line.
$cd ~/sourcekit-lsp/Editors/vscode
$code --install-extension sourcekit-lsp-vscode-dev.vsix
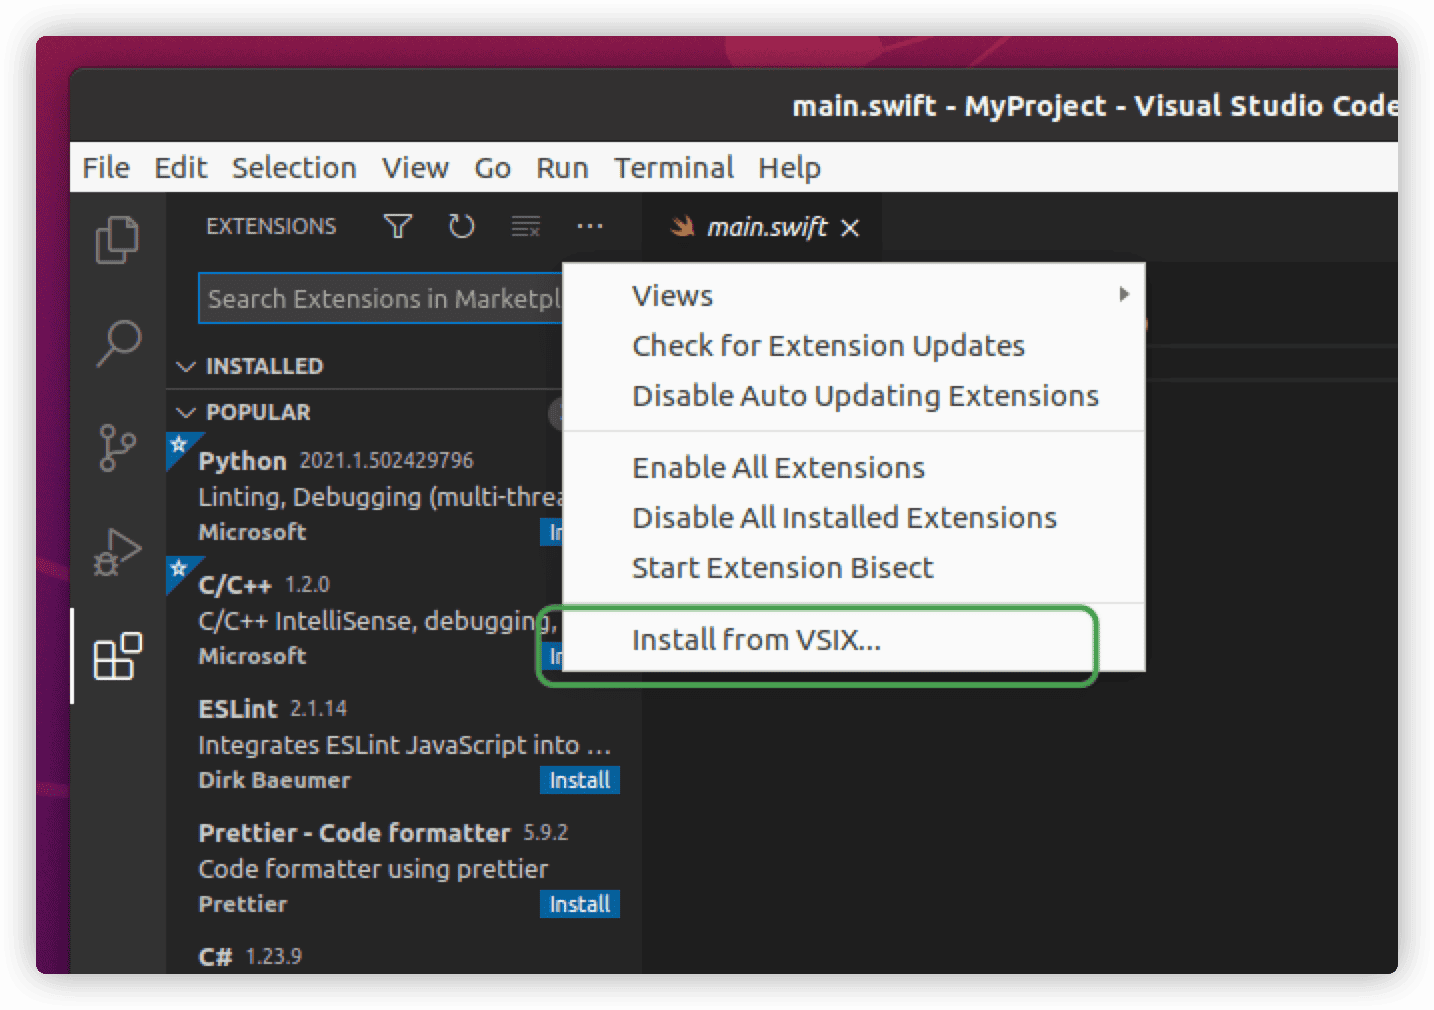
Or choose to install the plugin in vscode.
Configure Settings.
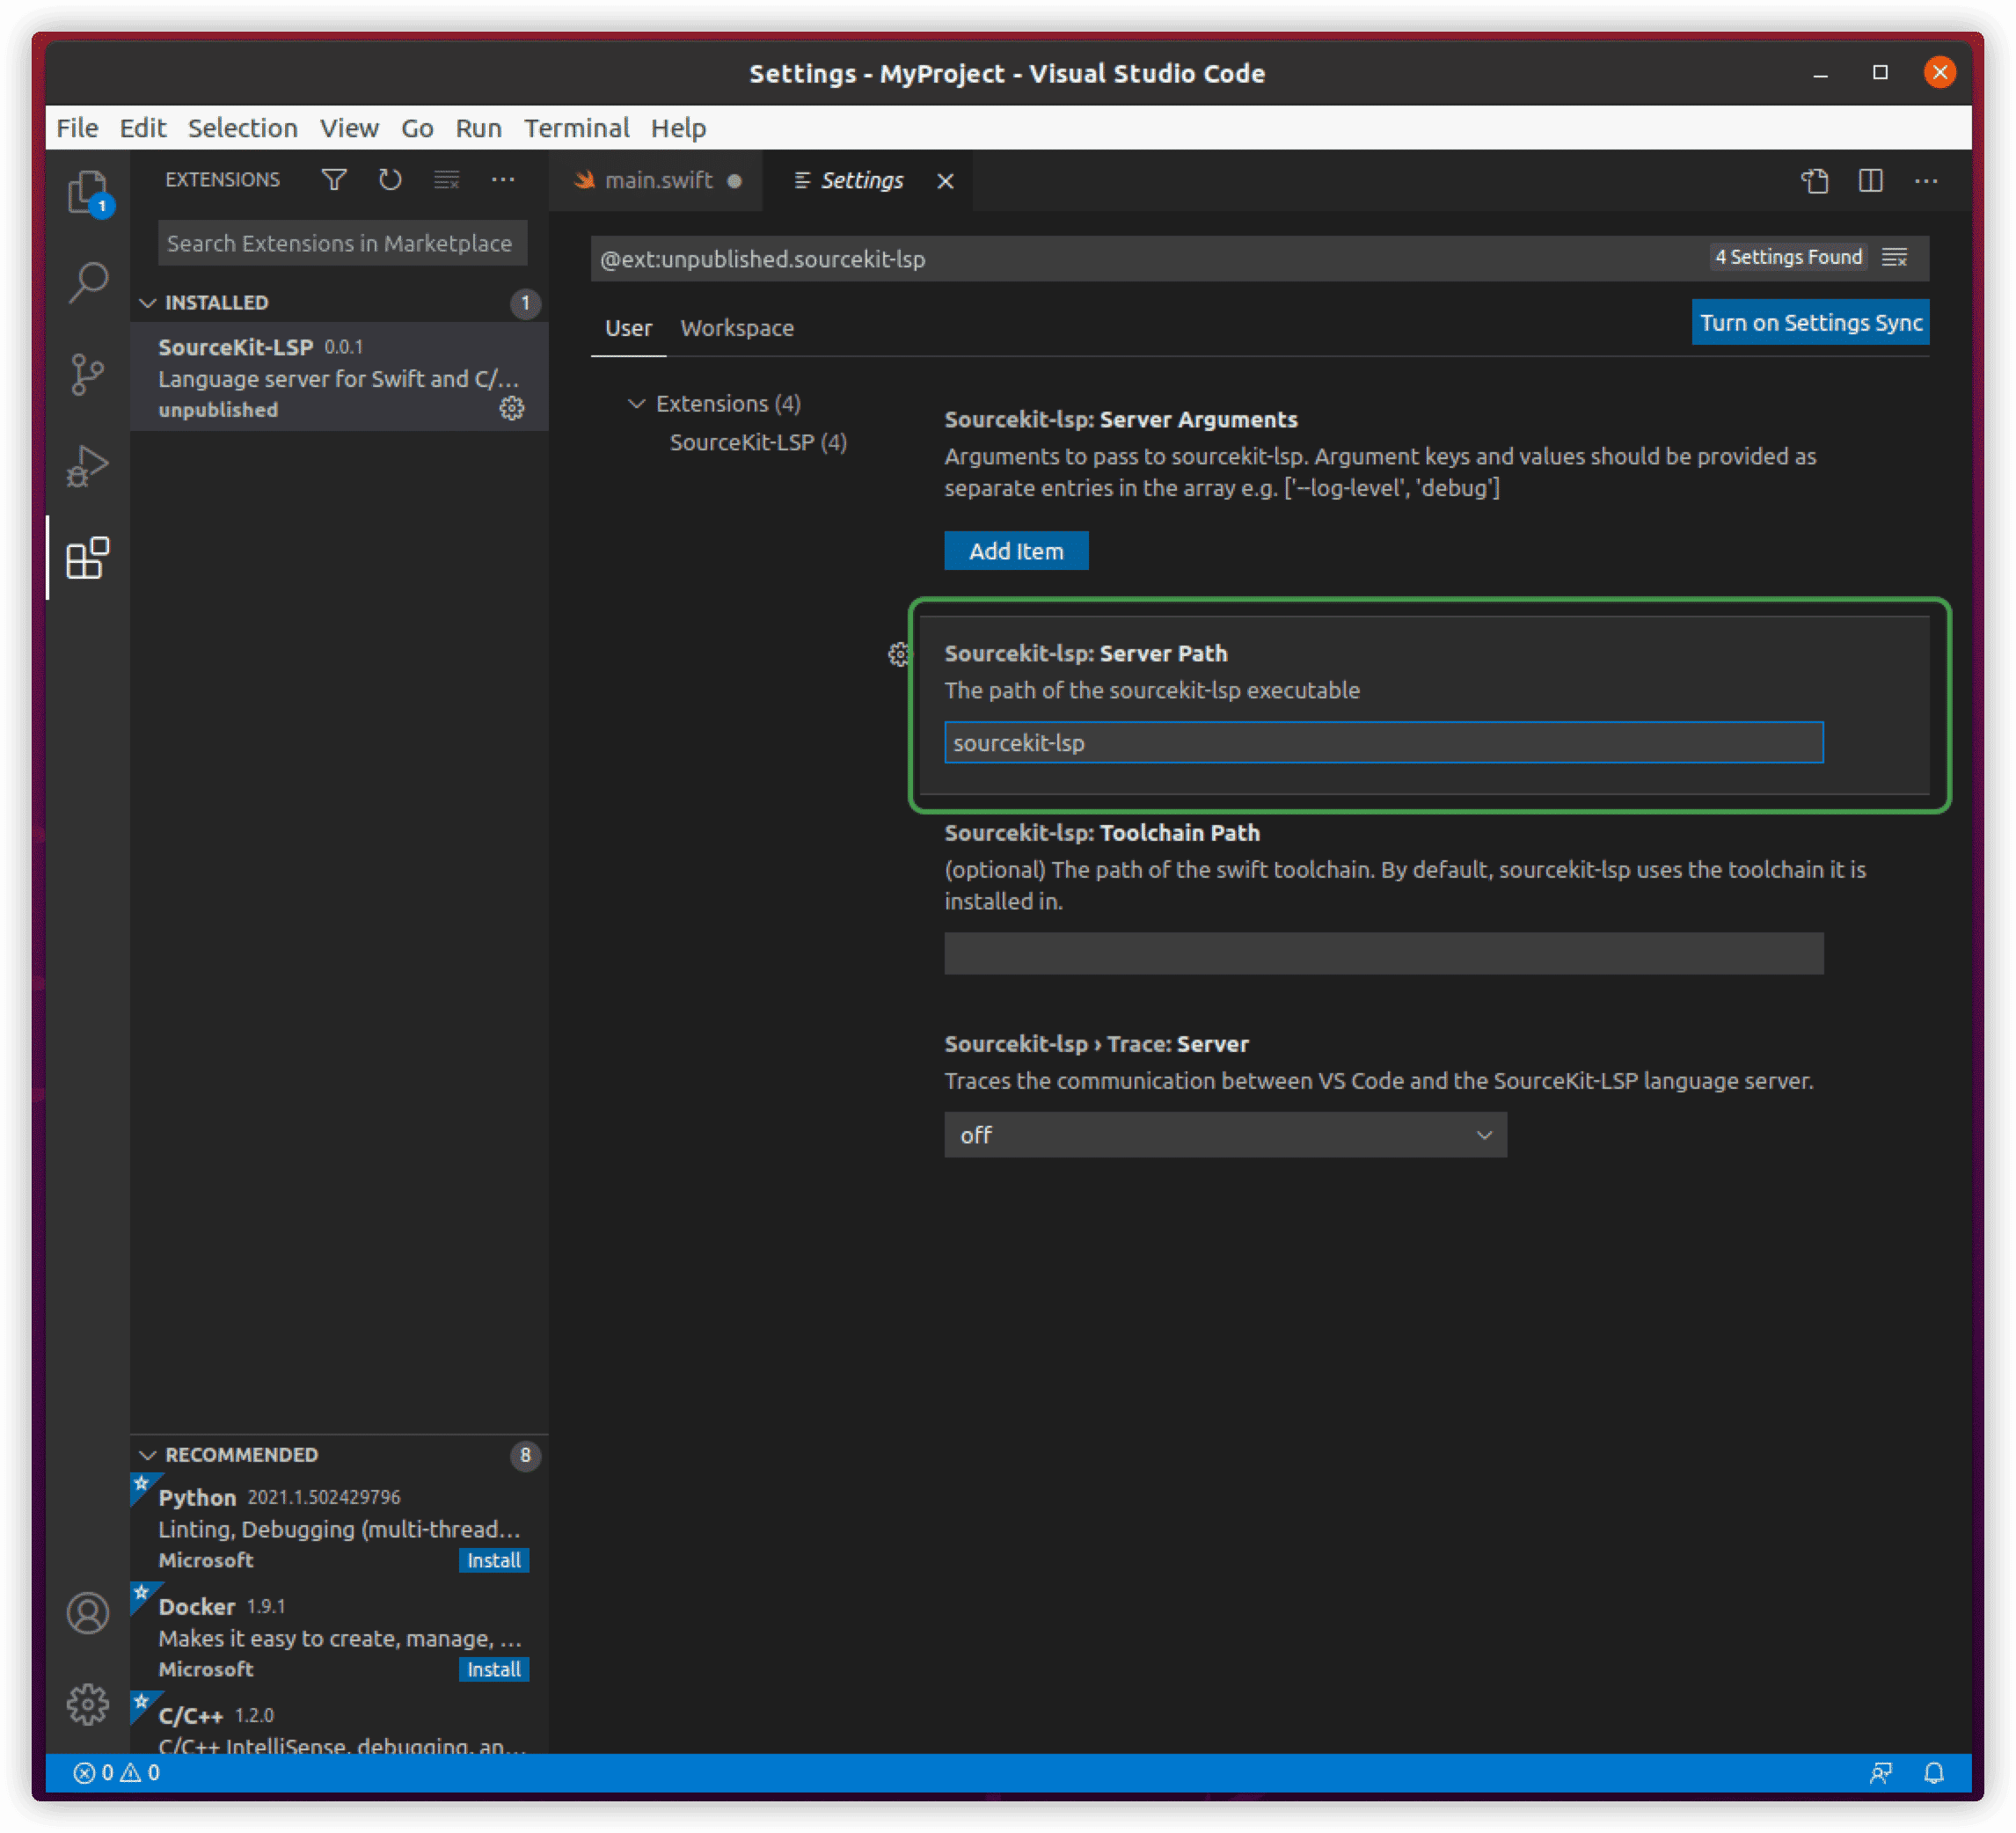
Since lsp is already integrated into the swift toolchain, it has been installed into the /usr/share/swift/usr/bin directory during our toolchain installation, and this directory is also set in the environment PATH. Therefore, it’s usually unnecessary to specify an absolute path for vscode to use Swift’s lsp feature. If you’ve downloaded a new version of lsp separately, you can set the corresponding path in settings.json.
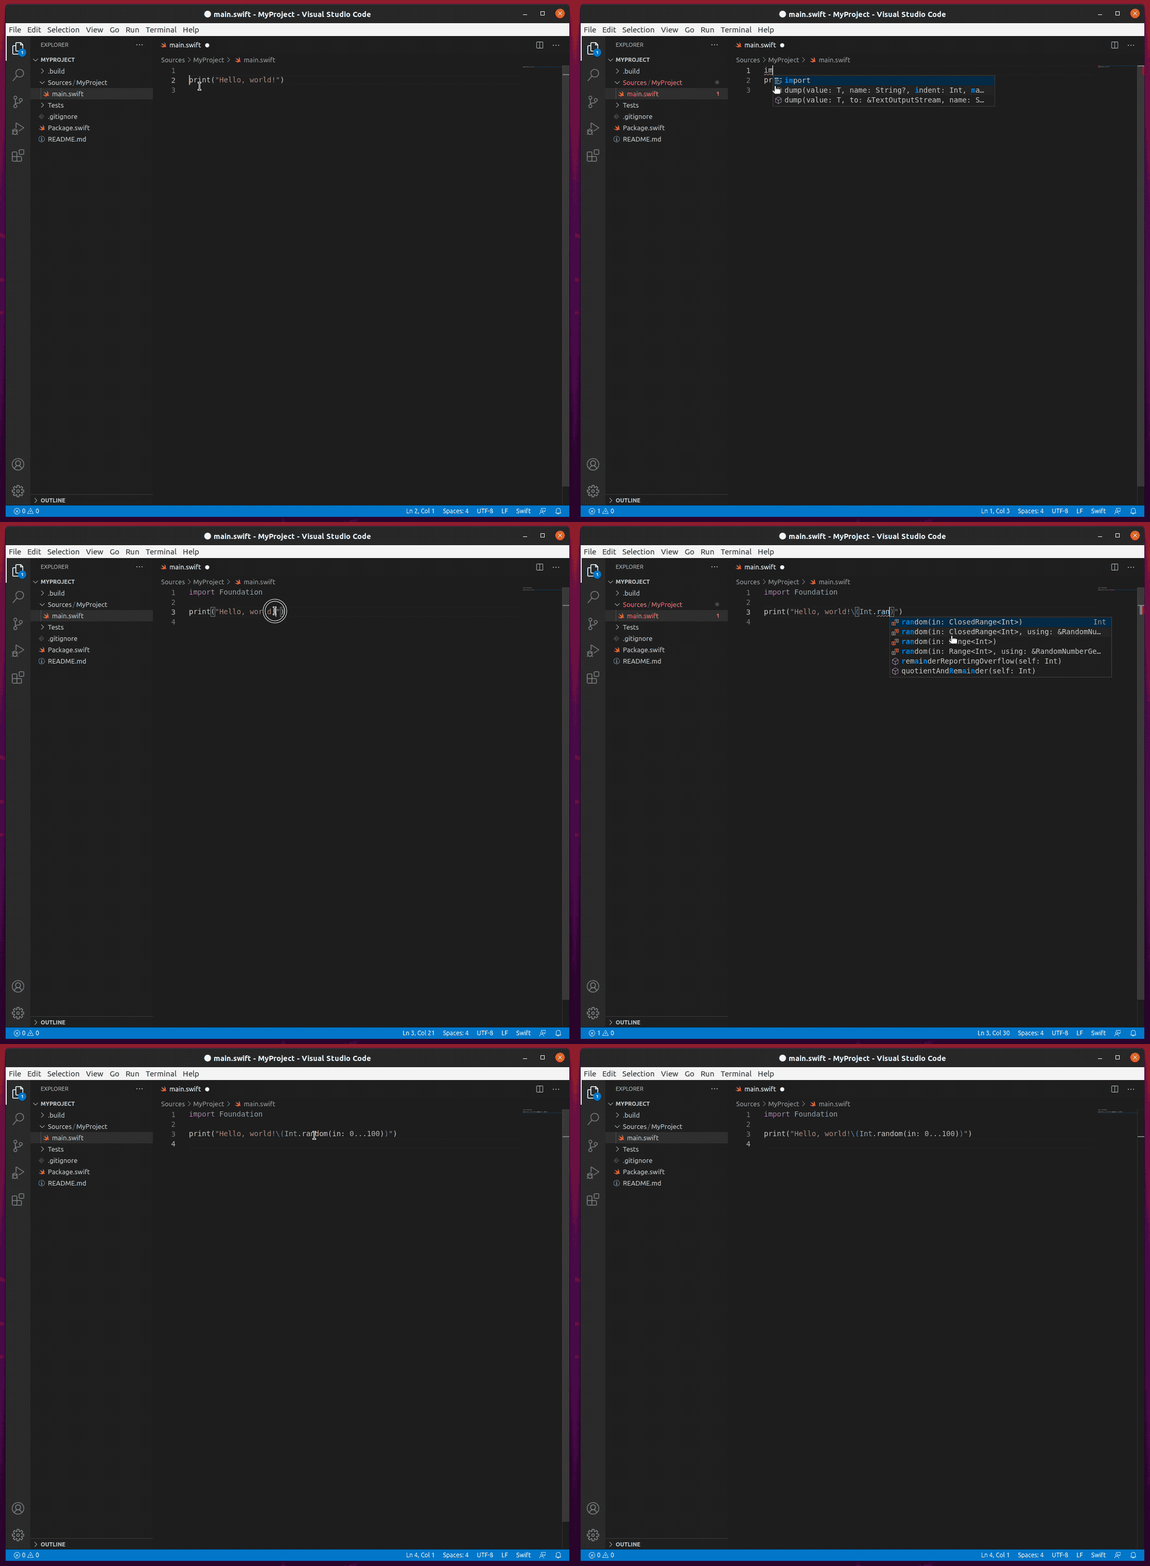
"sourcekit-lsp.serverPath": "/usr/share/swift/usr/bin/sourcekit-lsp"Once installed, vscode can support features like code autocomplete and definition jumping.
LLDB
What is LLDB?
LLDB is the debugger component of the LLVM project. It is built as a set of reusable components that extensively use existing libraries in LLVM, such as Clang expression parser and LLVM disassembler. With LLDB, vscode gains the ability to debug Swift code.
Installing LLDB
Since LLDB is already integrated into the Swift Toolchain, we don’t need to install it separately, only the vscode LLDB plugin is needed.
Install CodeLLDB from the vscode marketplace.
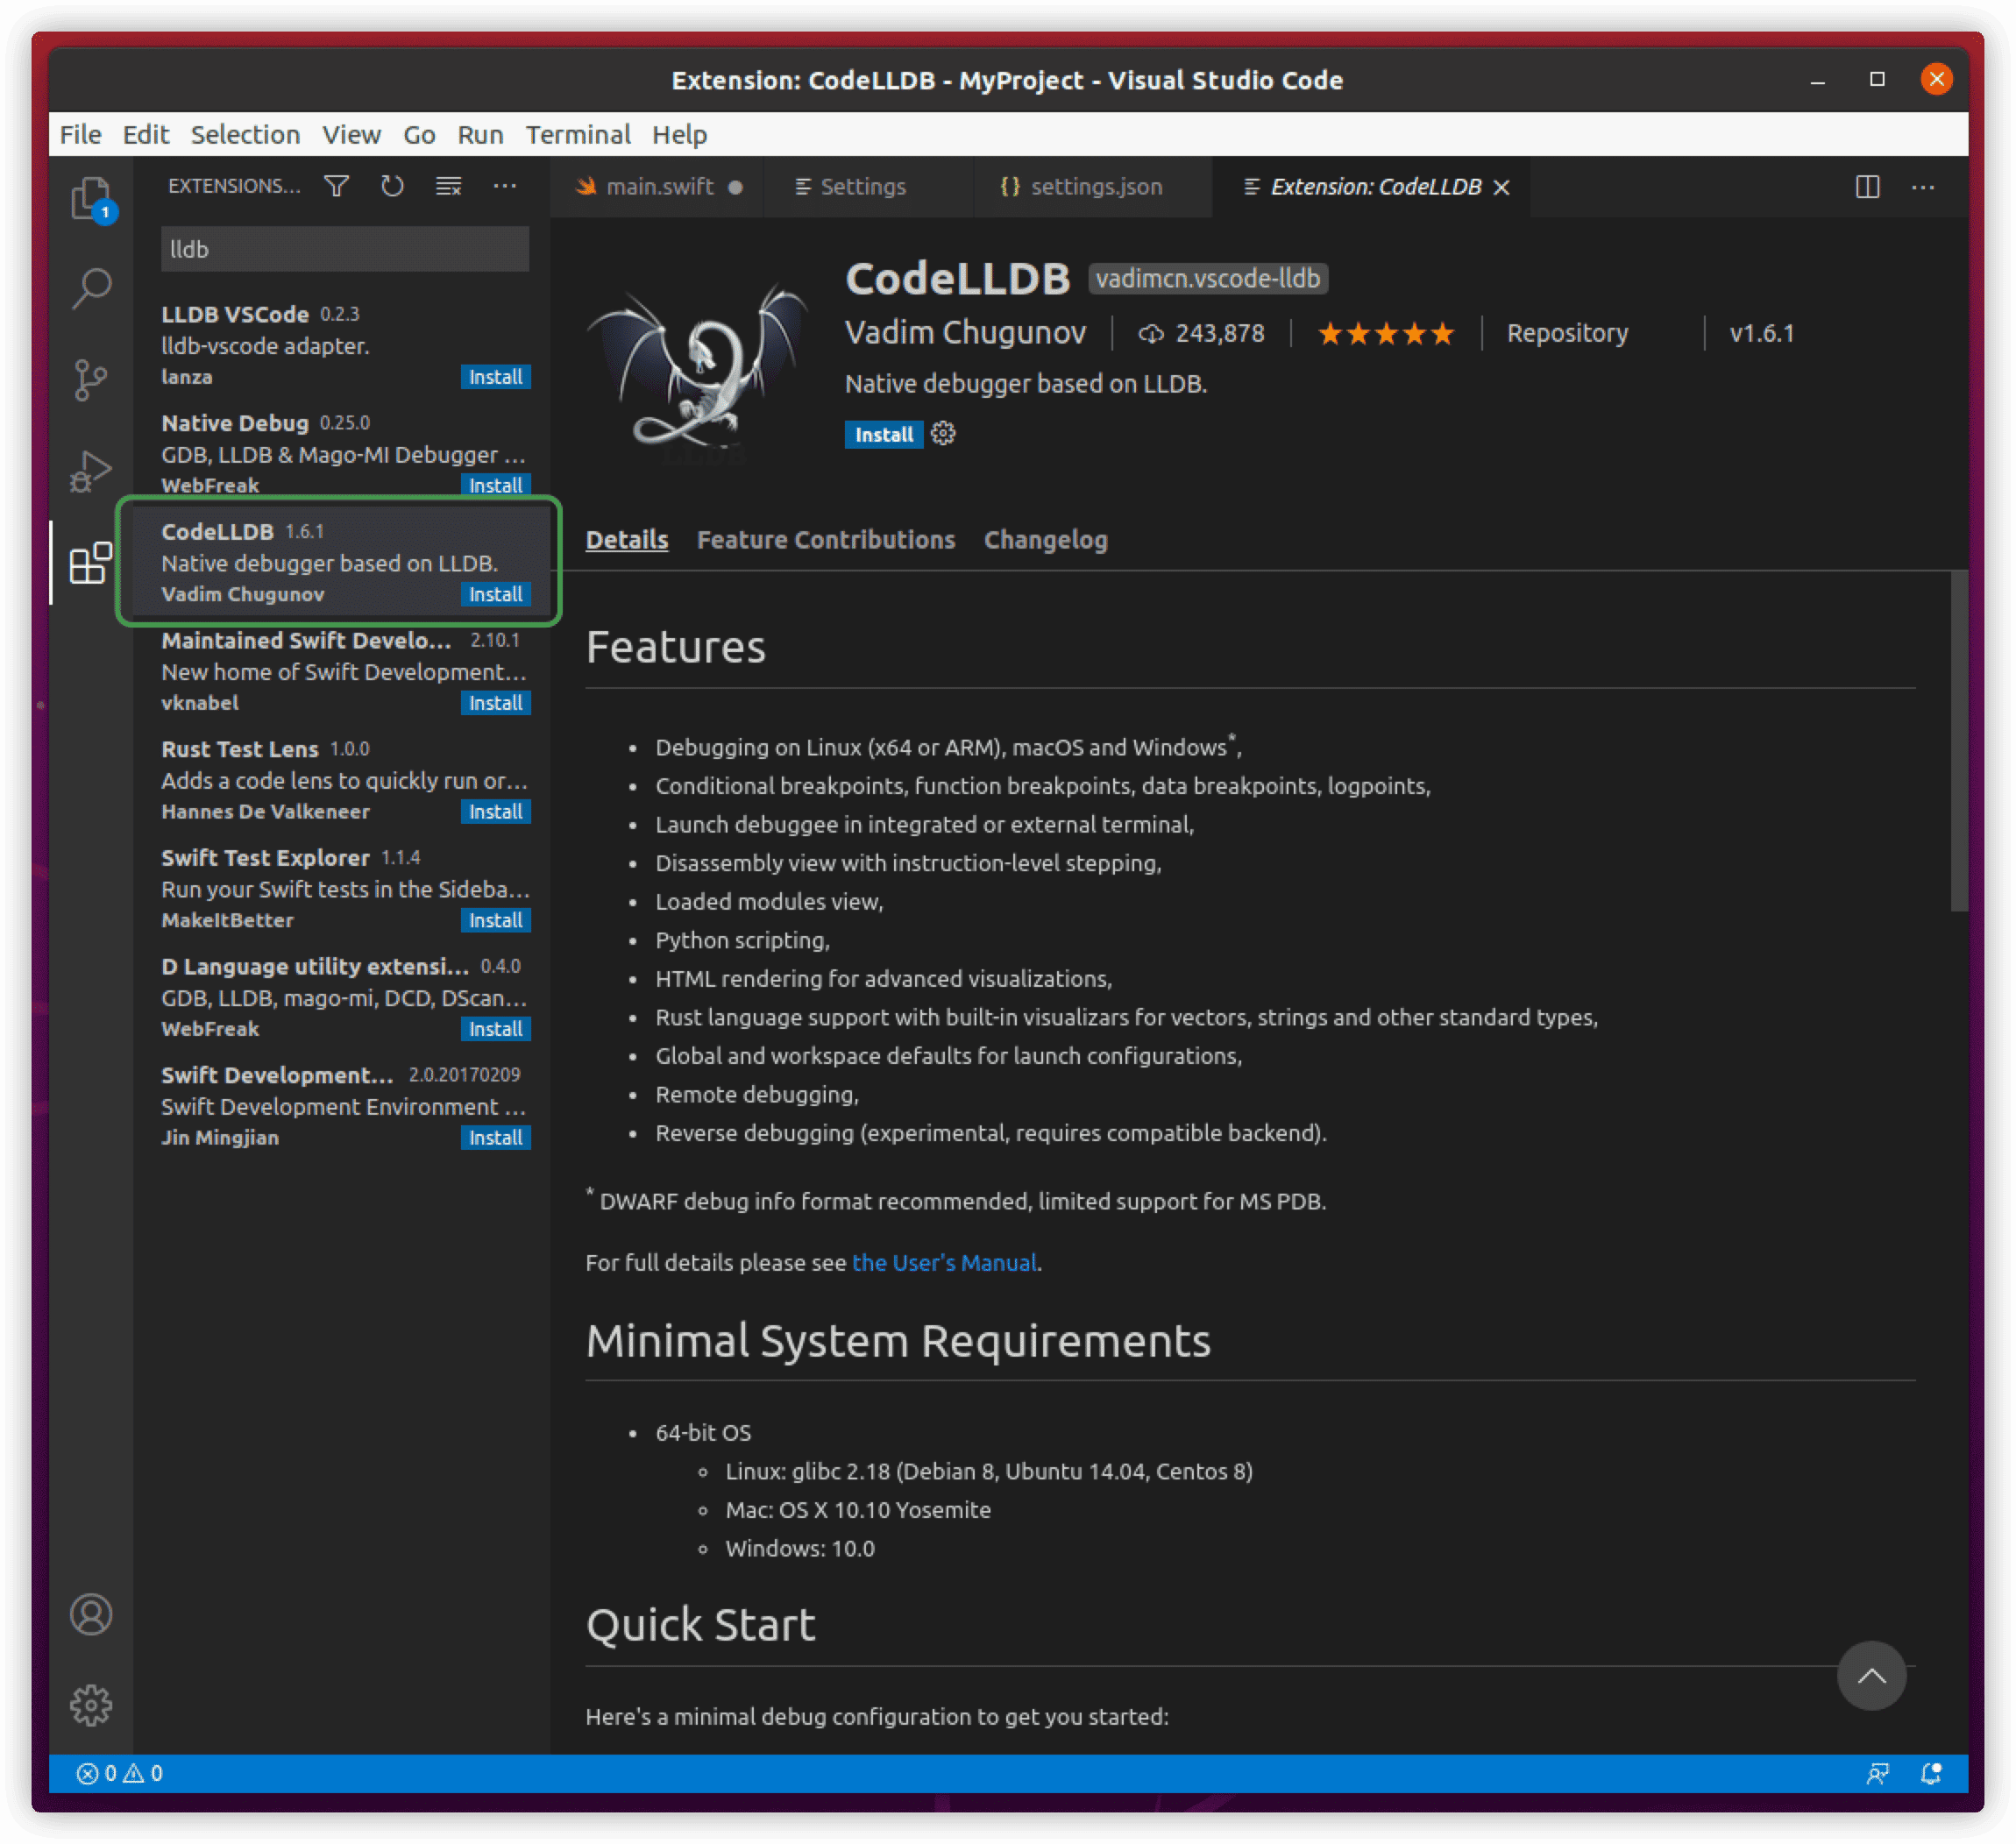
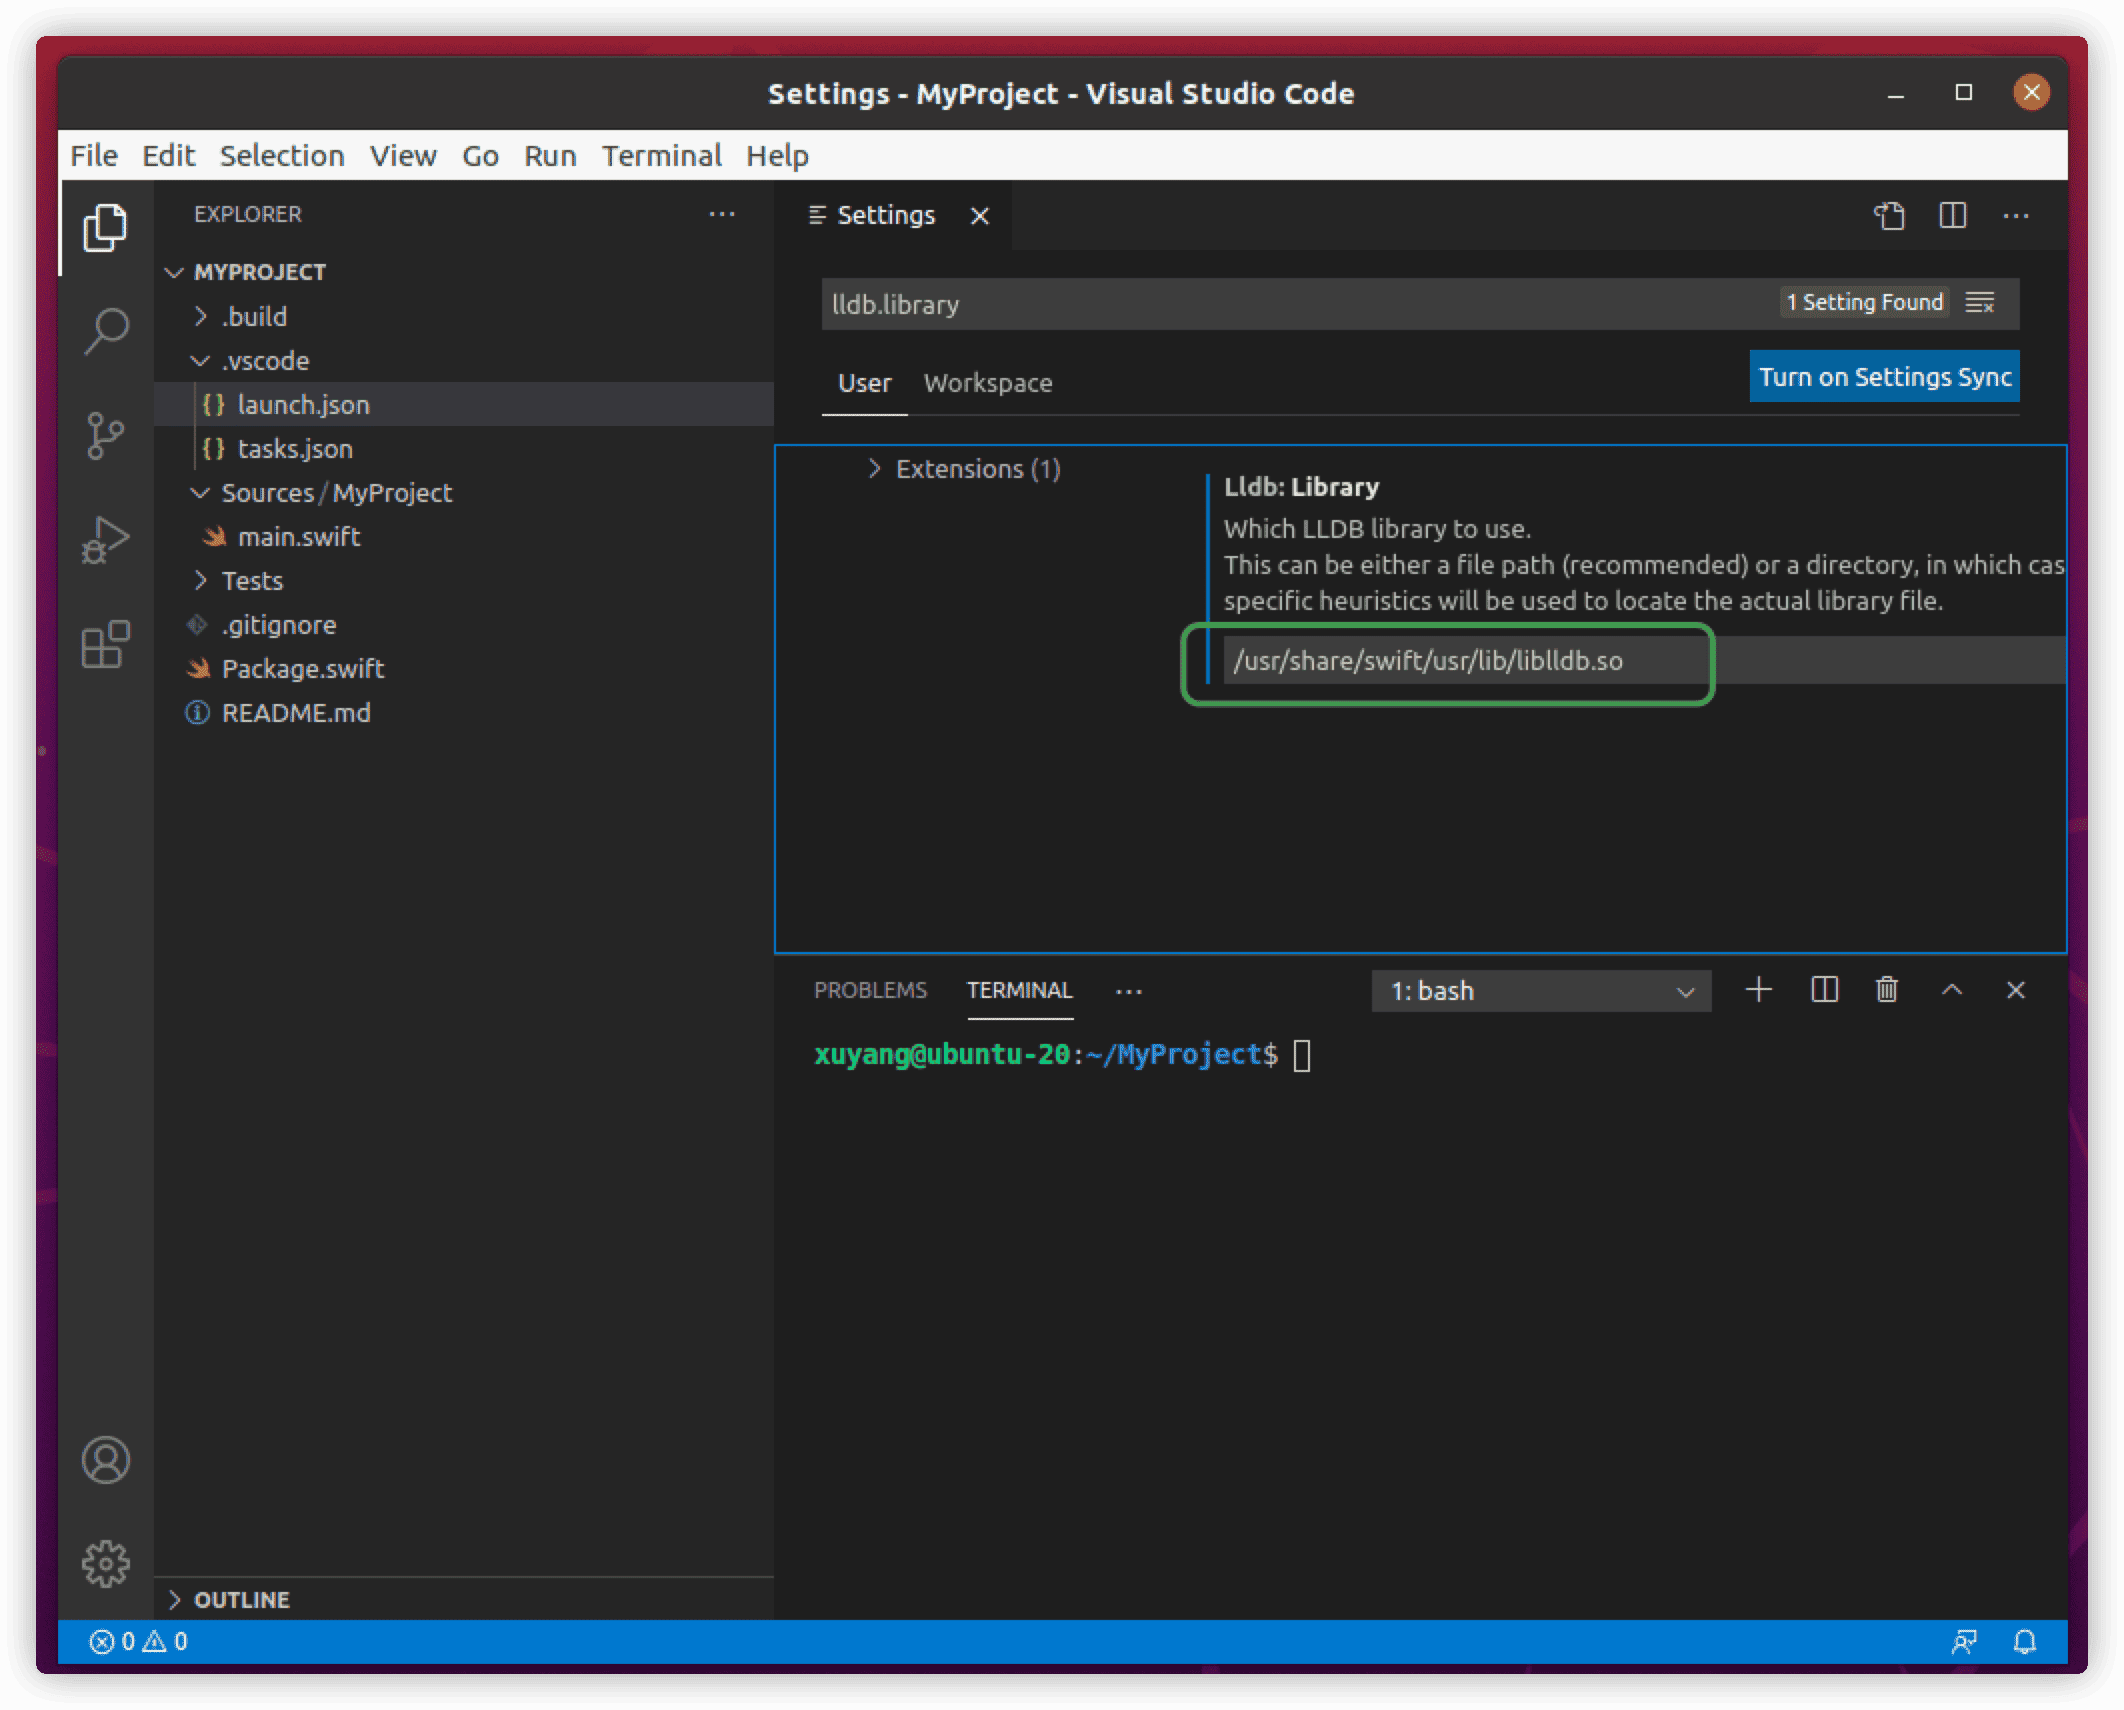
Specify the lldb location in settings.json.
"lldb.library": "/usr/share/swift/usr/lib/liblldb.so"Or set it in settings UI.
Debug Configuration File
To debug a project in vscode using lldb, you need to create launch.json and tasks.json debug configuration files in the project’s .vscode directory for each project.
launch.json is vscode’s configuration file for debugging, such as specifying the debugging language environment, the type of debugging, etc. It serves a similar purpose as XCode’s target. In a Swift project, we usually set two configurations, one for debugging the program and another for Unit testing.
$cd MyProject
$code .
When you click the run button on the left for the first time, vscode will prompt you to create a launch.json file. You can also
manually create this file in the .vscode directory.
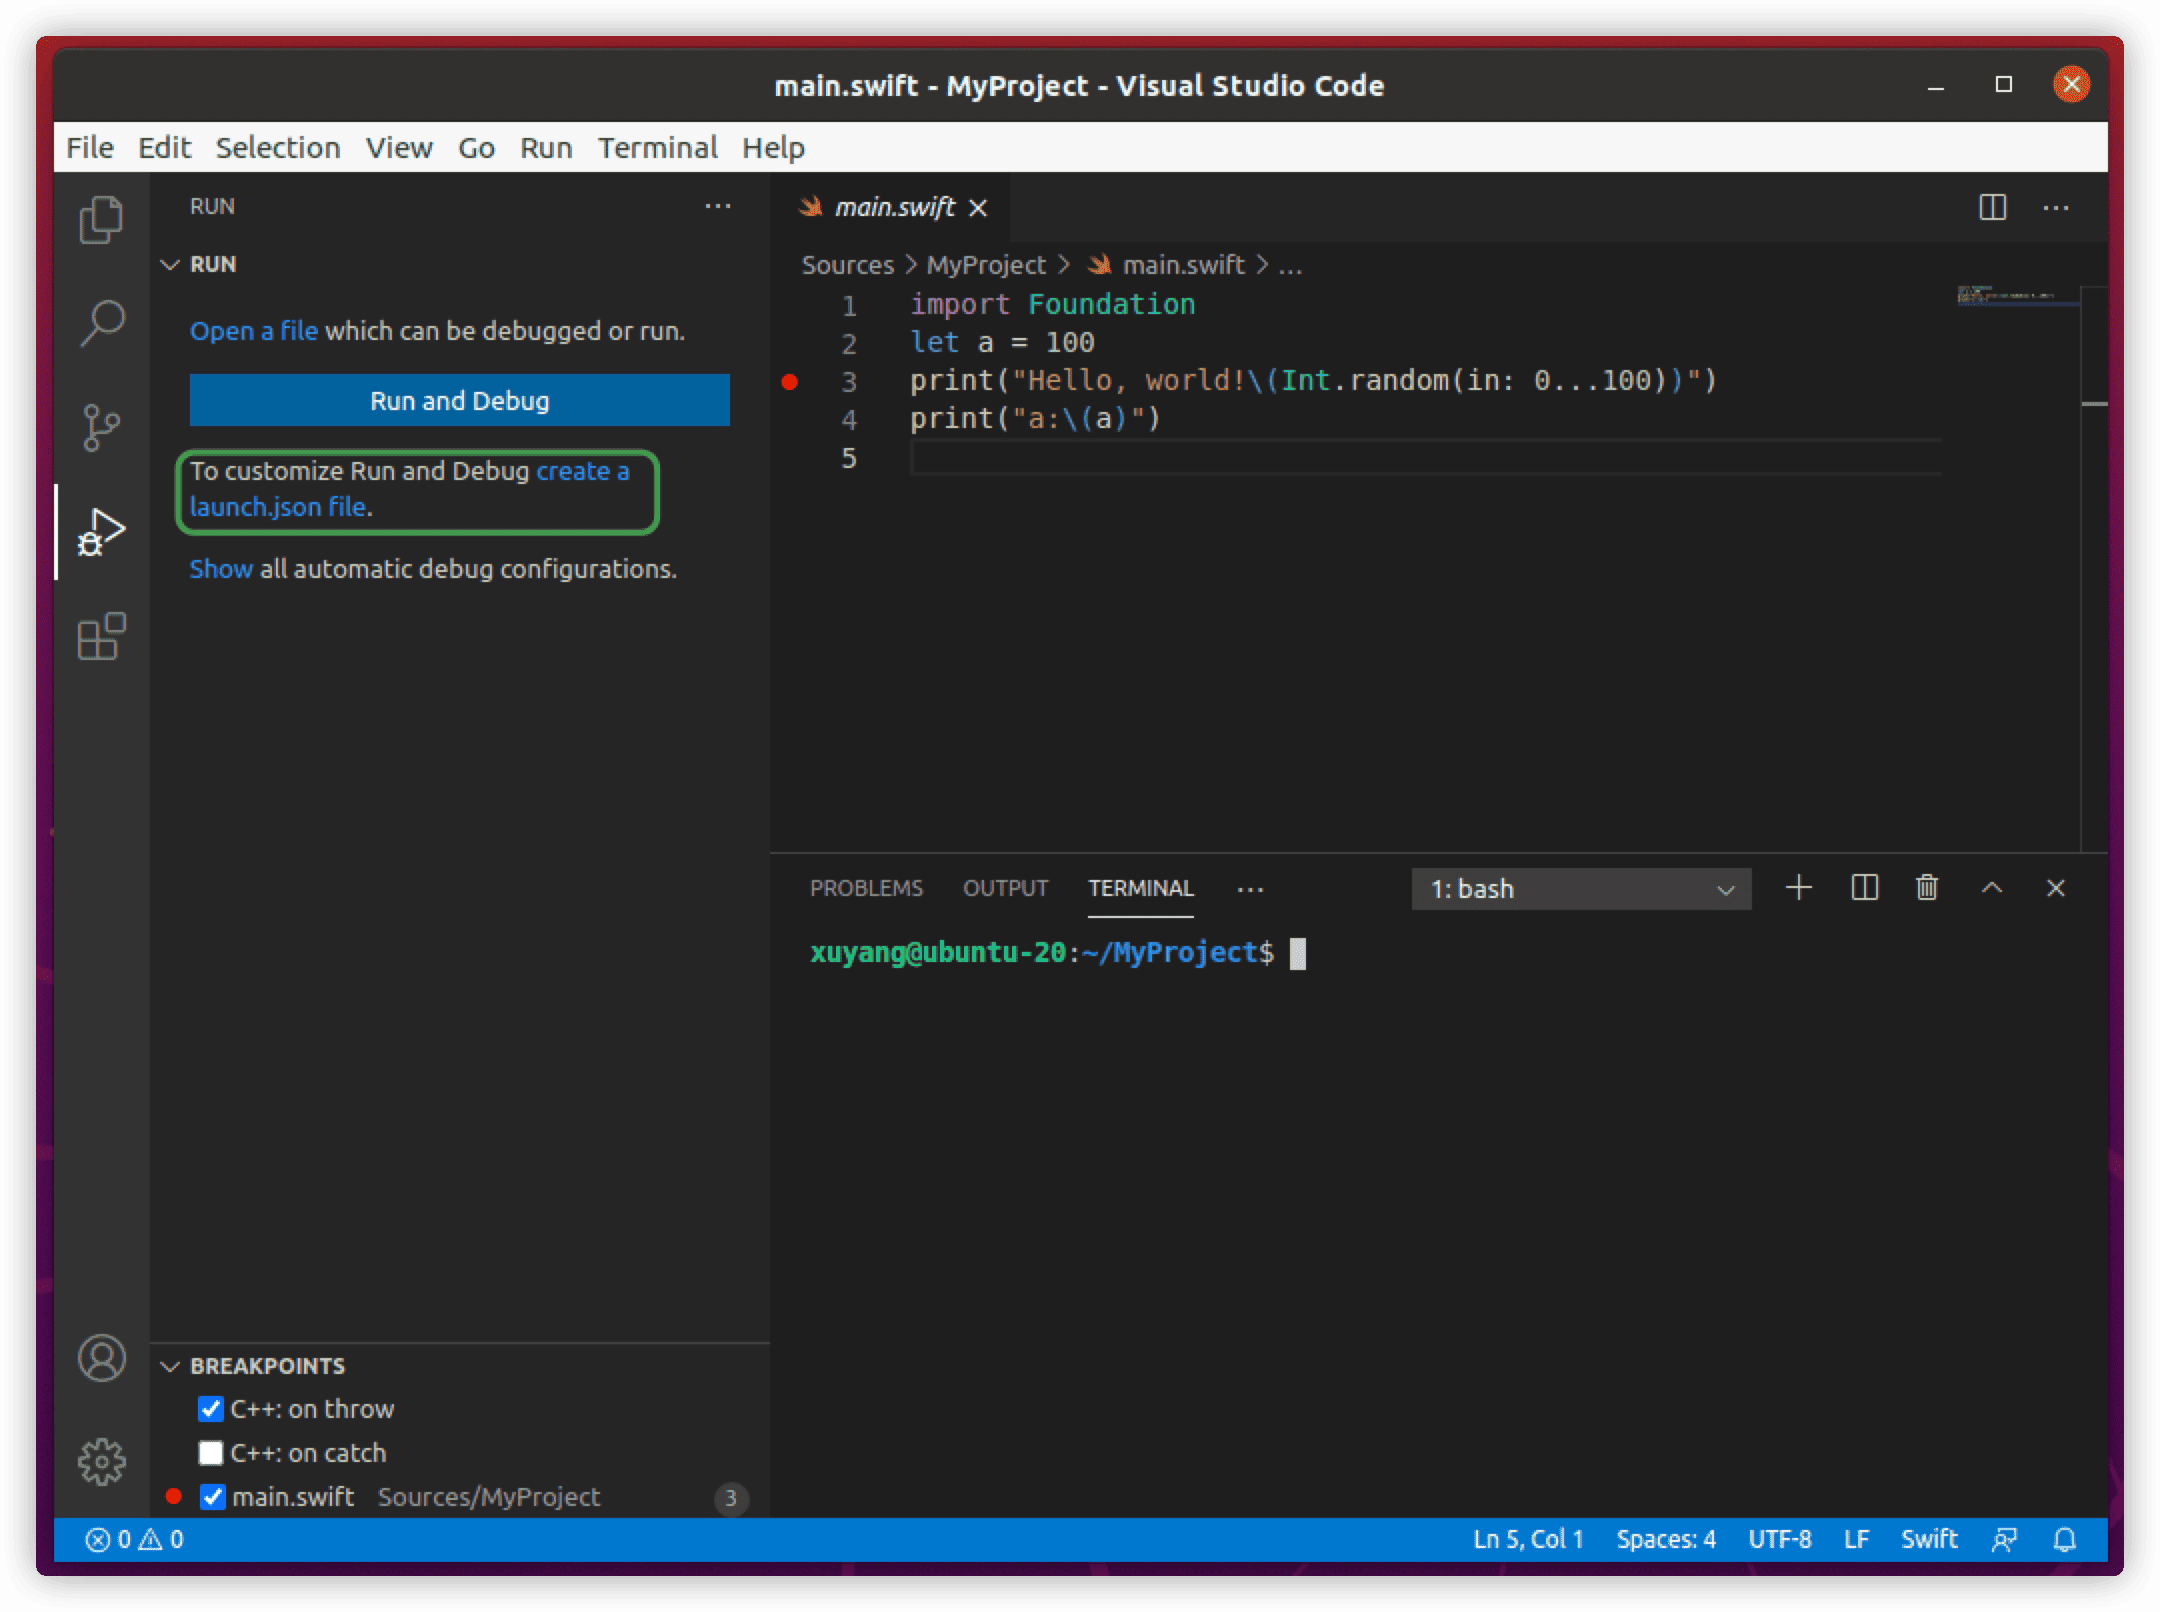
launch.json
{
    "version": "0.2.0",
    "configurations": [
        {
            "type": "lldb",
            "request": "launch",
            "name": "Debug",
            "program": "${workspaceFolder}/.build/debug/MyProject",
            "args": [],
            "cwd": "${workspaceFolder}",
            "preLaunchTask": "swift-build"
        },
        {
            "type": "lldb",
            "request": "launch",
            "name": "unit testing on Linux",
            "program": "./.build/debug/MyProjectPackageTests.xctest",
            "preLaunchTask": "swift-build-tests"
        }
    ]
}type- The type of debugger for this launch configuration, set to lldb for Swift debugging.request- The request type for this launch configuration, set to launch for Swift debugging.name- The name displayed in the debug start configuration dropdown list.program- The location of the executable file. Useswift buildto compile (without the release argument) and place the execution file inproject directory${workspaceFolder}/.build/debug/with the file name usually being the project name (in this case, MyProject);swift build -c releasecompiles the executable file into${workspaceFolder}/.build/release/with the file name as the project name (MyProject);unit testingexecutable file is placed in${workspaceFolder}/.build/debug/, with the file name usually beingproject name PackageTests.xctest(in this case, MyProjectPackageTests.xctest). Set this item according to the name and configuration of each project.args- Arguments passed to the program. For example, if your project supports start-up parameters likeMyProject name hello, thenargswould be["name","hello"].cwd- The current working directory, used to find dependencies and other files.preLaunchTask- The task to start before the debugging session begins. Each task needs to have a corresponding setting intasks.json. For Swift projects, the most common task before debugging is compiling.
tasks.json
{
    "version": "2.0.0",
    "tasks": [
        {
            "label": "swift-build",
            "type": "shell",
            "command":"swift build"
        },
        {
            "label": "swift-build-tests",
            "type": "process",
            "command": "swift",
            "args": [
                "build",
                "--build-tests"
            ]
        }
    ]
}label- Corresponds topreLaunchTaskinlaunch.json.type- Eithershellorprocess. For better demonstration, both forms are used in this example.command- Iftypeisprocess,commandcan only be the name of the executable file to be executed (without parameters), as inswiftin this example. Iftypeisshell, you can directly write the parameters you need to call incommand, such asswift build.args- For thetypeprocess, the parameters to be called are filled in here. In this example,swift-build-testscould also be written as:
"label": "swift-build-tests",
"type": "shell",
"command": "swift build --build-tests"
launch.json and tasks.json have many other options. For more uses, please refer to the vscode manual and the SPM manual.
Now we can start debugging Swift projects.
First Debugging
$cd MyProject
$code .
Add some content to main.swift, for example:
import Foundation
let a = 100
print("Hello, world!\(Int.random(in: 0...100))")
print("a:\(a)")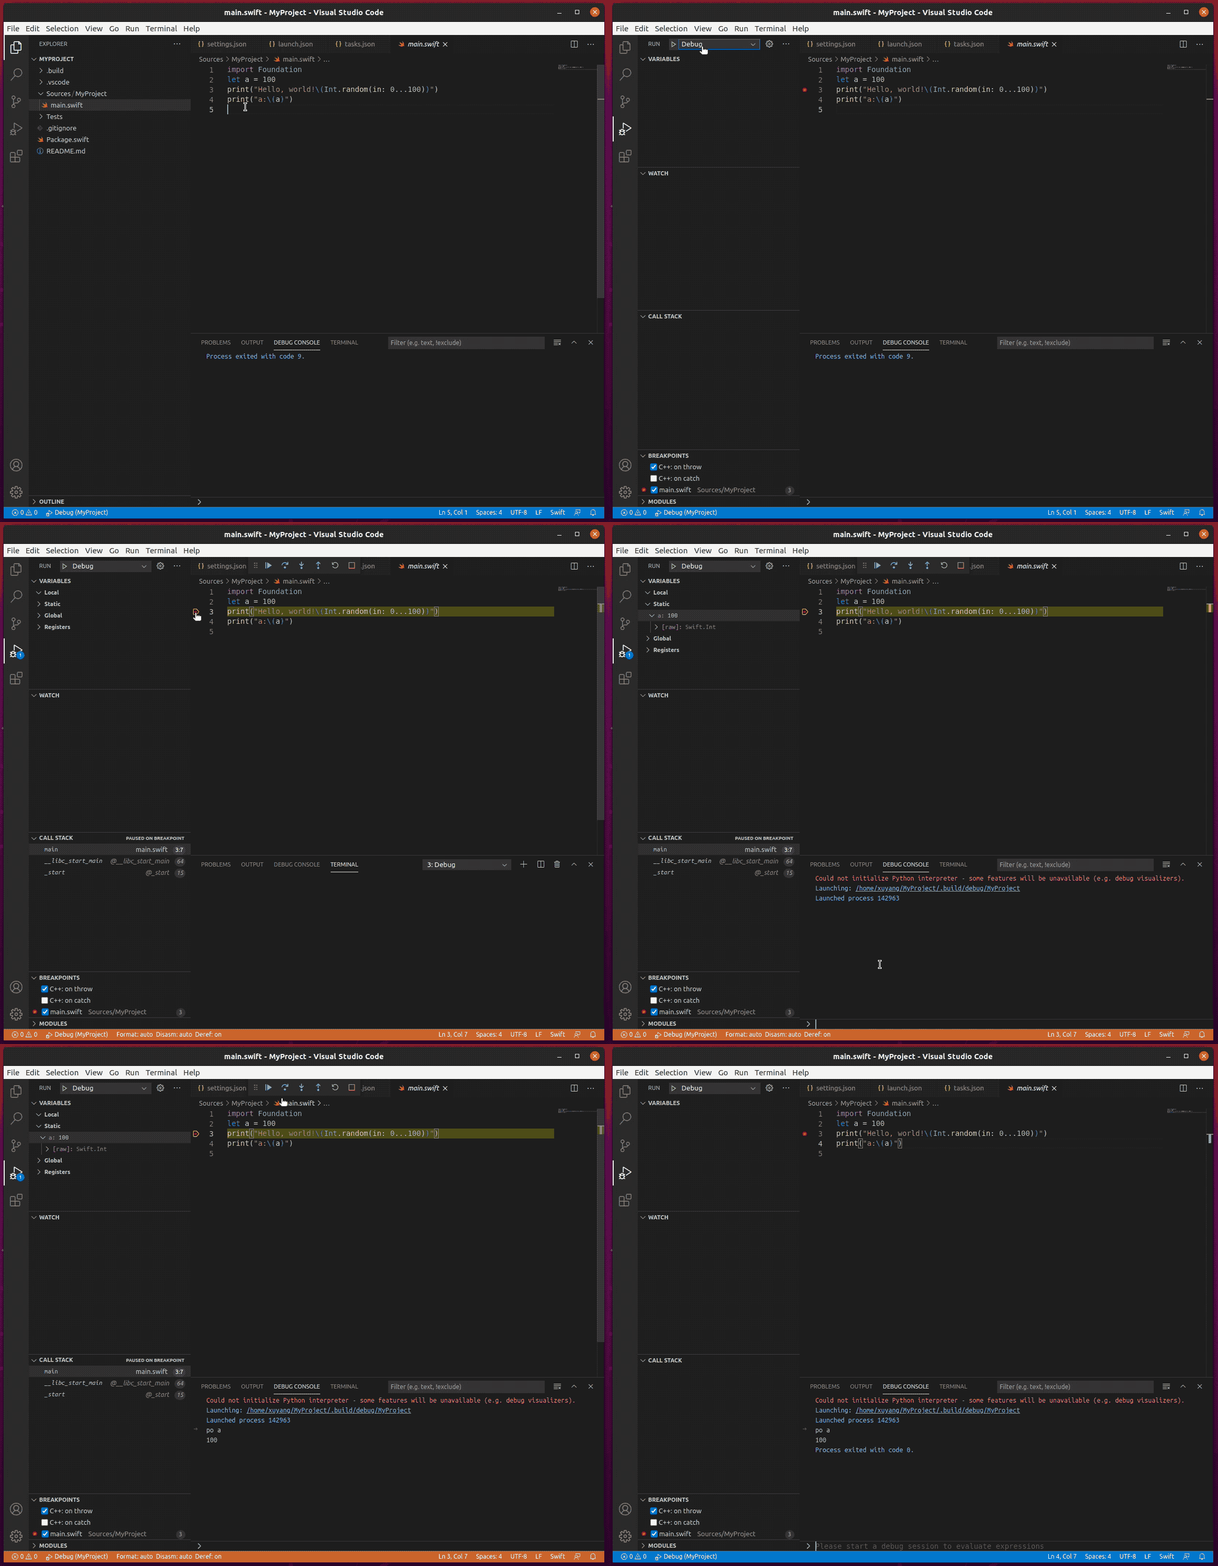
Why Format Code
Many projects adhere to specific coding styles. Unified code standards not only aid in project iteration and maintenance but also make the code more aesthetically pleasing and readable. However, not every programmer can master and proficiently use a project’s style conventions. Using automated tools for this task is a gratifying solution.
In the Swift community, there are several formatting projects, with the most active being nicklockwood’s swiftformat and Apple’s swift-format. In this example, we choose to install nicklockwood’s swiftformat. Both have similar installation methods, but swiftformat supports more rules and, unlike swift-format, does not require strict binding to Swift versions.
Installing the Command Line Tool
$cd ~
$git clone https://github.com/nicklockwood/SwiftFormat.git
$cd SwiftFormat
$swift build -c release
$sudo cp ~/SwiftFormat/.build/release/swiftformat /usr/local/bin
$swiftformat --version
0.47.11
Installing the vscode Plugin
The vscode plugins for swiftformat, swift-format, and swiftlint were all developed by Valentin Kabel, who has also managed and developed several other Swift plugins for vscode, making significant contributions to the use of Swift on vscode.
In the plugin store, select the corresponding swiftformat plugin (make sure not to choose the wrong one).
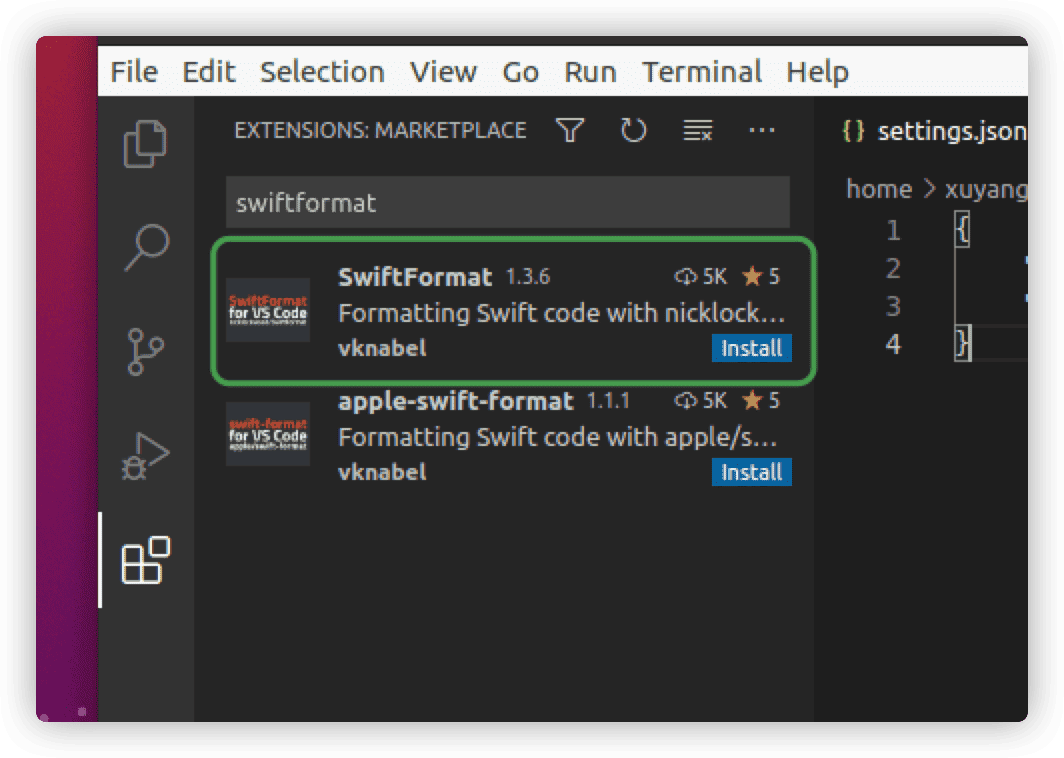
Add in settings.json:
"swiftformat.path": "/usr/local/bin/swiftformat",
"swiftformat.configSearchPaths": [
        "./swiftformat",
        "~/.swiftformat"
]
swiftformat will try to find a user-created configuration file (.swiftformat) from the paths set in Swiftformat.configSearchPaths. The configuration above searches the current directory first, then the user root directory. If neither is found, the default configuration and rules are used.
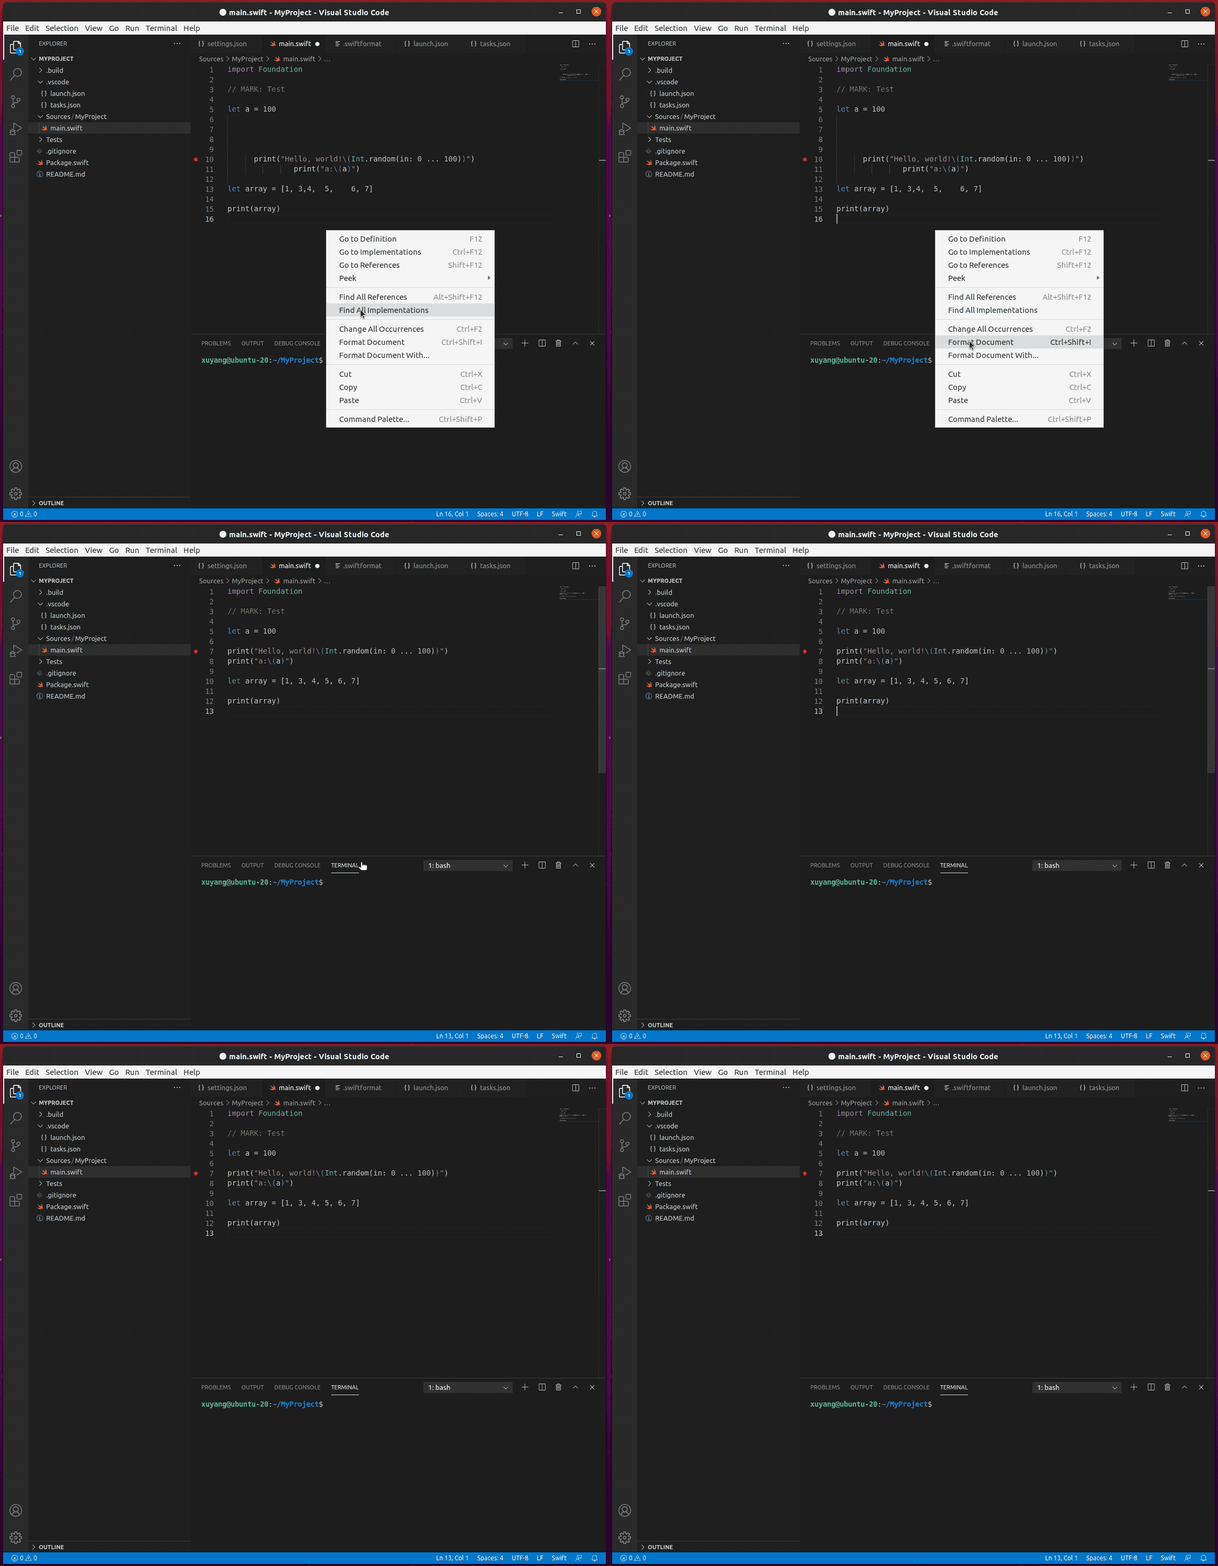
swiftformat currently includes over 50 rules. Its documentation is well done and the latest list of rules and demonstrations can be found in Rules.md. Note that vscode currently cannot correctly respond to the --indent in swiftformat’s custom configuration; indent needs to be set separately in vscode (I currently use EditorConfig for VS Code for a unified setting). Additionally, rules specified through swift.options:["--config","~/rules/.swiftformat"] take precedence over rules in swiftformat.path.
SwiftLint
Making Code More Standard
In computer science, a lint is a tool that marks suspicious or non-structural segments in source code. It’s a static analysis tool, originally developed for C language on UNIX platforms. Later, it became a general term for tools that mark dubious segments in source code of any computer programming language. In the Swift community, the most widely used is SwiftLint by realm.
Actually, both swiftformat and swift-format have linting capabilities, and many of their rules are similar to those of swiftlint (all based on Github’s Swift Style Guide). However, each has its distinct features.
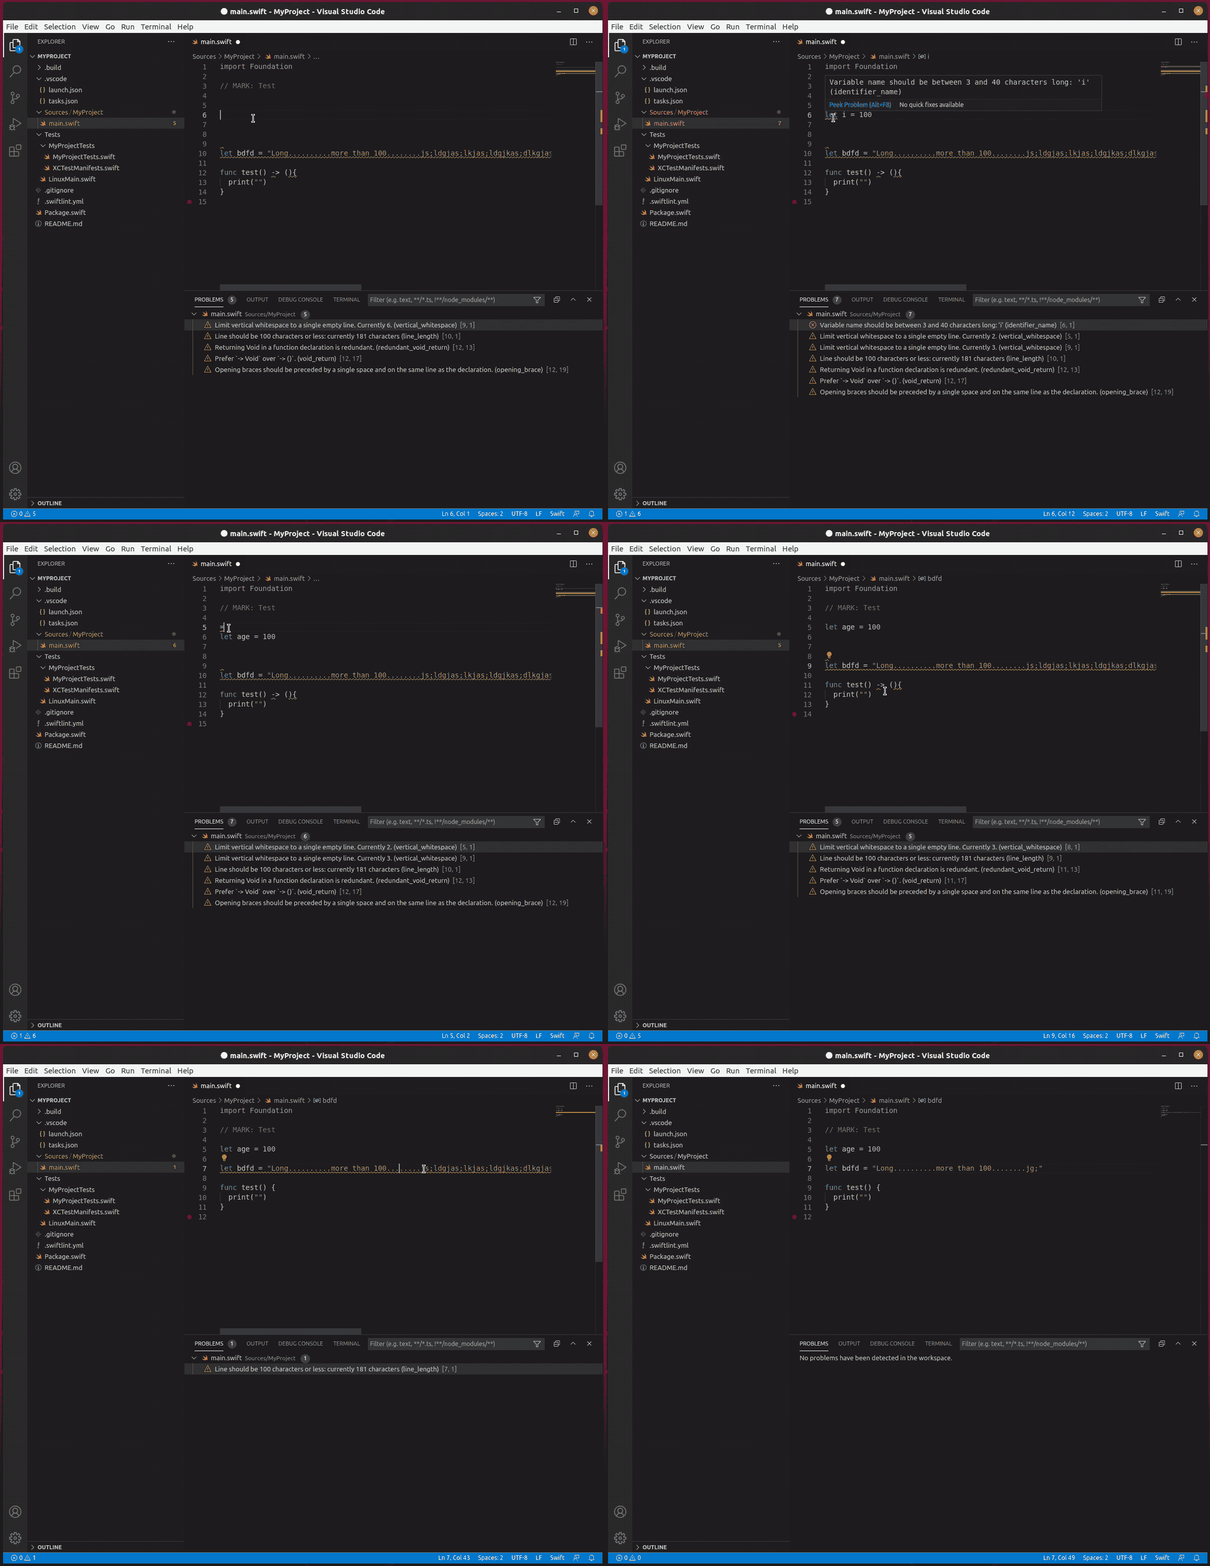
swiftformat focuses more on automatic code modification, while swiftlint, by directly hooking into Clang and Sourcekit, provides real-time verification and hints during the code input stage (usually not using its autocorrect).
Installing SwiftLint
$git clone https://github.com/realm/SwiftLint.git
$cd SwiftLint
$swift build -c release
$sudo cp ~/SwiftLint/.build/release/swiftlint /usr/local/bin
$swiftlint --version
0.42.0
Installing the swiftlint vscode Plugin
Install the swiftlint plugin from the vscode plugin market.
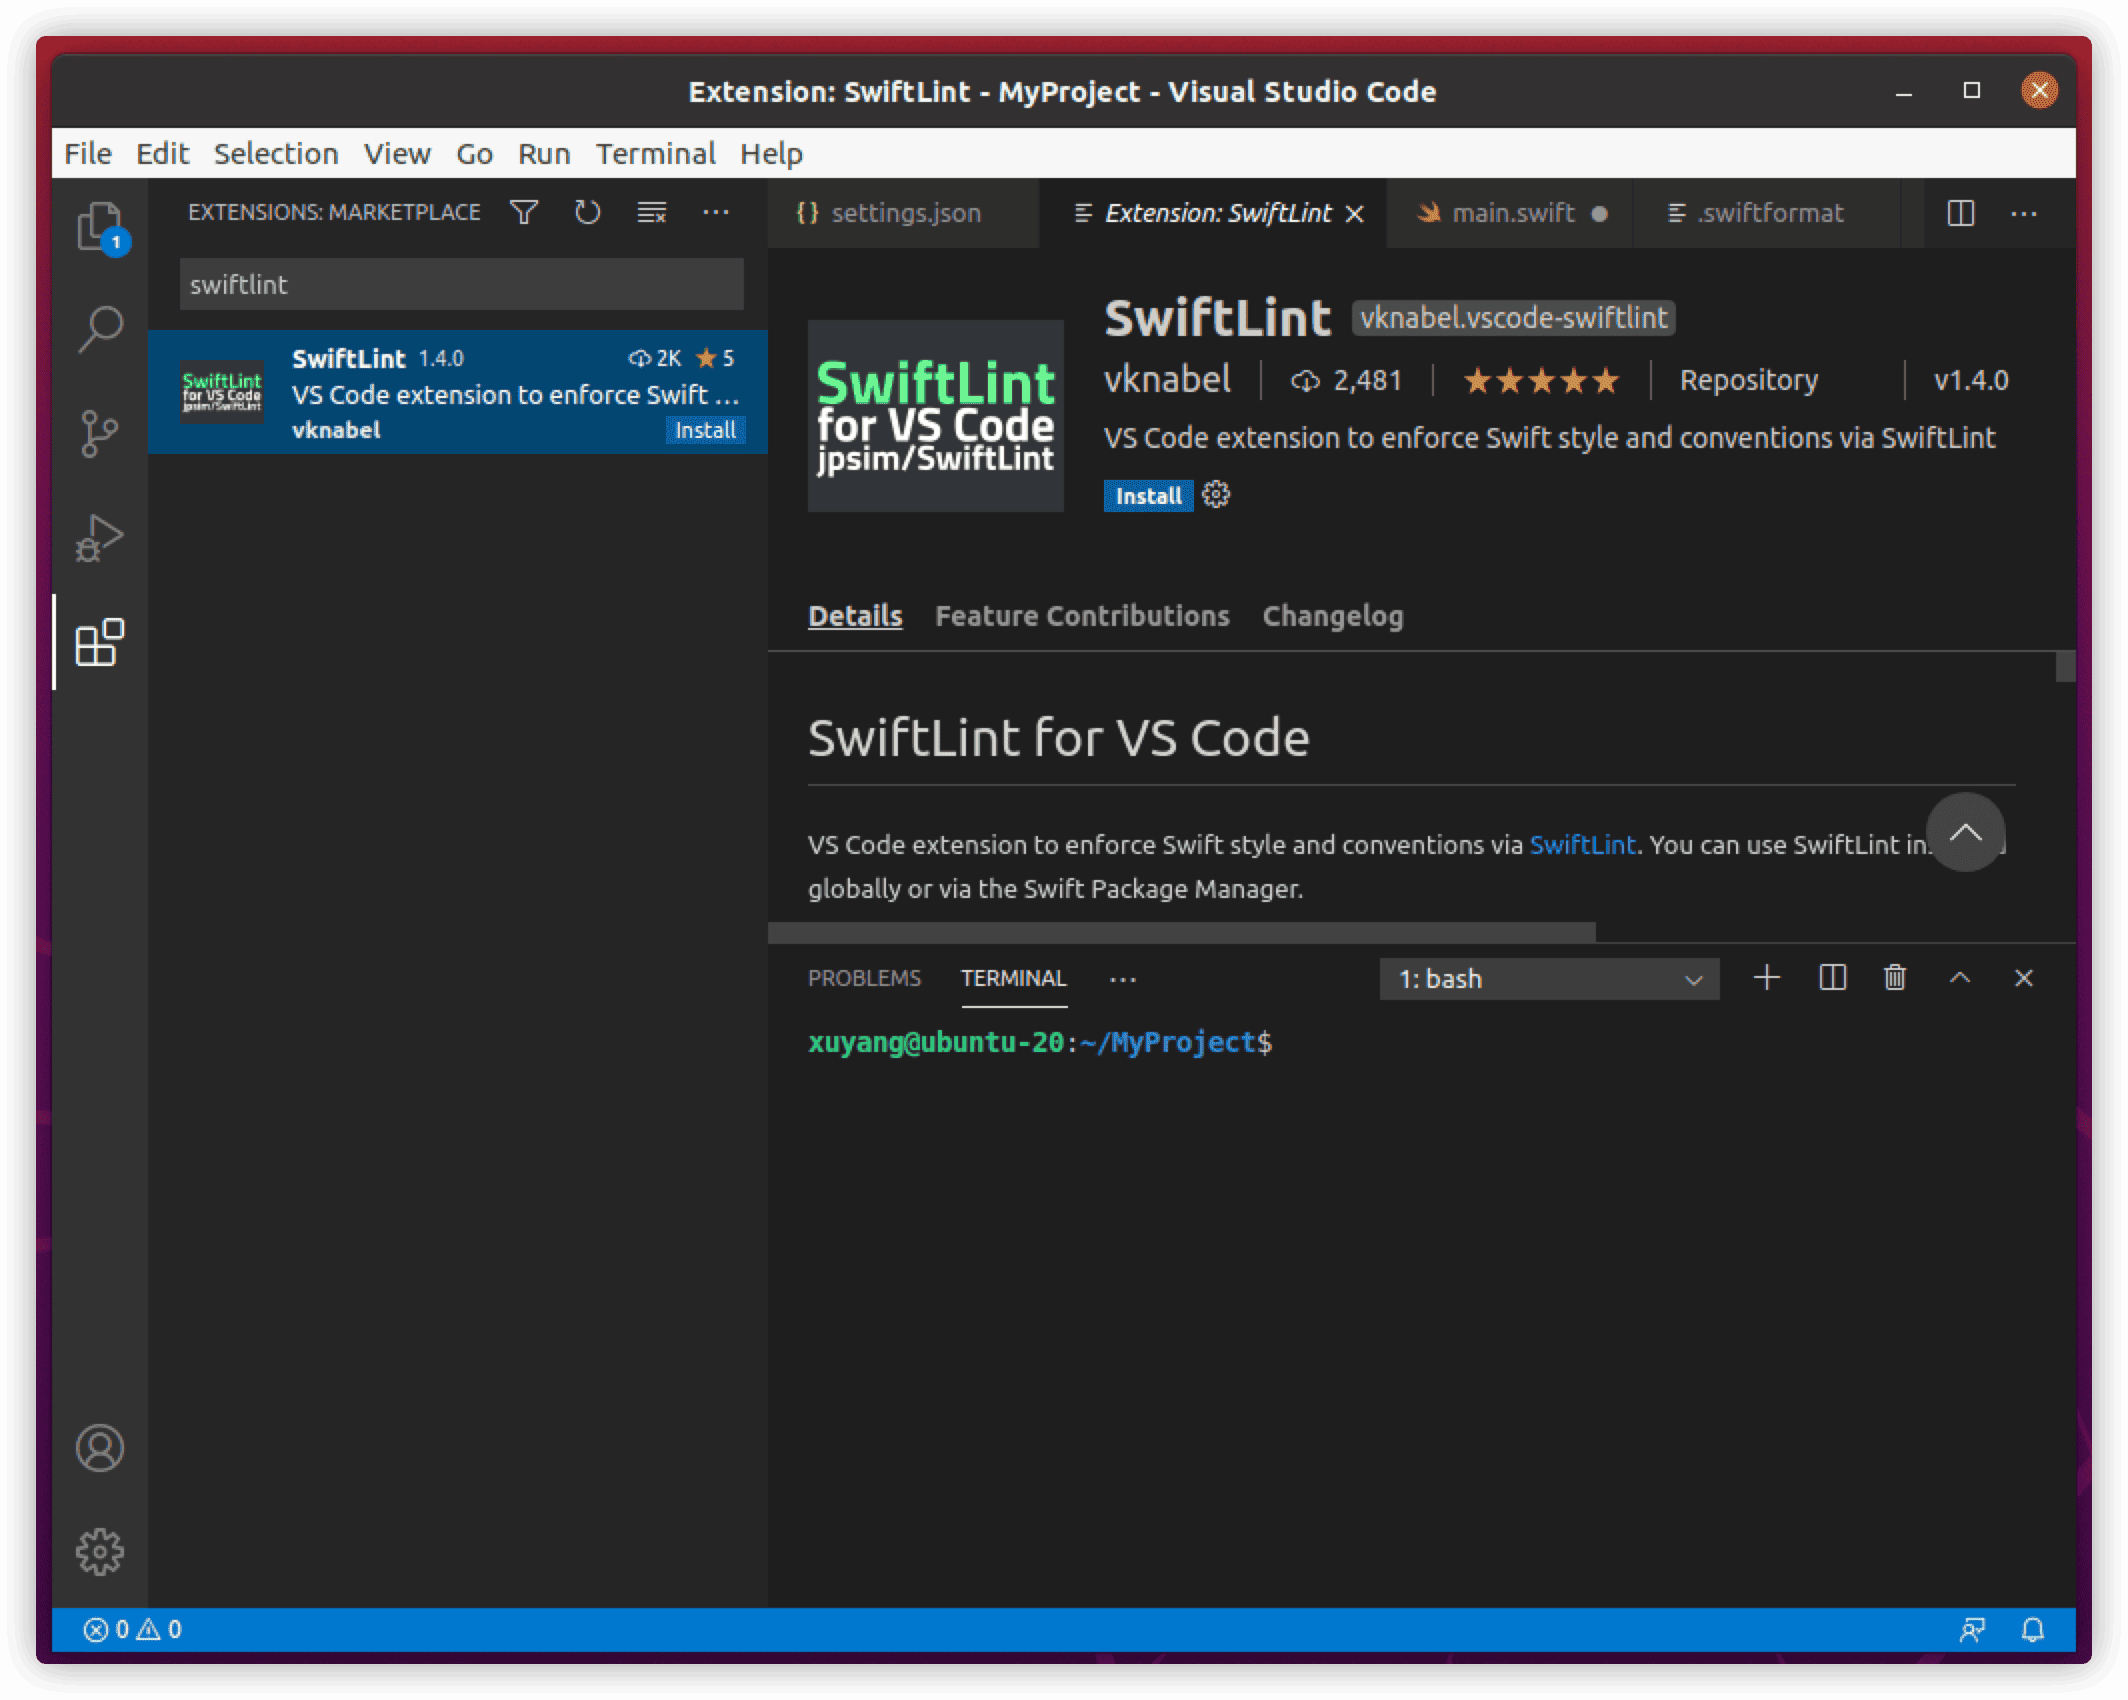
Add in settings.json:
"swiftlint.path": "/usr/local/bin/swiftlint",
"swiftlint.toolchainPath": "/usr/share/swift/usr/bin",
"swiftlint.configSearchPaths": [
        "./.swiftlint.yml",
        "~/.swiftlint.yml"
]
The setting for configSearchPath is similar to `swiftformat
`. If no custom configuration is needed, it’s not required to fill in.
Cross-Platform Configuration
We have built a comprehensive Swift development environment on Ubuntu 20.04.
Settings
If you, like me, use vscode’s settings sync feature, then the above settings.json won’t work properly on other platforms (like Mac).
To make our development environment adaptable to multiple platforms, enable multi-platform support in the configuration and set it separately for different platforms.
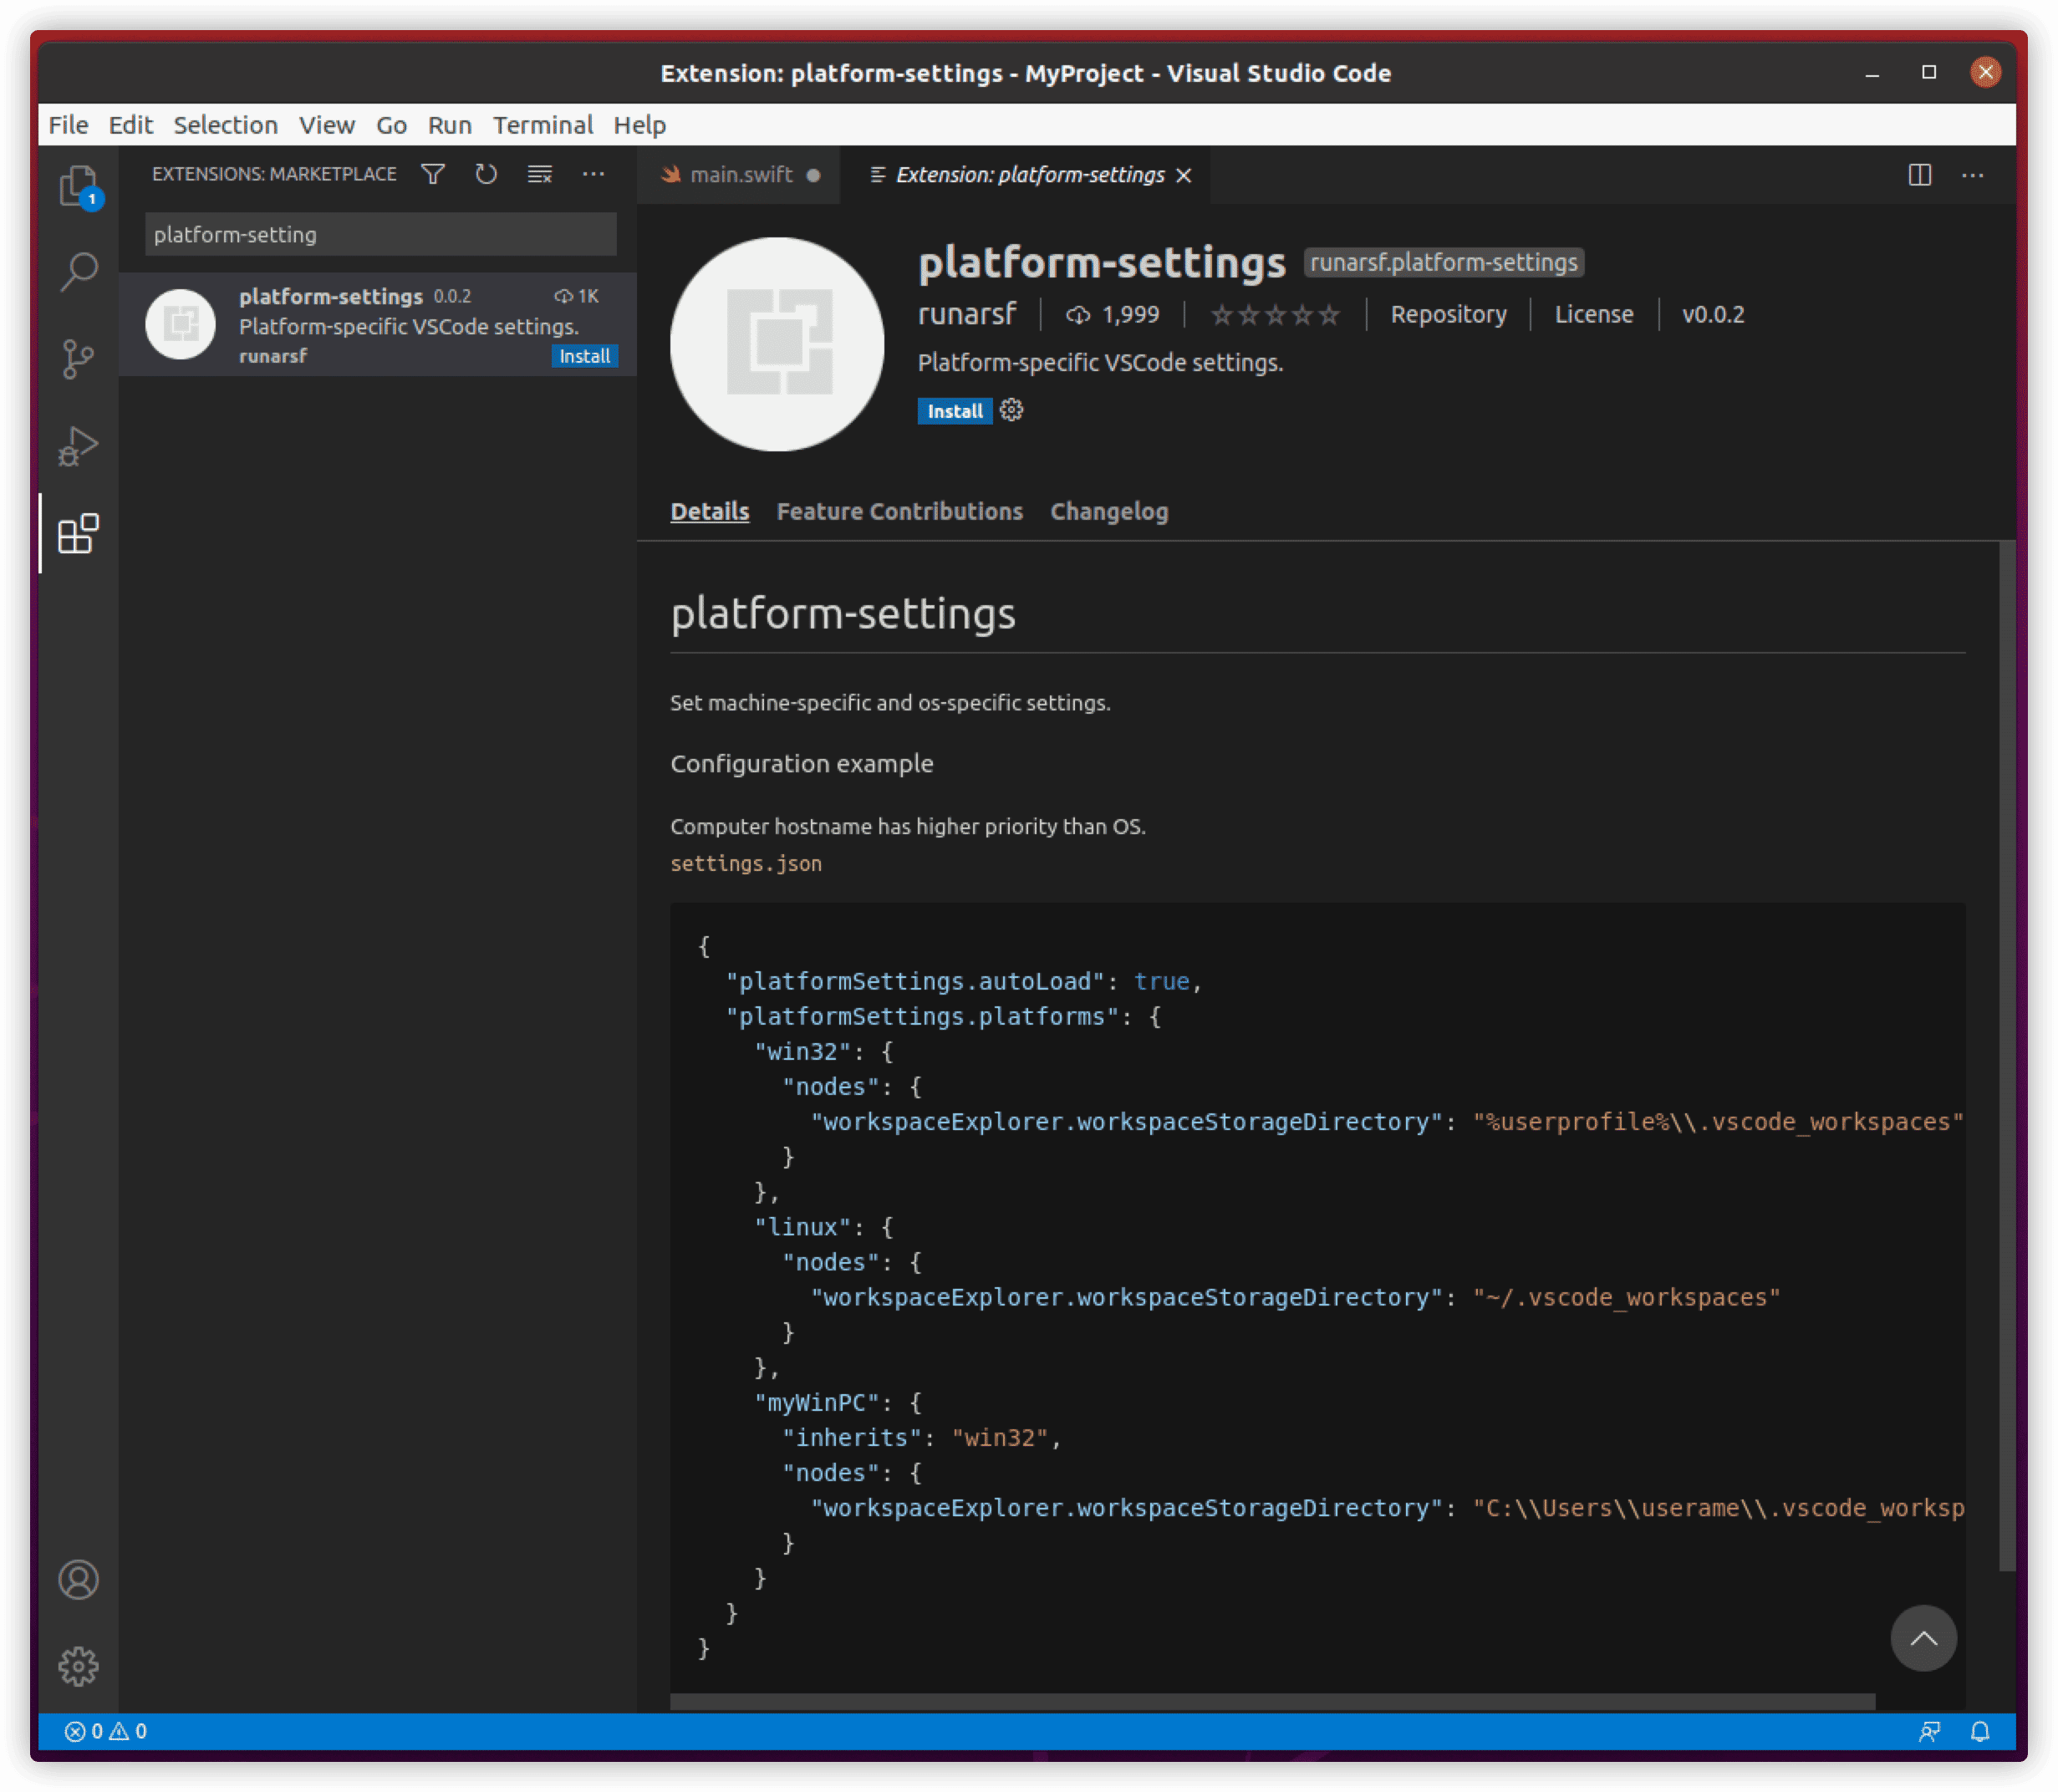
Install the platform-settings plugin.
Modify settings.json.
Current settings:
{
    "sourcekit-lsp.serverPath": "/usr/share/swift/usr/bin/sourcekit-lsp",
    "lldb.library": "/usr/share/swift/usr/lib/liblldb.so",
    "swiftformat.path": "/usr/local/bin/swiftformat",
    "swiftformat.configSearchPaths": [
        "./swiftformat",
        "~/.swiftformat"
    ],
    "swiftlint.path": "/usr/local/bin/swiftlint",
    "swiftlint.toolchainPath": "/usr/share/swift/usr/bin",
    "swiftlint.configSearchPaths": [
        "./.swiftlint.yml",
        "~/.swiftlint.yml"
    ]
}
Modified to:
{
    "platformSettings.autoLoad": true,
    "platformSettings.platforms": {
        "linux":{
            "sourcekit-lsp.serverPath": "/usr/share/swift/usr/bin/sourcekit-lsp",
            "lldb.library": "/usr/share/swift/usr/lib/liblldb.so",
            "swiftformat.path": "/usr/local/bin/swiftformat",
            "swiftlint.path": "/usr/local/bin/swiftlint",
            "swiftlint.toolchainPath": "/usr/share/swift/usr/bin",
        },
        "mac":{
            "sourcekit-lsp.serverPath": "/Applications/Xcode.app/Contents/Developer/Toolchains/XcodeDefault.xctoolchain/usr/bin/sourcekit-lsp",
            "lldb.library": "/Applications/Xcode.app/Contents/SharedFrameworks/LLDB.framework/Versions/A/LLDB",
            "swiftformat.path": "/usr/local/bin/swiftformat", // Also installed here by homebrew
            "swiftlint.path": "/usr/local/bin/swiftlint", // Pointing to the actual tool path
            "swiftlint.toolchainPath": "/Applications/Xcode.app/Contents/Developer/Toolchains/XcodeDefault.xctoolchain/usr/bin",
        }

    },
    "swiftformat.configSearchPaths": [
        "./swiftformat",
        "~/.swiftformat"
    ],
    "swiftlint.configSearchPaths": [
        "./.swiftlint.yml",
        "~/.swiftlint.yml"
    ]
}
launch.json
On macOS, the invocation method for unit testing is different from Linux, so a configuration needs to be added in launch.json. Since it uses the same preLaunchTask, no changes are needed in tasks.json.
       {
            "type": "lldb",
            "request": "launch",
            "name": "Debug tests on macOS",
            "program": "/Applications/Xcode.app/Contents/Developer/usr/bin/xctest", //For example /Applications/Xcode.app/Contents/Developer/usr/bin/xctest
            "args": [
                "${workspaceFolder}/.build/debug/MyProjectPackageTests.xctest"
            ],
            "preLaunchTask": "swift-build-tests"
        },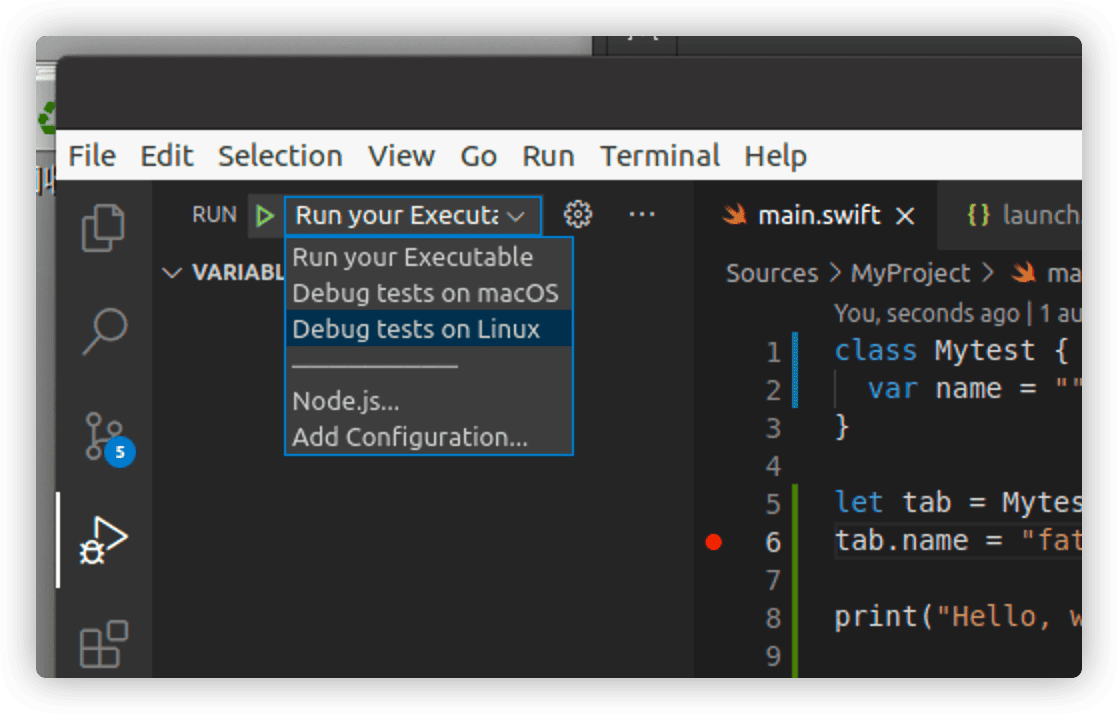
On different platforms, select the corresponding target.
Conclusion
I hope this article helps more friends to develop with Swift on Linux.